This Configuration Guide shows how to configure an LTE connection manually.
Situation
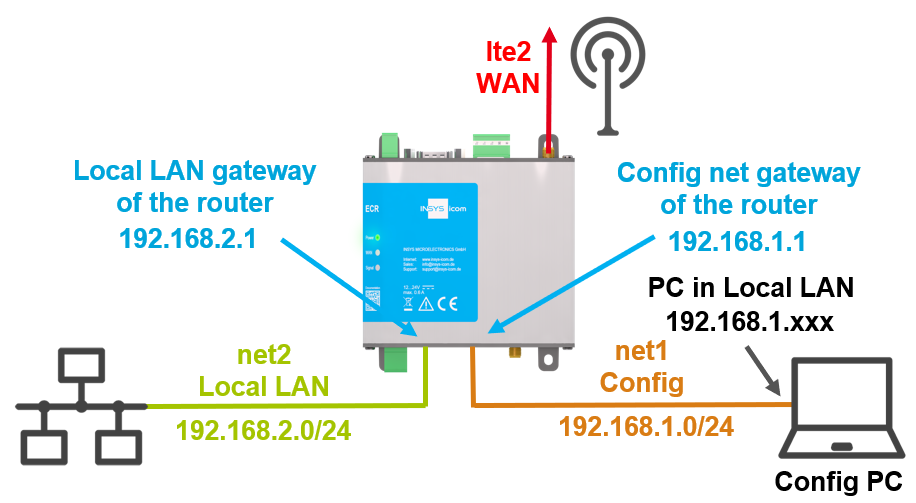
A local network is to be connected to the Internet via the LTE router manually.
Solution
The steps executed in the Startup wizard for configuring a cellular connection are carried out manually for this purpose.
It is prerequisite that the device has an LTE modem and a functional SIM card is inserted. This Configuration Guide assumes a device in default settings. In case of already configured devices or other network configuration requirements, the individual steps may need to be adapted.
Please note!
The device can only be accessed via the first Ethernet socket in default settings. This avoids to bridge several networks accidentally on an already configured router when resetting to default settings.
Open the user interface of the router: https://insys.icom
Click To manual configuration on the splash screen under Manual configuration when the splash screen appears or enter your credentials if the router is no longer in factory settings.
Open the
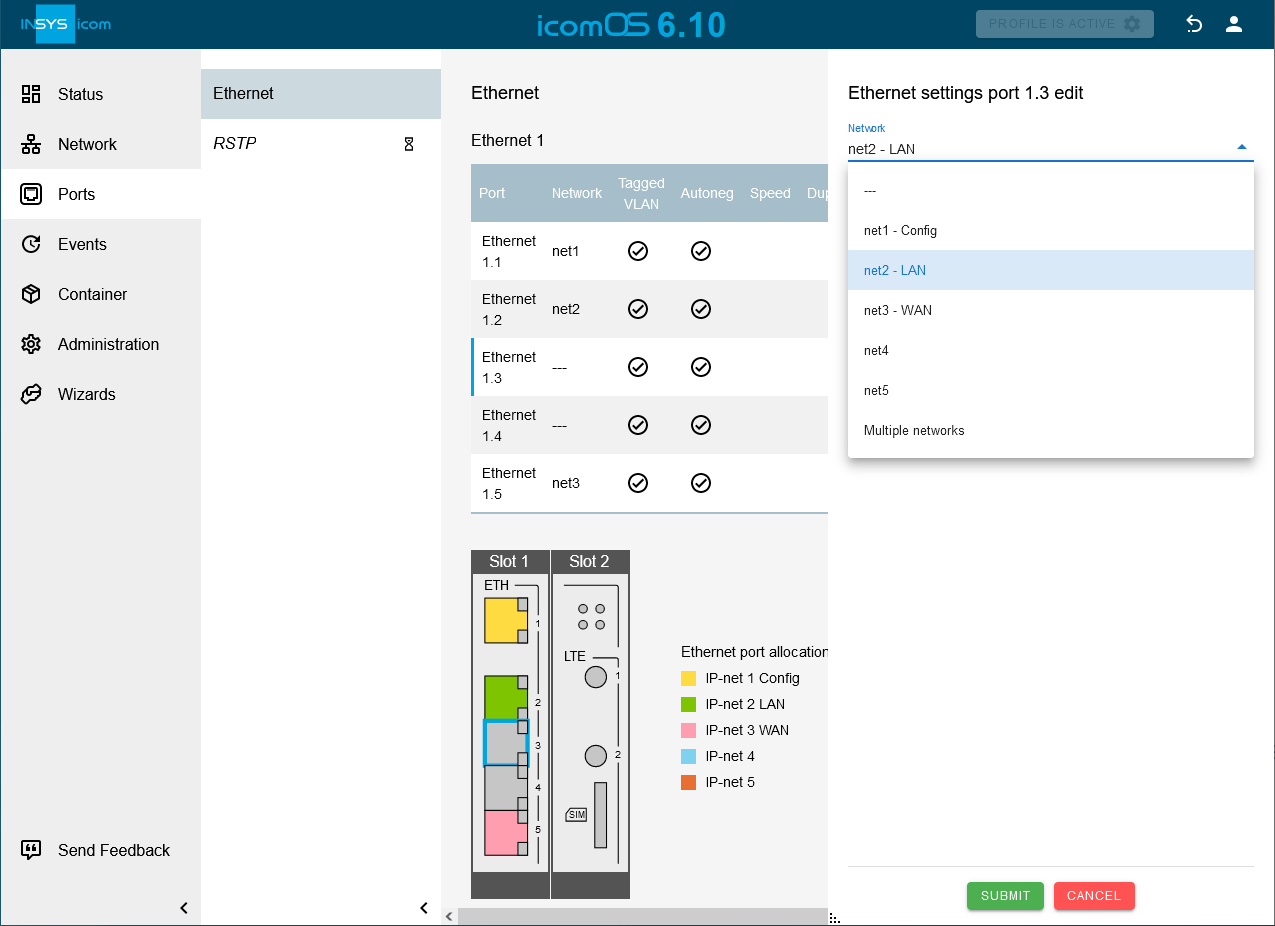
 Ports → Ethernet page and get an overview of the configuration of the Ethernet ports; adjust them with a click on in the row of this port, if necessary.
The switch ports must first be assigned to an interface!
In this case, interface net1 remains a separate network that serves for accessing and configuring the router only. Interface net2 is intended for connecting the devices, which are connected to the router, to the Internet. The router and its web interface can be accessed from both, net1 and net2, in this example.
Open the Network → Interfaces page and get an overview of the configuration of the network interfaces; adjust them with a click on in in the row of this network interface, if necessary.
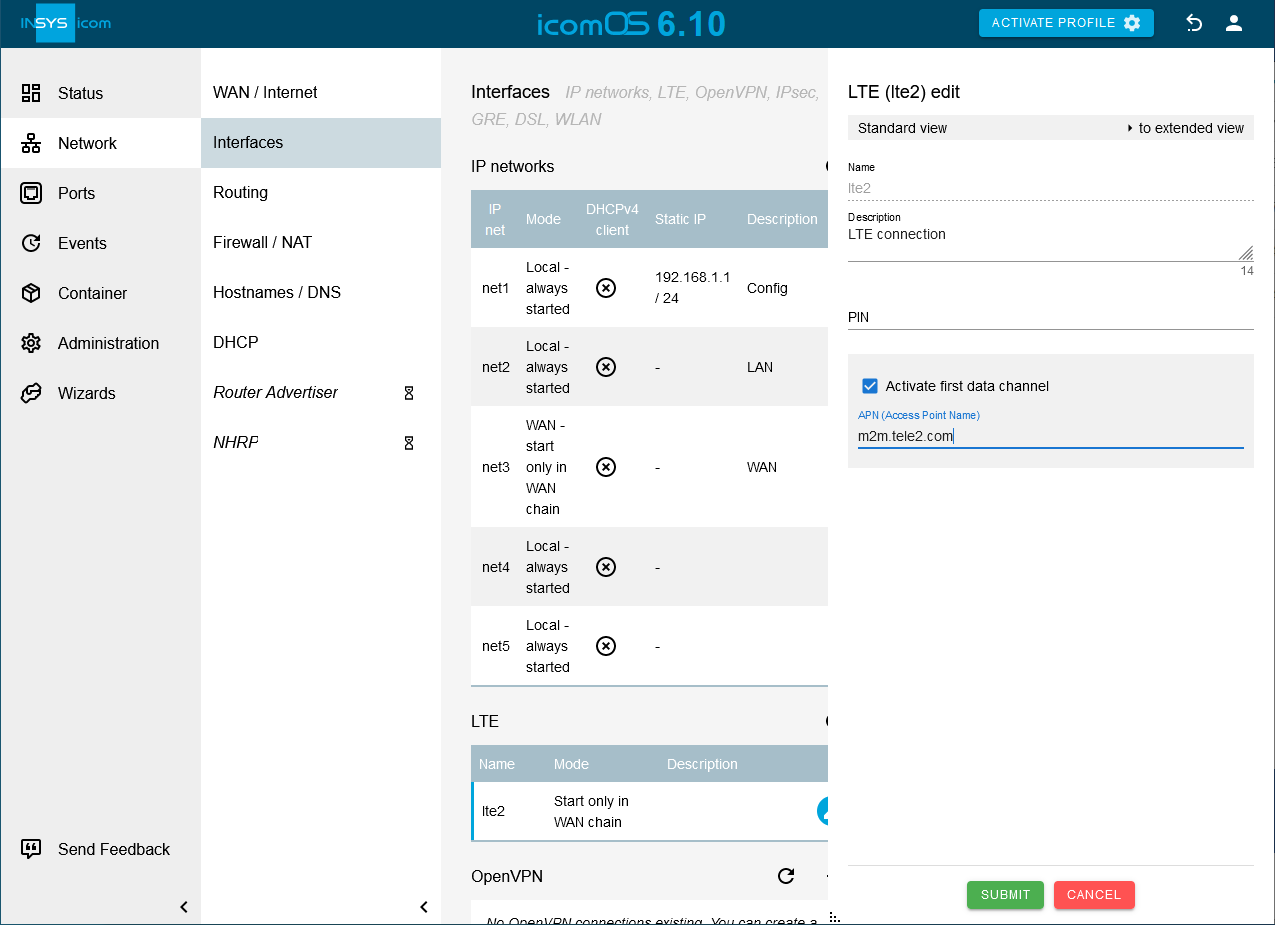
Click on the Network → Interfaces page in the LTE table on in the row of the network lte2.
Enter the PIN and APN.
Please note!
Routers with two SIM card slots do also have a second LTE interface lte2_2. For routers with several slots for plug-in cards (MRcards), the LTE card can also be inserted in a slot other than slot 2; in this case, the interface is then called lte3 for slot 3, for example.
The APN (Access Point Name) is important. If no or a wrong APN is configured, it may happen that no or only a 3G connection will be established. It is possible that the modem must authenticate with the provider using a user name and password. For this, click on to extended view at the top right.
Click on SUBMIT.
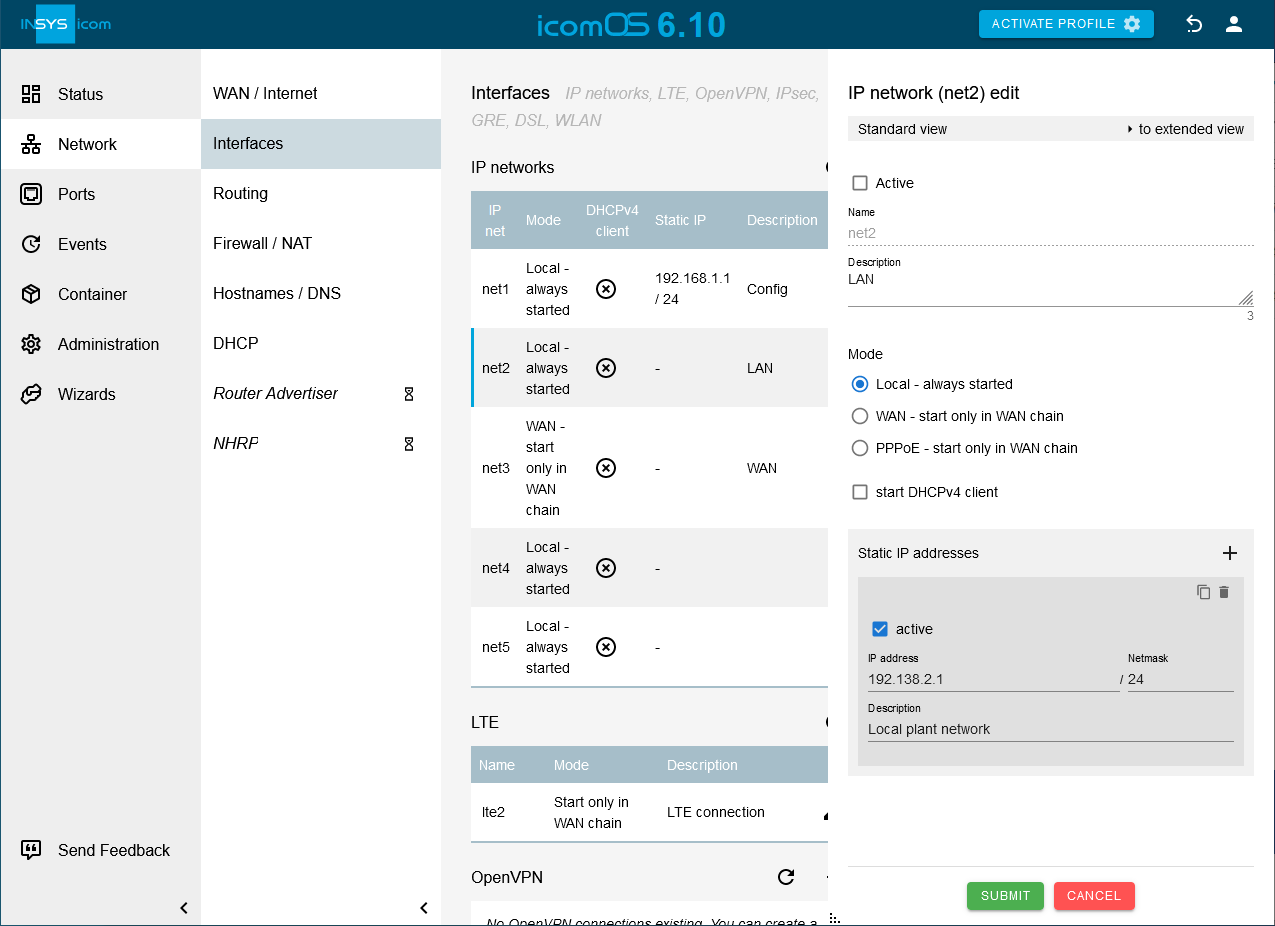
Click on the Network → Interfaces page in the IP networks table on in the row of the network net2 and check the checkbox Active.
Click on behind Static IP addresses and enter the IP address with Netmask the router is supposed to get in the LAN.
Please note!
The operating mode Local - always started means that the interface is started when the router is started. Several static IPv4 and IPv6 addresses can be configured for this interface.
Click on SUBMIT.
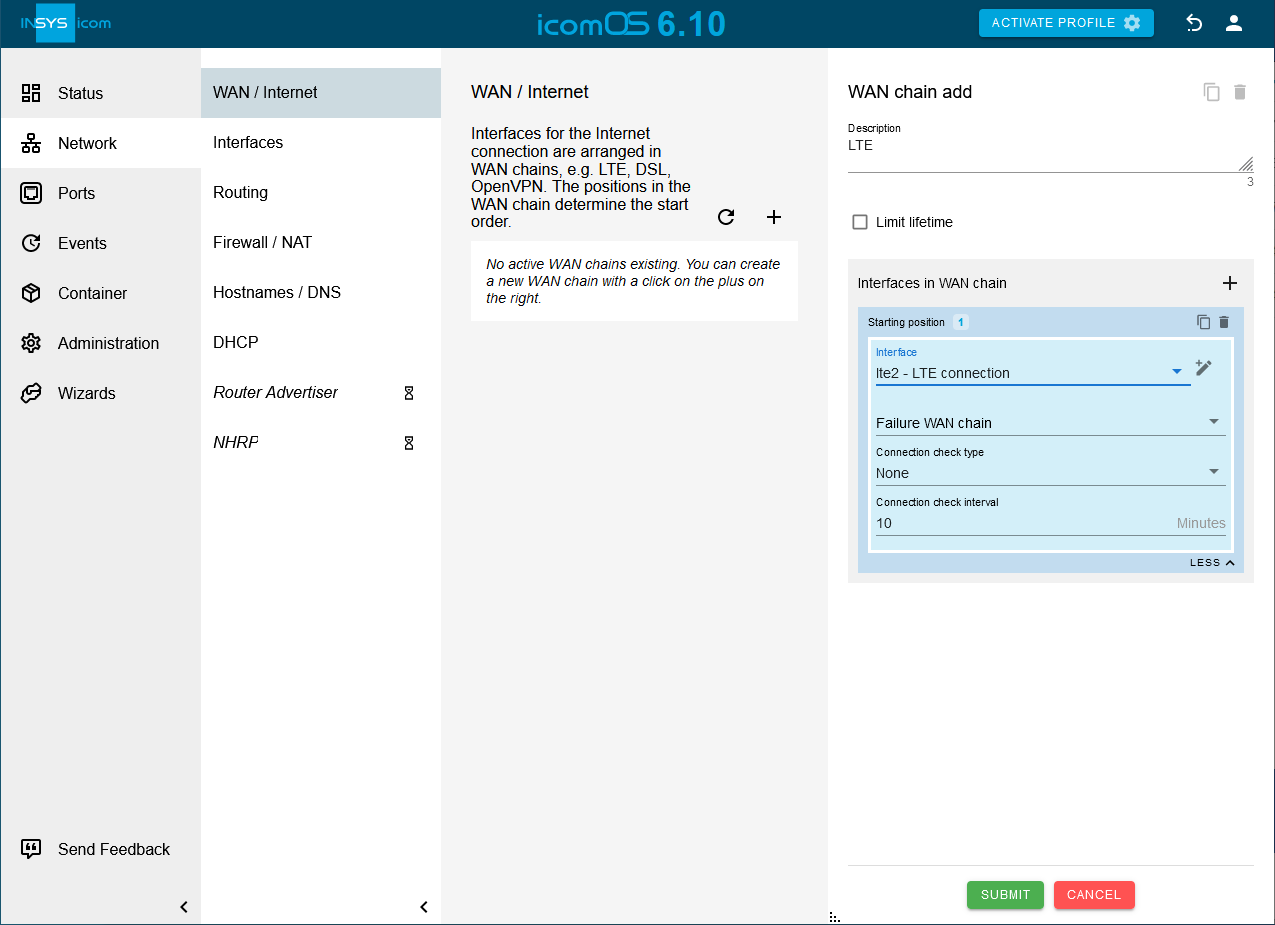
Click on on the Network → WAN / Internet page to add a WAN chain.
Please note!
The interfaces are arranged one after another in a WAN chain. It will be tried to put the interfaces in the WAN chain in online condition one after another. Each interface can optionally be provided with a connection check that confirms the online condition. If the connection check fails or the router self-service detects that an interface in a WAN chain does not have the online condition any longer, the establishment of the WAN chain will be considered as failed.
Click on behind Interfaces in WAN chain to add an interface to this WAN chain and select the Interface lte2.
Please note!
In case of one interface in a WAN chain, the router usually detects independently whether it is in online condition or not. In case the interface is offline, you can select whether the own WAN chain, another WAN chain (if available) or only the interface itself should be restarted. An additional connection check may still be reasonable. In case of Ethernet interfaces, the Ethernet link is not sufficient to detect whether IP traffic is possible. A DNS check or a ping to a certain IP address provides more certainty about the possibility to reach certain destinations. An Internet connection via LTE can also be useless if DNS resolution does not work any longer. In such cases, it might be reasonable to change the WAN chain and establish the Internet connection via another medium or restart the existing interfaces.
Click on SUBMIT.
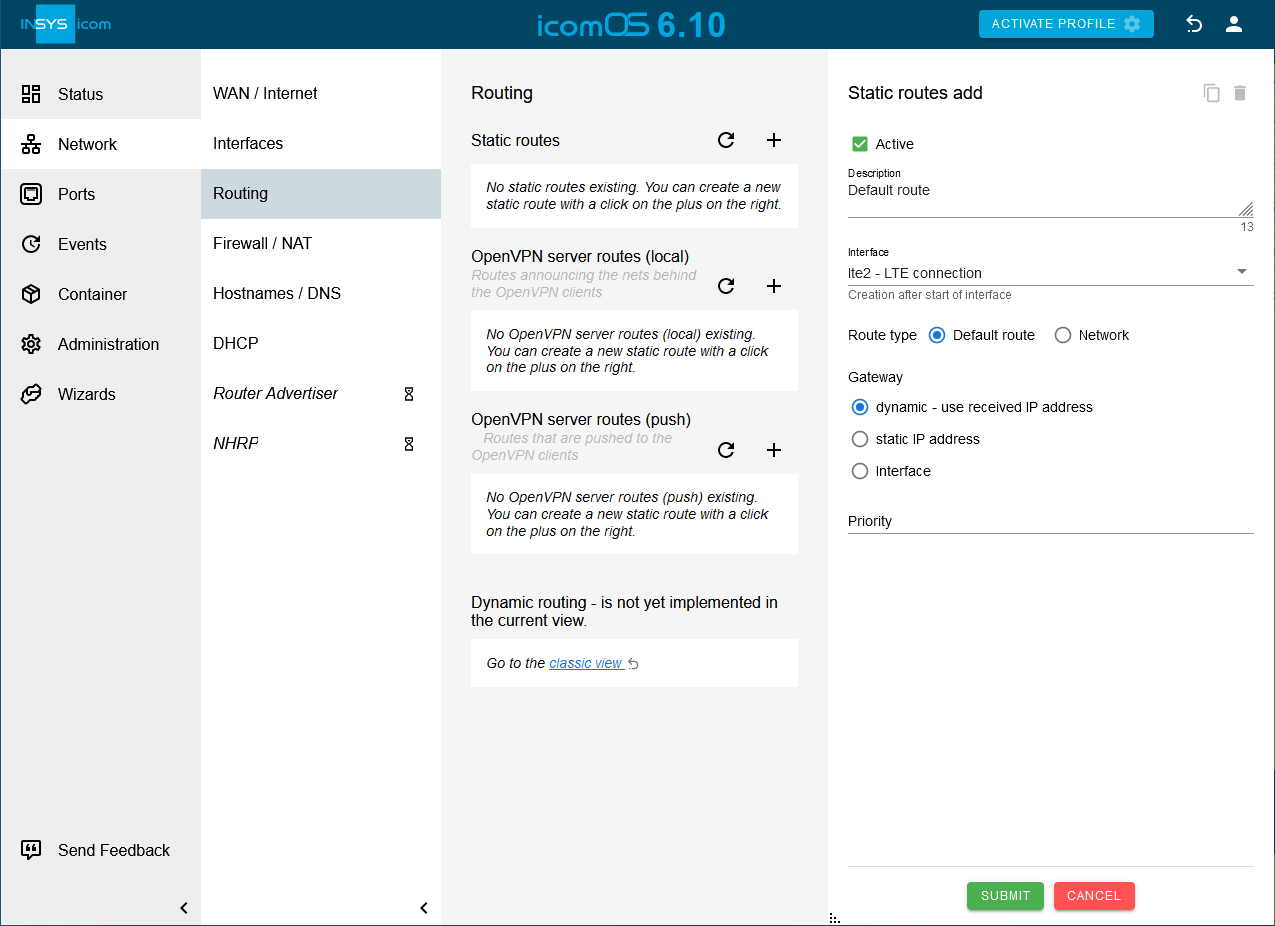
Click on hinter Static routes on the Network → Routing page to add a static route:
Creation after start of Interface: lte2
Type of the route: Default route
Gateway: dynamic - use received IP address
Please note!
When starting an interface (local or in a WAN chain), it will always be checked, whether a route is configured for this interface. The type of the route can be a default route (0.0.0.0/0), a network route (e.g. into network 172.16.0.0/16) or a host route (e.g. 172.16.7.4/16). The gateway to which the new route shall direct, will be received dynamically in this case. A static IP address is known for a few providers only. Alternatively, it would be possible to enter the interface lte2 as gateway for the route in case of an LTE modem. An IP packet will be sent via the route, whose netmask is most strict, thus /32 for IPv4 and /128 for IPv6). The priority of the route defines which route is to be used if several routes with identical range are present. The lowest priority figure defines the route that is to be used first. This allows to add several default routes together.
Click on SUBMIT.
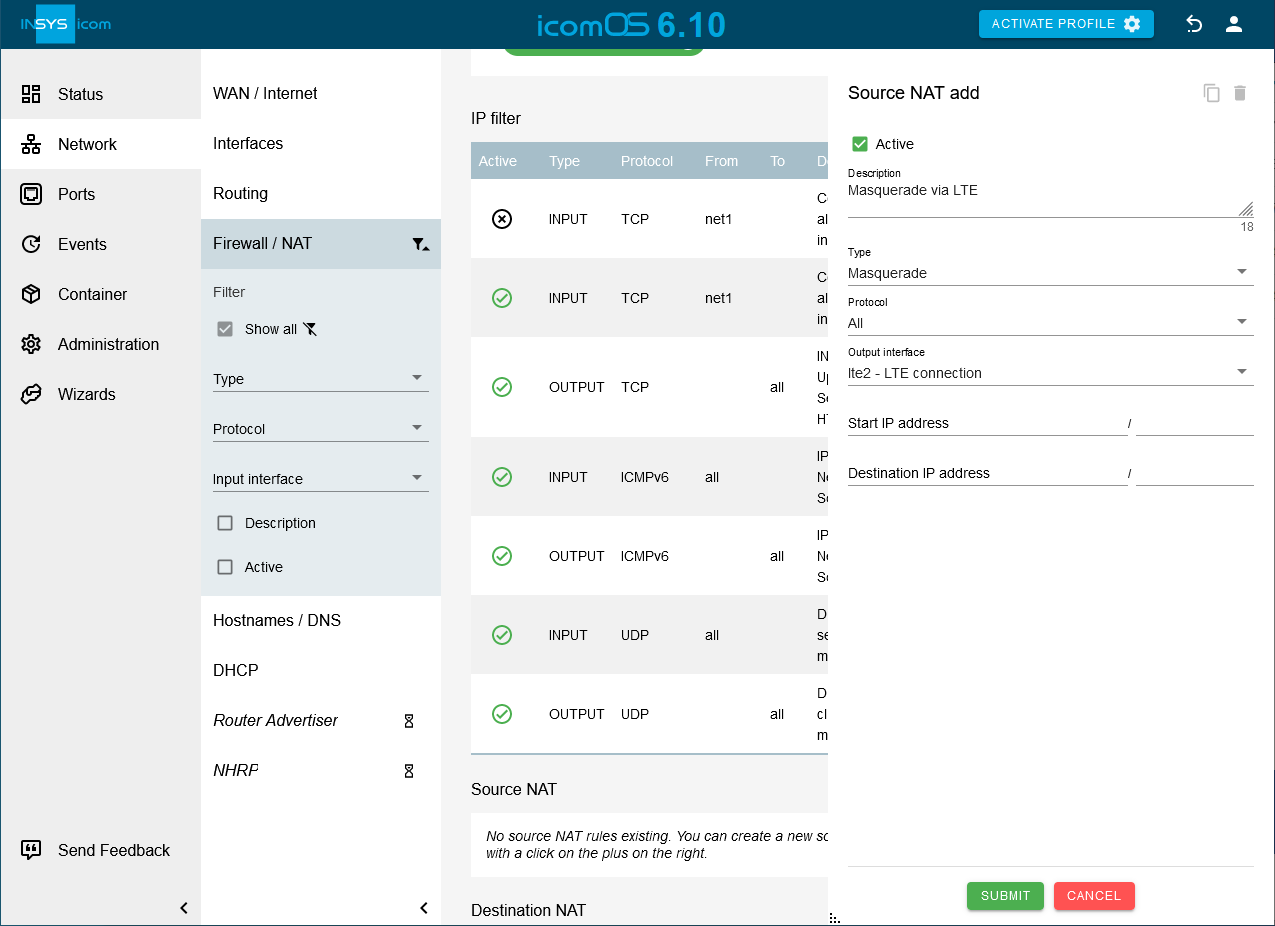
Click on behind Source NAT on the Network → Firewall / NAT page to add a Source NAT rule:
Type: Masquerade
Protocol: All
Output interface: lte2
Please note!
Most providers allot private IP addresses to the modems connecting to the network since there are no sufficient free public IPv4 addresses any more. In order that IP packets that are sent from the LAN to the Internet find their way back from the Internet to the right LAN again, the router must replace the source IPv4 address with the IP address that the modem has received from the provider dynamically. This process is called masquerading. This is necessary if the provider assigns public accessible IP addresses. It is absolutely important to activate the IP filters in this case to regulate the permitted IP traffic.

Click on SUBMIT.
If your router is still in default settings:
Open the Administration → User page and click on in the row of the user to configure the standard user and enter a User name and a Passwort.
Click on SUBMIT.
Click on ACTIVATE PROFILE to activate a profile.
Result testing
Open the
 Status → Dashboard page, check the settings of the local networks and observe the establishment of the LTE Connection and the WAN chain.
Troubleshooting
The status of the WAN chain and their interfaces is displayed on the
Status → Dashboard page. If an interface does not achieve the online condition, its condition can also be examined on this page.If no network traffic is achieved, the tools integrated in the router can be used for debugging.
Network devices connected to the router cannot use the Internet connection. The reason can be that they have not entered the router as gateway and DNS server.
The IP filters can be deactivated for testing purposes. The router itself is also subject to the IP filters. If the router itself has to send packets, an OUTPUT rule is necessary for this. If the router itself has to receive packets, an INPUT rule is necessary for this. In order to be able to route IP packets, a FORWARD rule is necessary.