This article explains how to invite new users to your icom Router Management (iRM) Cloud environment. This is useful when multiple colleagues need access to manage routers, monitor updates, or configure system settings.
Note:
This feature is available only in iRM Cloud and requires a Cloud Basic license or higher.
iRM Cloud Free only supports a single user account.
For user administration in iRM On-Premises (Server or Data Center), refer to the separate article: “Managing Users in iRM On-Premises”.
How Do I Invite a New User?
Follow these steps to invite new users to your iRM Cloud organization:
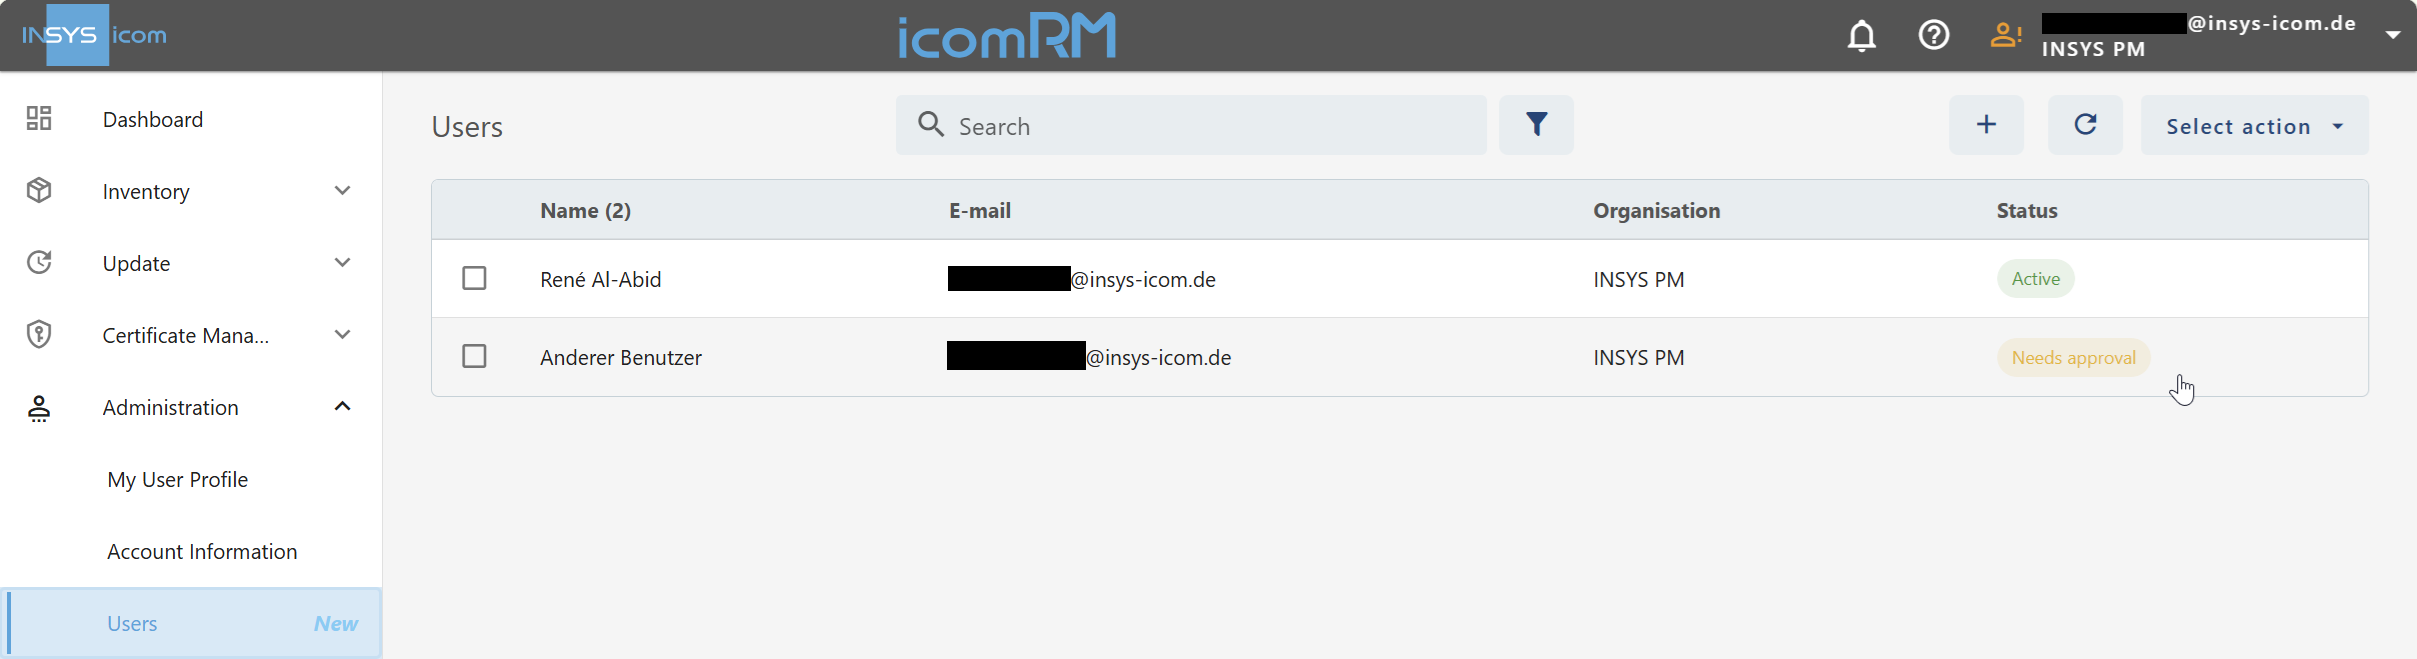
Open the user management page:
Navigate to Administration → Users.Start the invitation process:
Click the "+" icon, or open the “Select action” dropdown and choose “Invite”.Enter user details:
Fill in the invitee's first name, last name, and email address.Send the invitation:
Click “Send invitation”. The new entry will appear in the users table with the status “Invited”.
.png)
What Happens After the Invitation?
Email delivery:
The invitee receives an email containing the inviter’s name and organization, along with a registration link to iRM.User registration:
The invitee sets a new, strong password and accepts the general terms and conditions.Confirmation step:
The invitee clicks “Finish registration”.Pending approval status:
The user now appears in the list with the status “Needs approval”.
How Is the User Activated?
Approval required:
A current iRM user must approve the registration.Select the pending user entry in the table.
Open the “Select action” dropdown and choose either:
“Approve registration”, or
“Revoke invitation” in case of doubt or error.
User activated:
Once approved, the new user status changes to “Active” and login to iRM becomes possible.
.png)