This article describes how you can use the new wizard in icom Router Management to distribute and install one or more firmware versions on your routers.
⚠️ Important Security Notice
To keep your routers secure, reliable, and equipped with the latest features, it is essential to install firmware updates regularly. Outdated firmware may expose your devices to security vulnerabilities and prevent access to important improvements and new functionality.
Start Firmware Update Directly From the Inventory View
You can start firmware updates either for individual routers or for entire router groups:
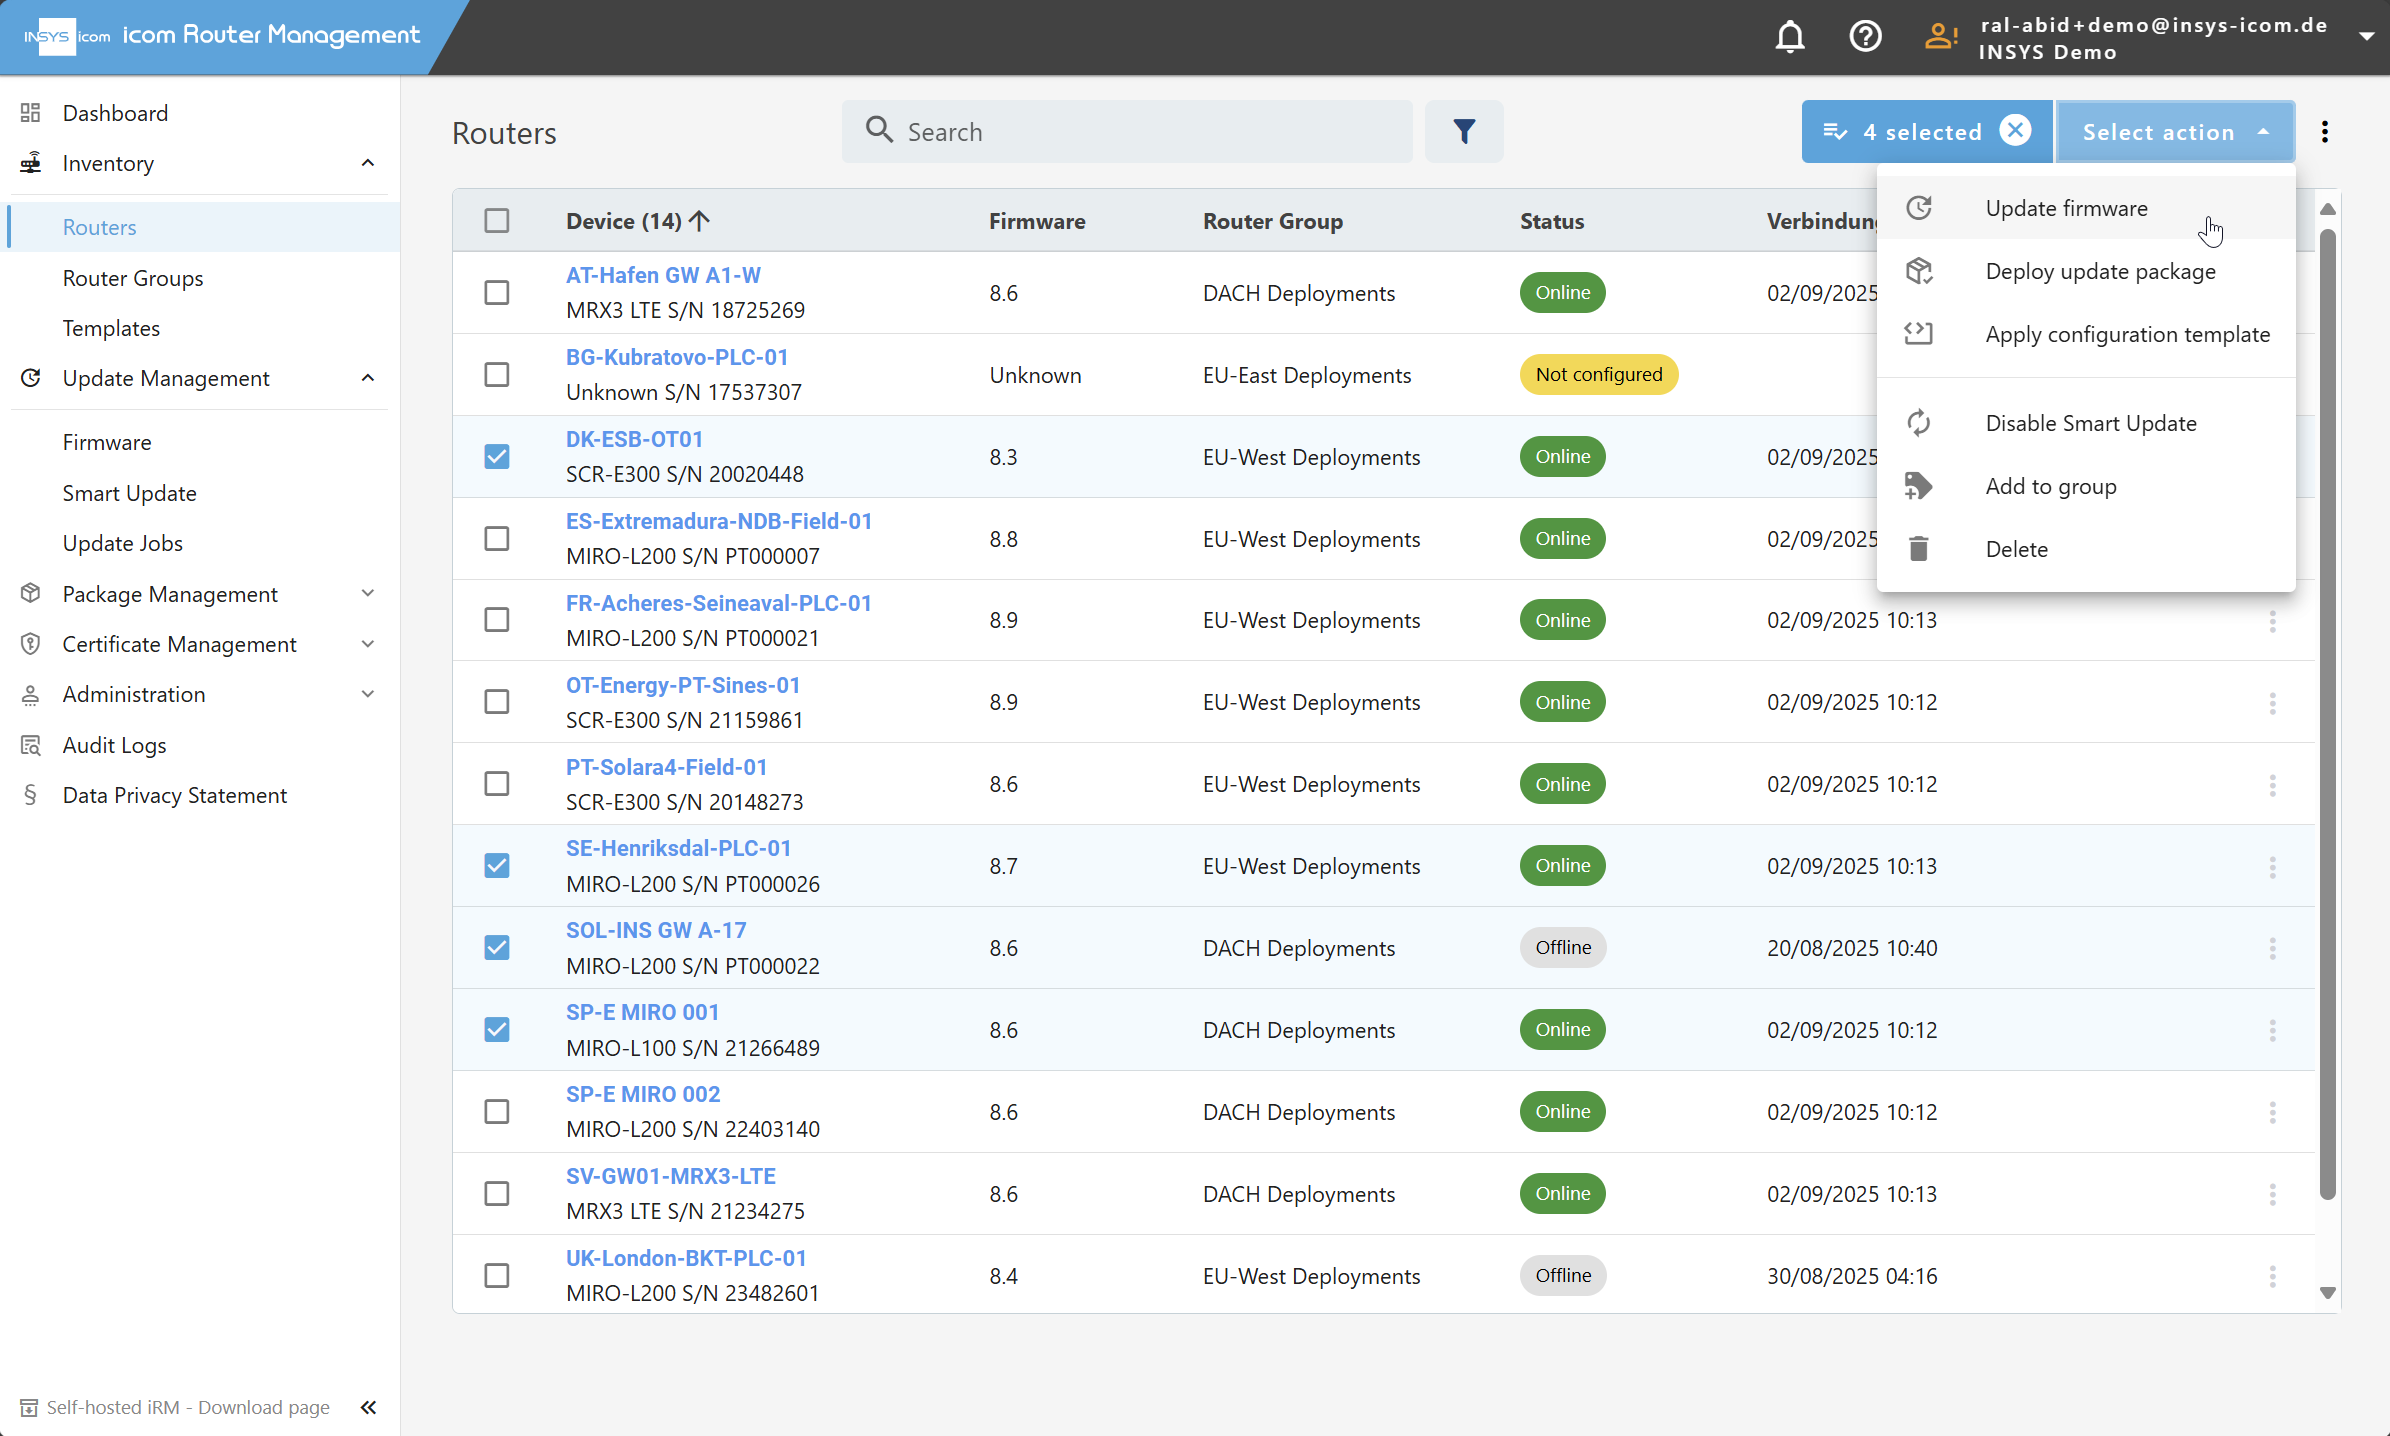
Navigate to Inventory → Routers or Inventory → Router Groups.
Select one or more routers or groups.
Click on Select Action at the top right and then on Update Firmware.
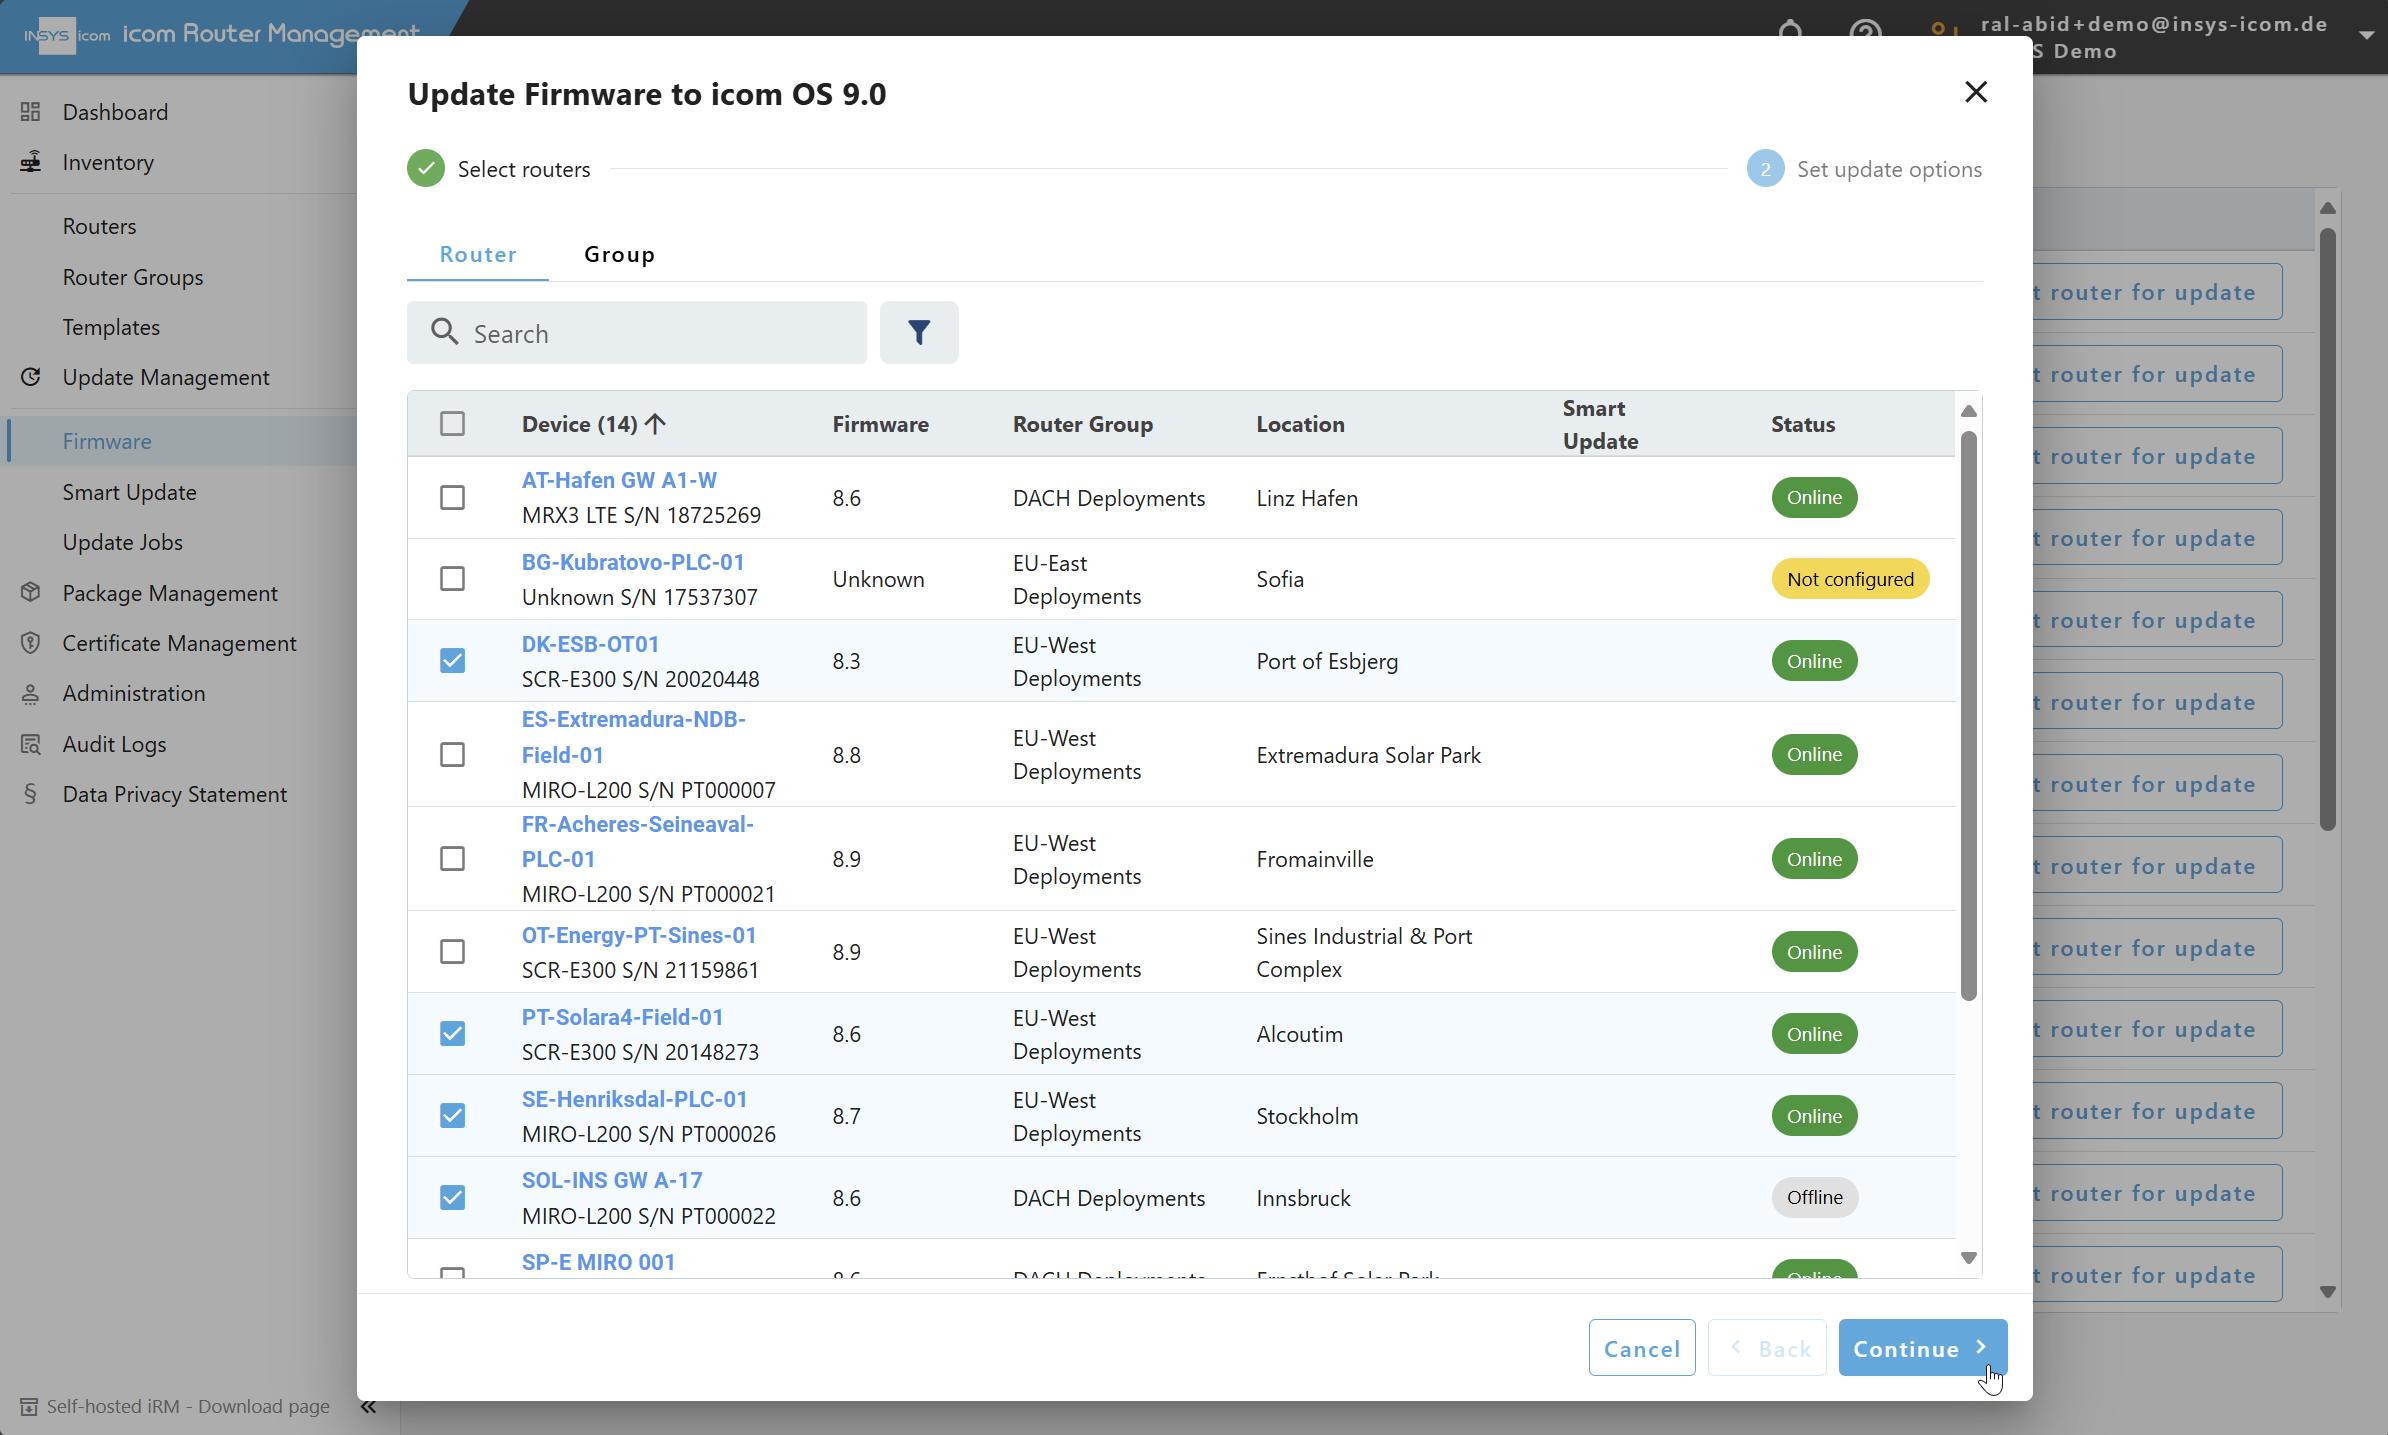
In the first step of the wizard, select the desired icom OS firmware version from the list. The list also contains links to the respective release notes to help you choose the appropriate version.
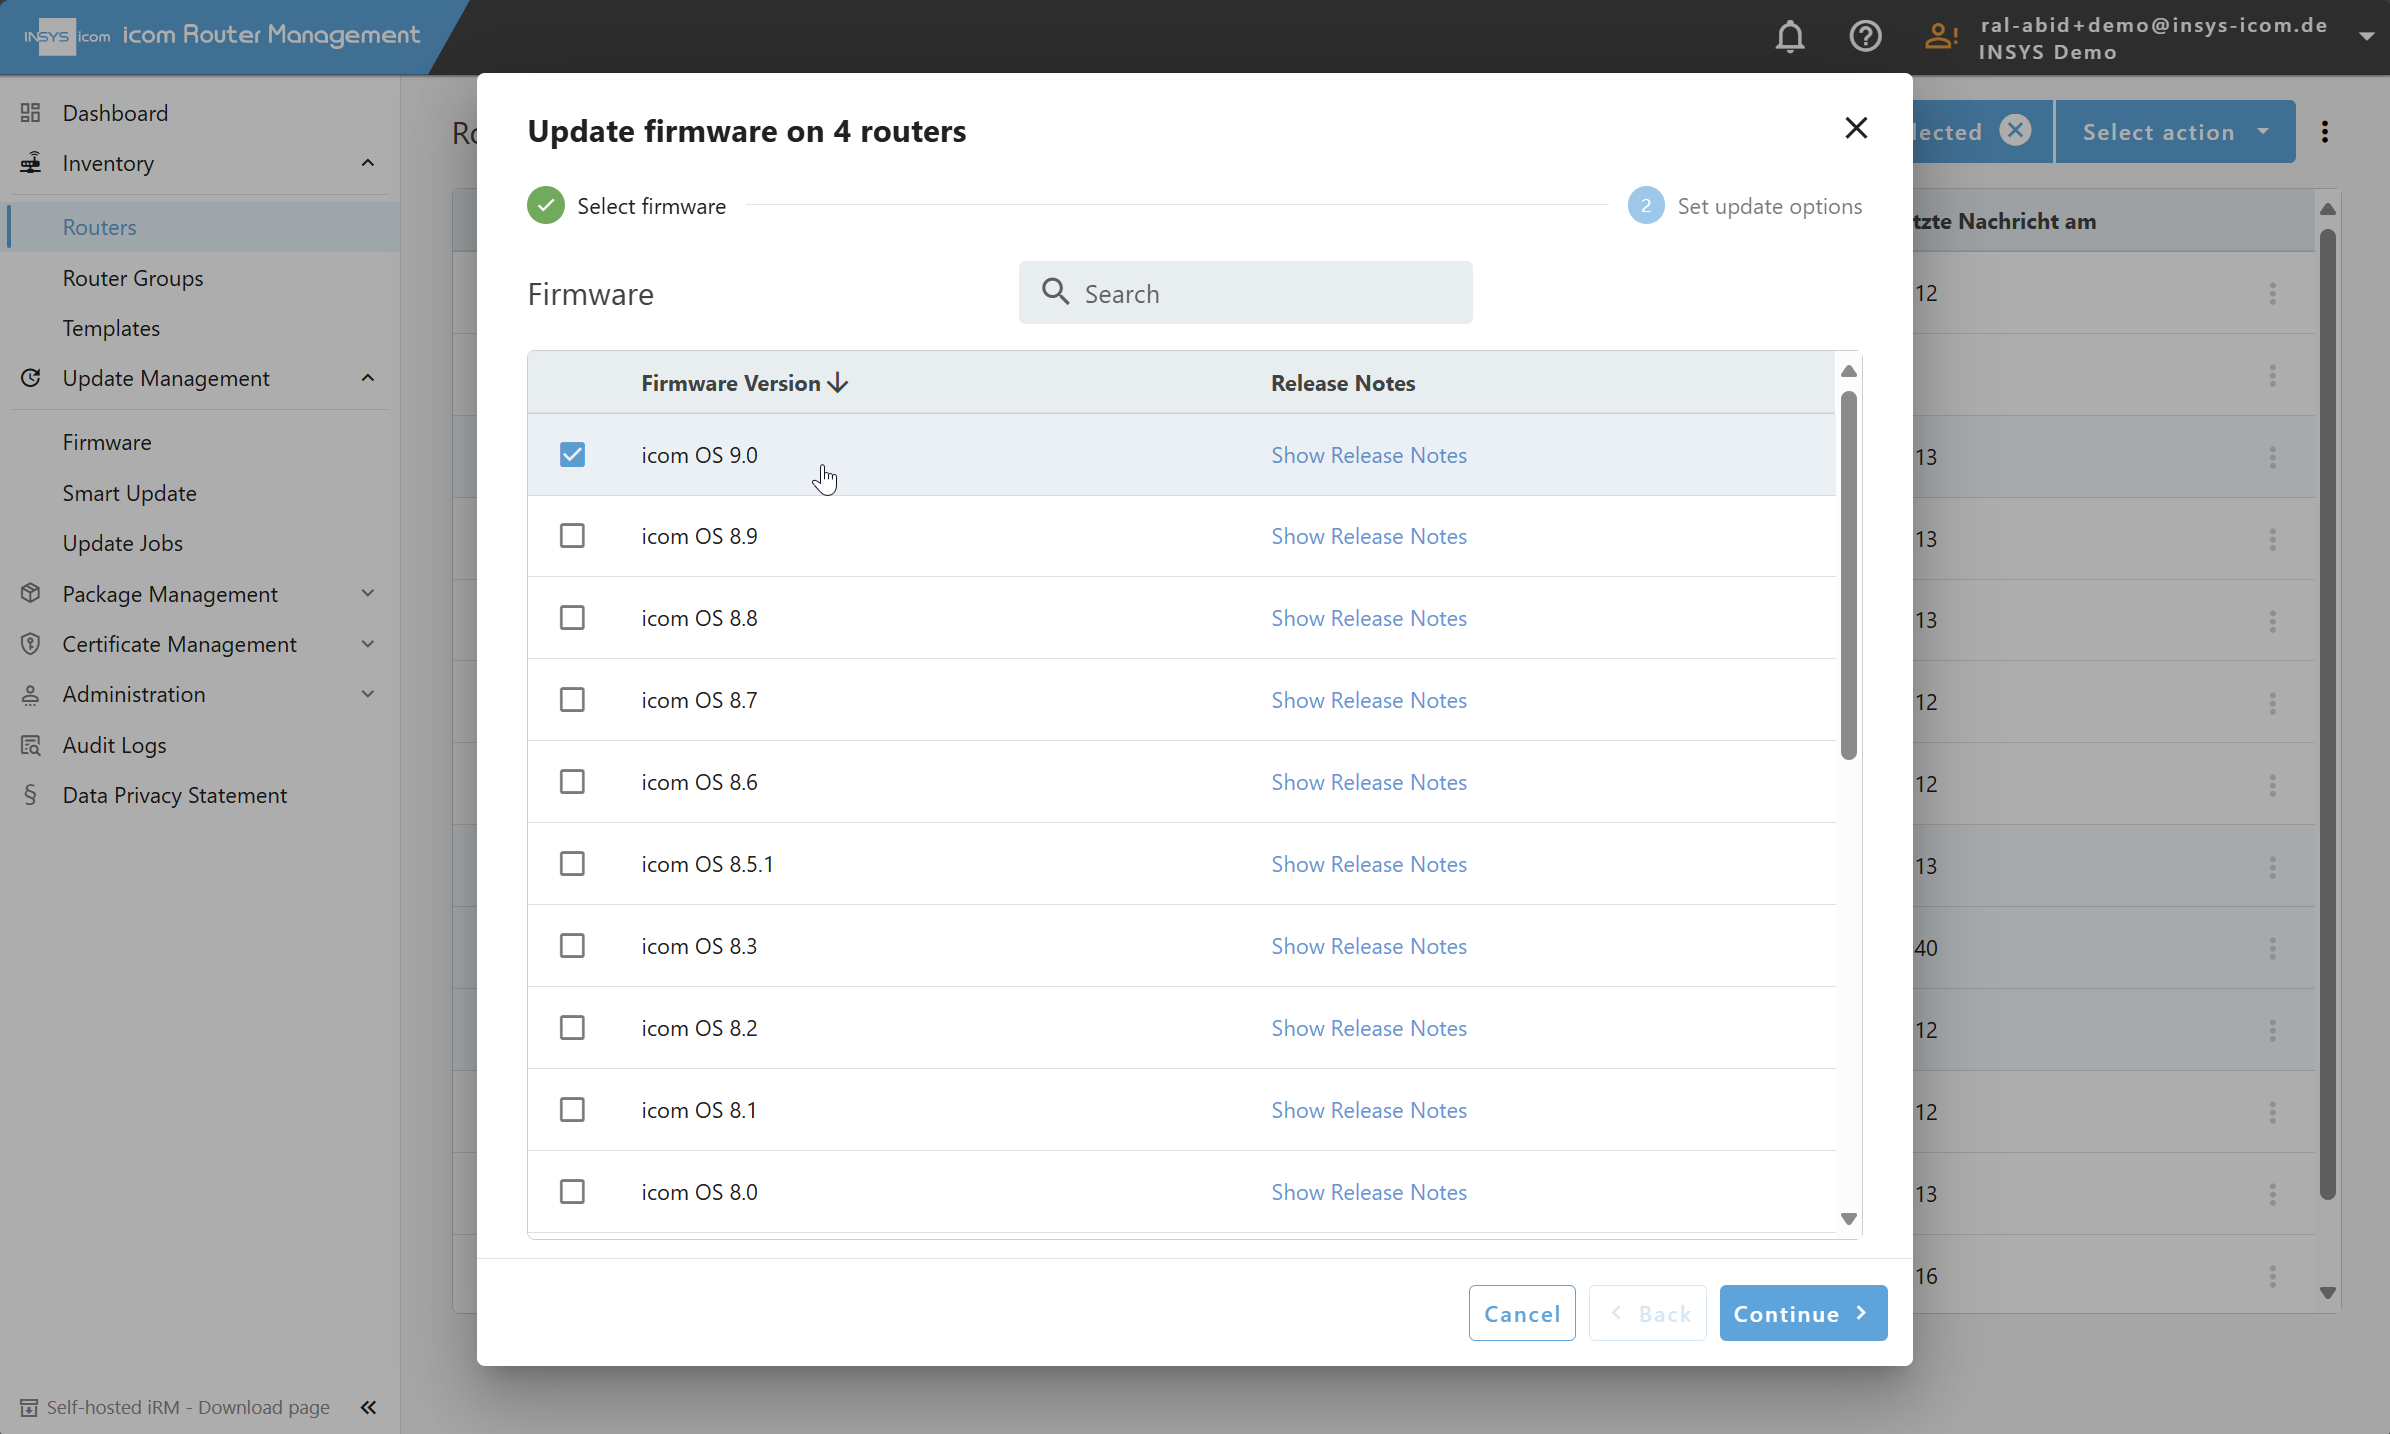
Click Next to proceed to the second step.
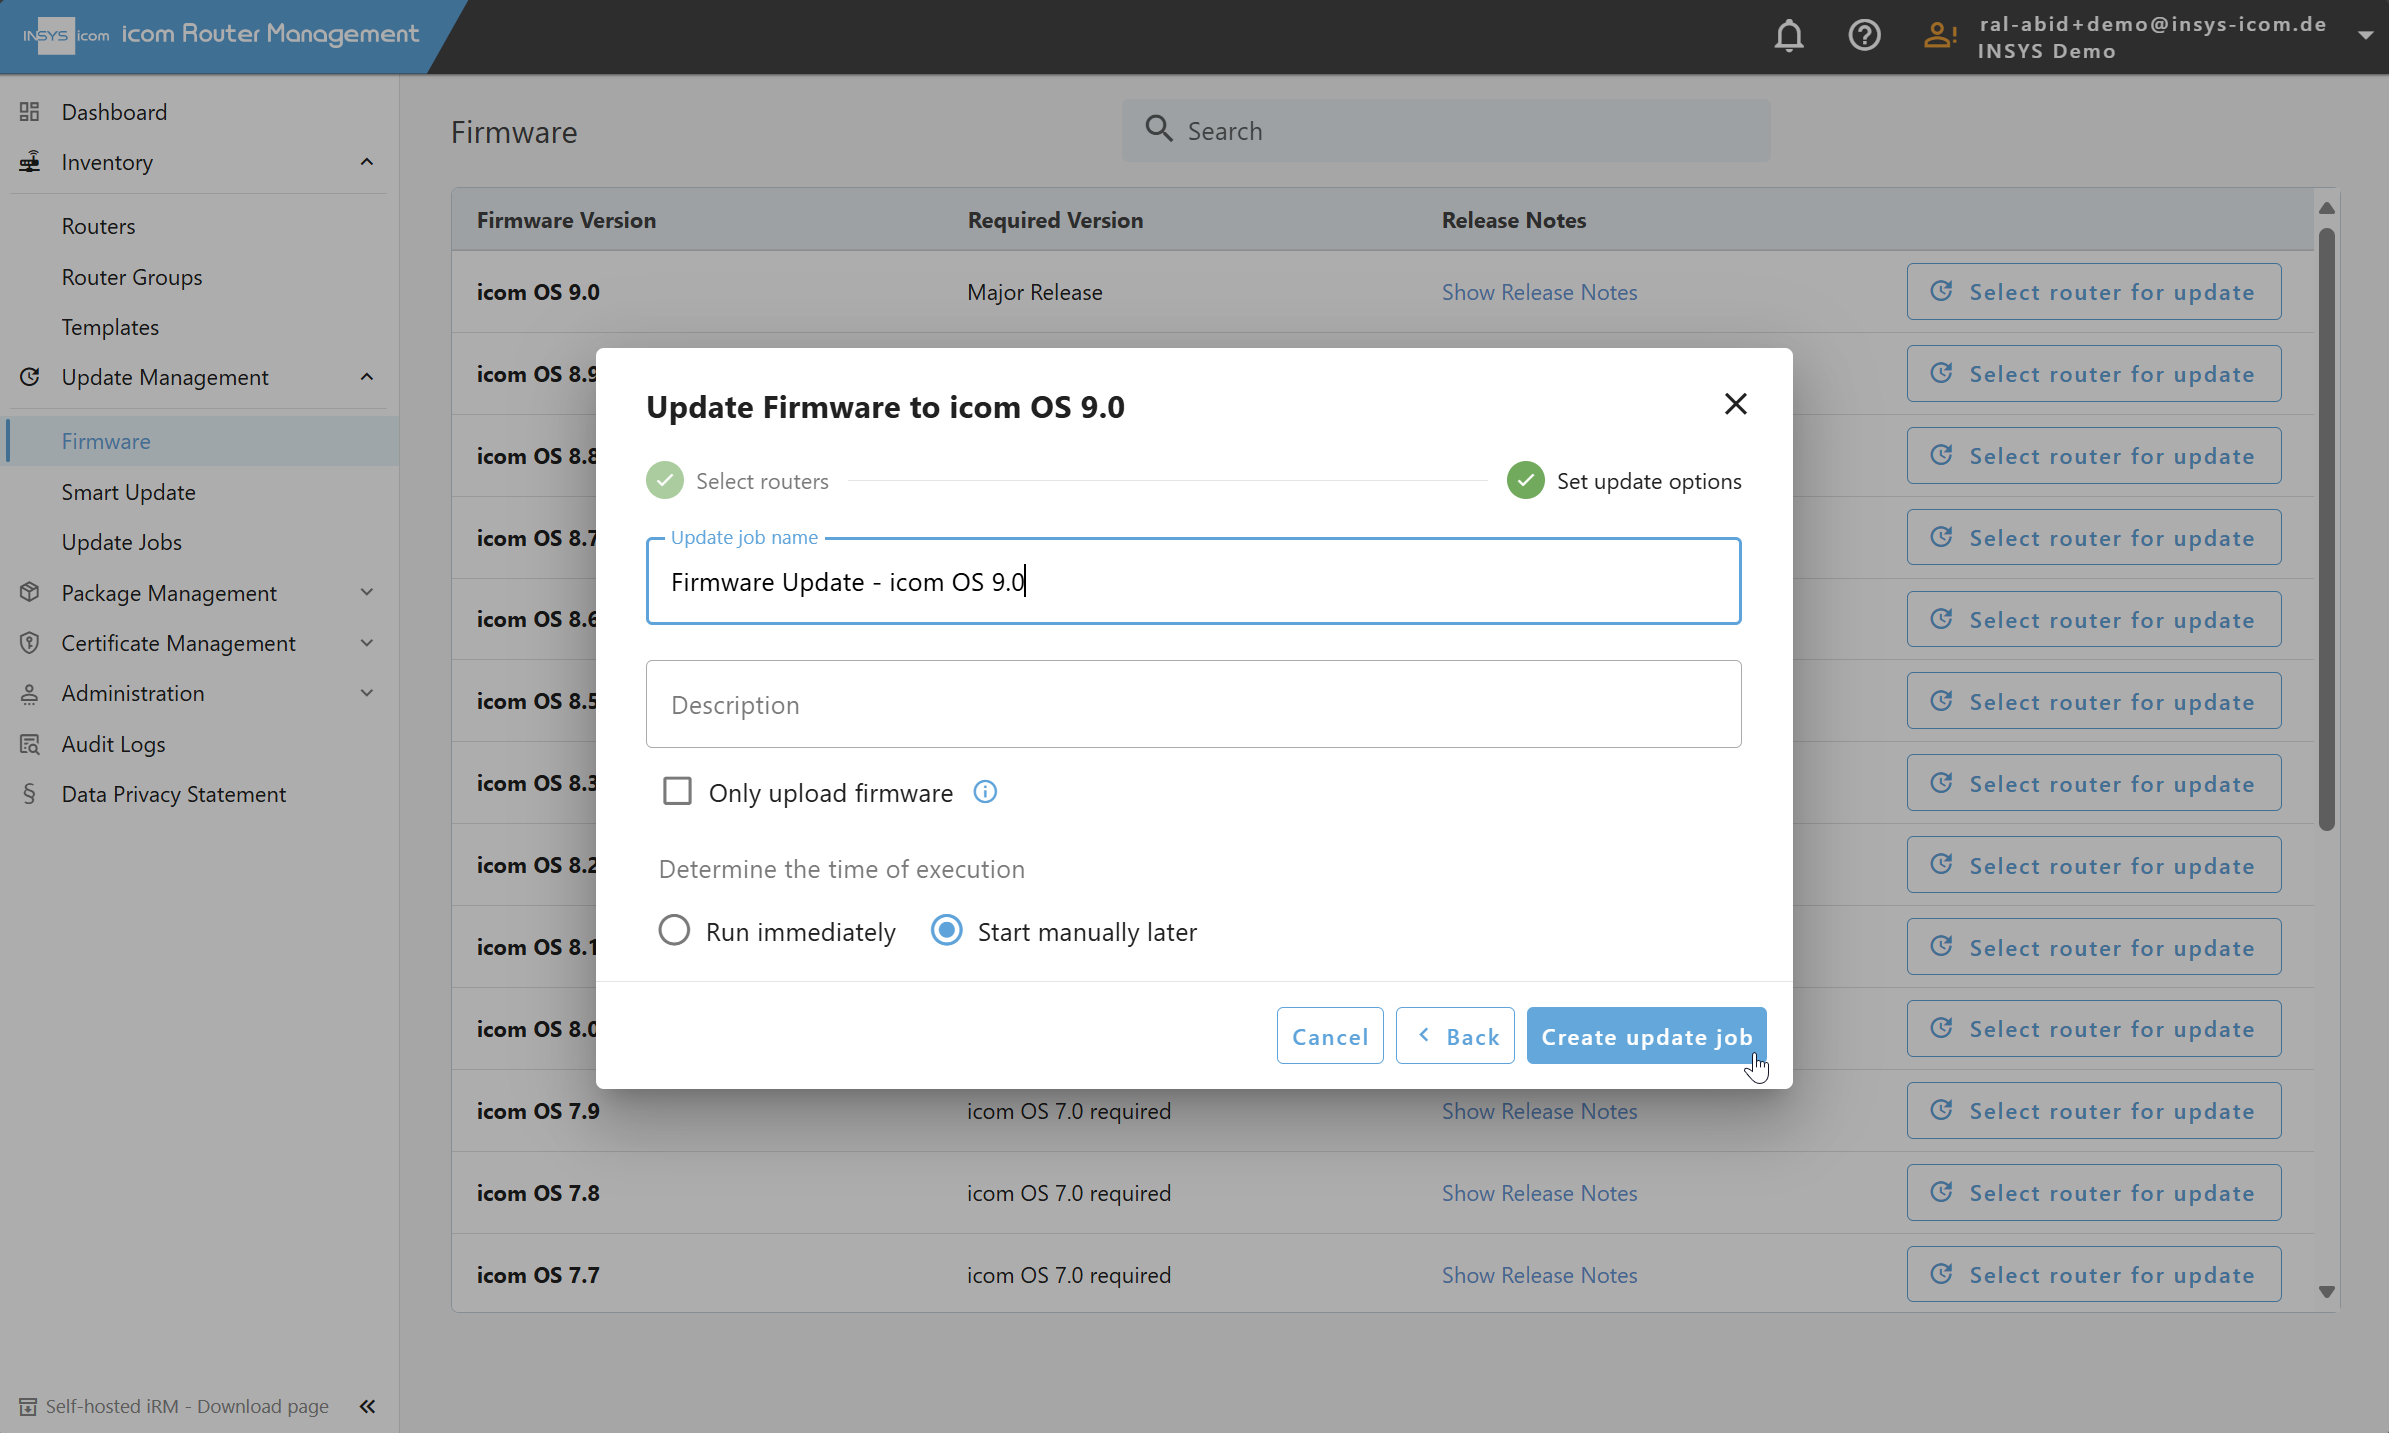
Here you can:
- Assign a meaningful name to the resulting update job (optional).
- Add a description (optional).
- Optionally activate the checkbox Upload Firmware Only if you do not want to install the update immediately.
- Choose whether the update job should start immediately or be triggered manually later.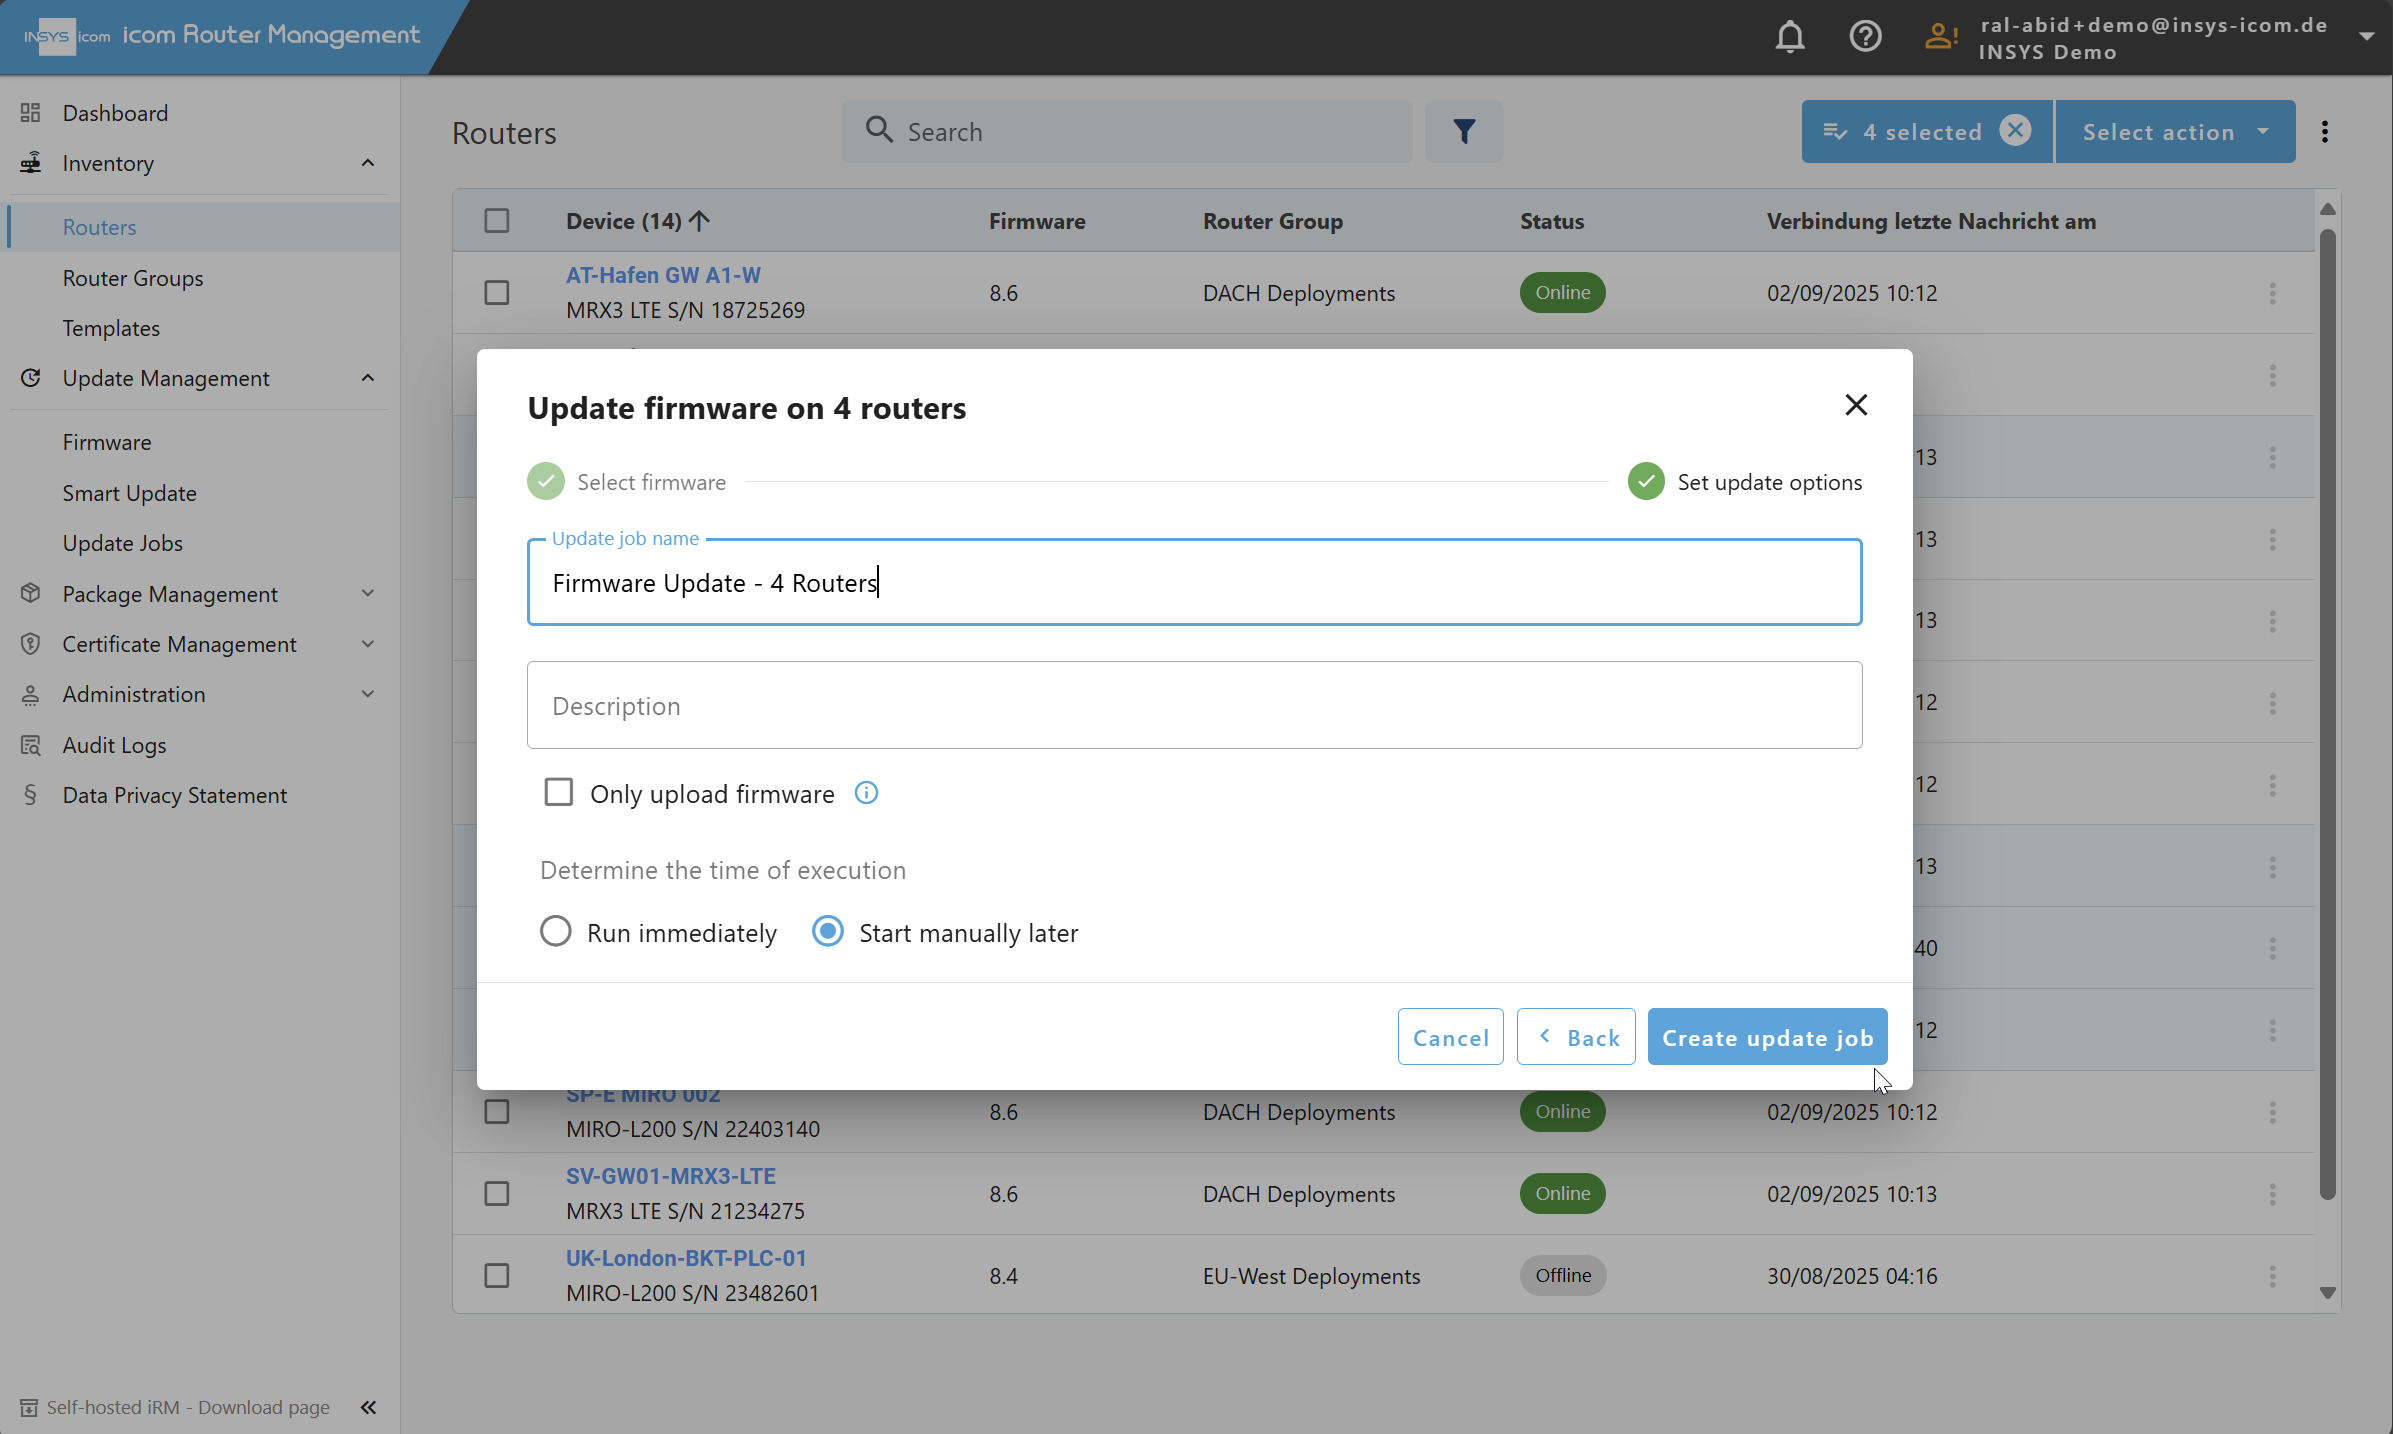
Finish the wizard by clicking Create Update Job.
The result of this wizard is an update job that is managed under Update Management → Update Jobs. If you selected “Start Manually Later,” you can edit the job again there, e.g., to change routers or groups or replace the firmware version.
Start Firmware Update Directly From Firmware Management
Alternatively, you can also start the update from the firmware page:
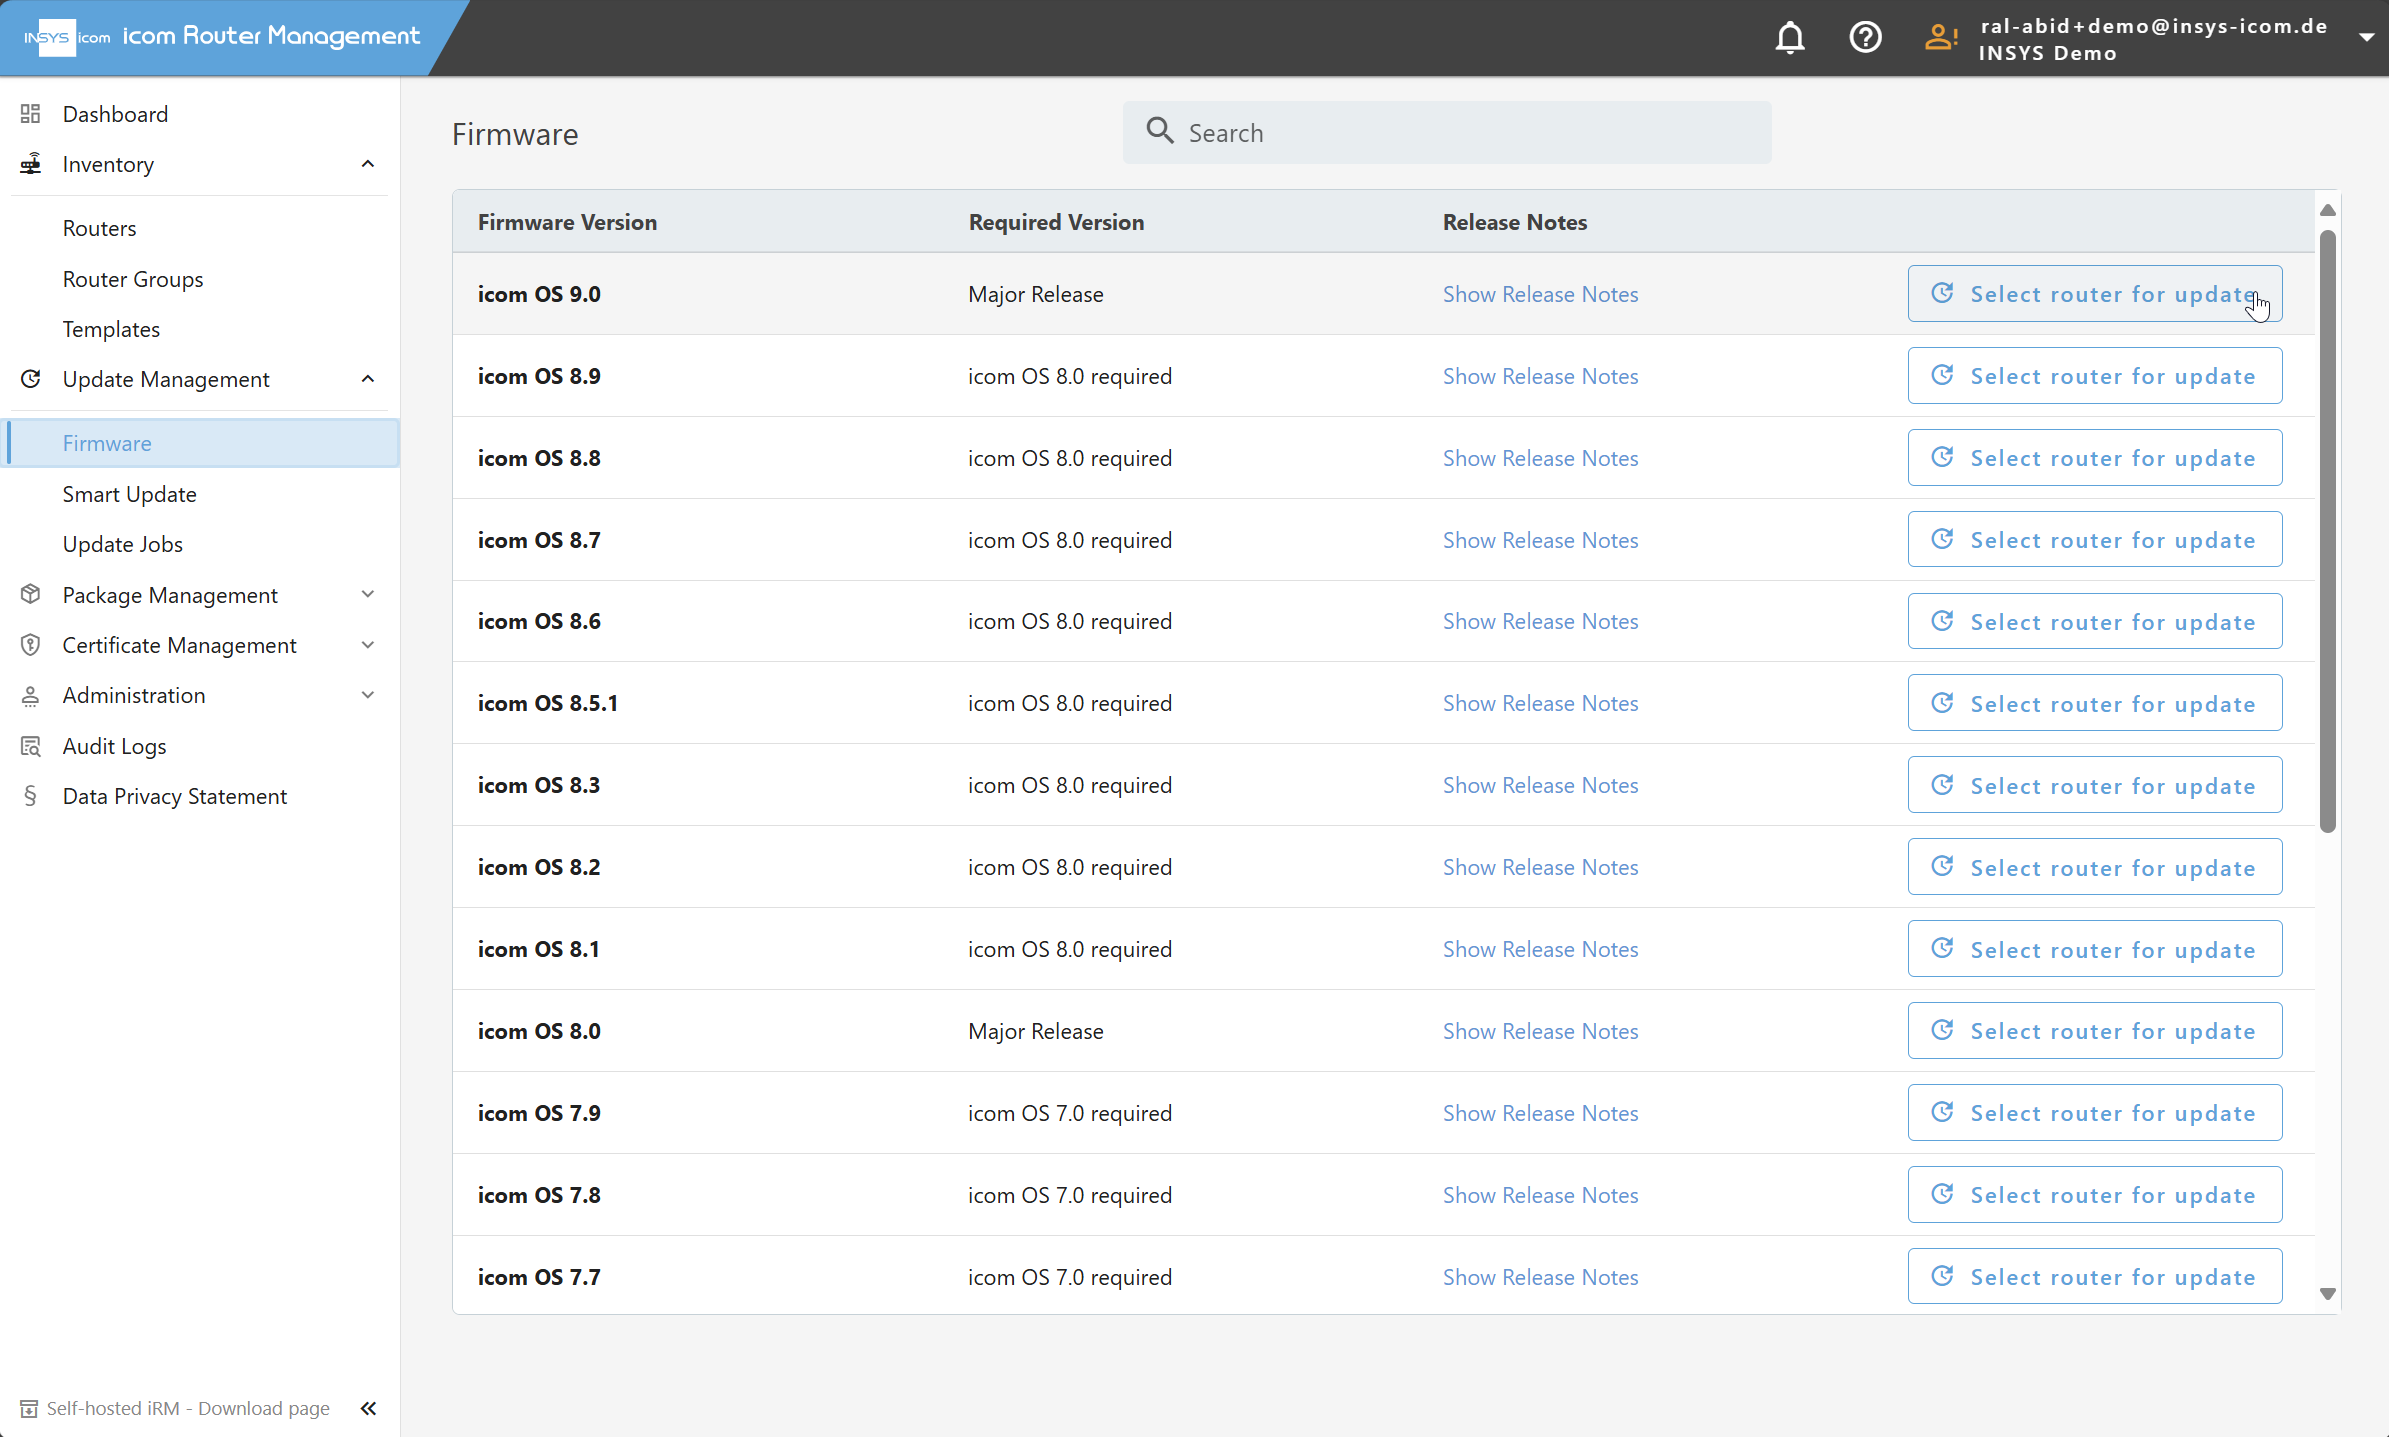
Navigate to Update Management → Firmware.
Find the desired firmware version in the list.
Click on Select Routers for Update.
In the dialog that appears, select one or more routers or groups.
Click Next to proceed to the second step.
Fill in the same fields as in the previous wizard (name, description, installation type, start time).
Click Create Update Job to complete the process.