INSYS icom routers support running Linux Containers (LXC) to host edge applications. These containers can mount a persistent folder /data/etc/, commonly used to store .ini files, Lua scripts, or similar configuration assets required by the containerized application.
With the new "Container Configuration" ASCII template type, you can:
Manage environment-specific container configurations (e.g. development, staging, production)
Inject router-specific parameters using Custom Fields or inline String parameters
Deploy consistent and scalable configurations across multiple devices
This template type behaves similarly to existing ASCII templates, but specifically targets container configuration files.
How It Works
The container configuration template results in a file placed in /data/etc/ inside the container. The container then reads and applies the configuration as designed by your application logic (e.g. on startup or upon file change).
Supported formats within the template:
.ini-style key-value pairsEmbedded Lua scripting
Parameter placeholders (
{{parameter_name}}) for inline or Custom Field-based substitution
Note: Only String-type inline parameters are supported for now. All referenced Custom Fields must be populated before deployment.
Step-by-Step Guide
1. Create a Container Configuration Template
Navigate to Inventory → Templates
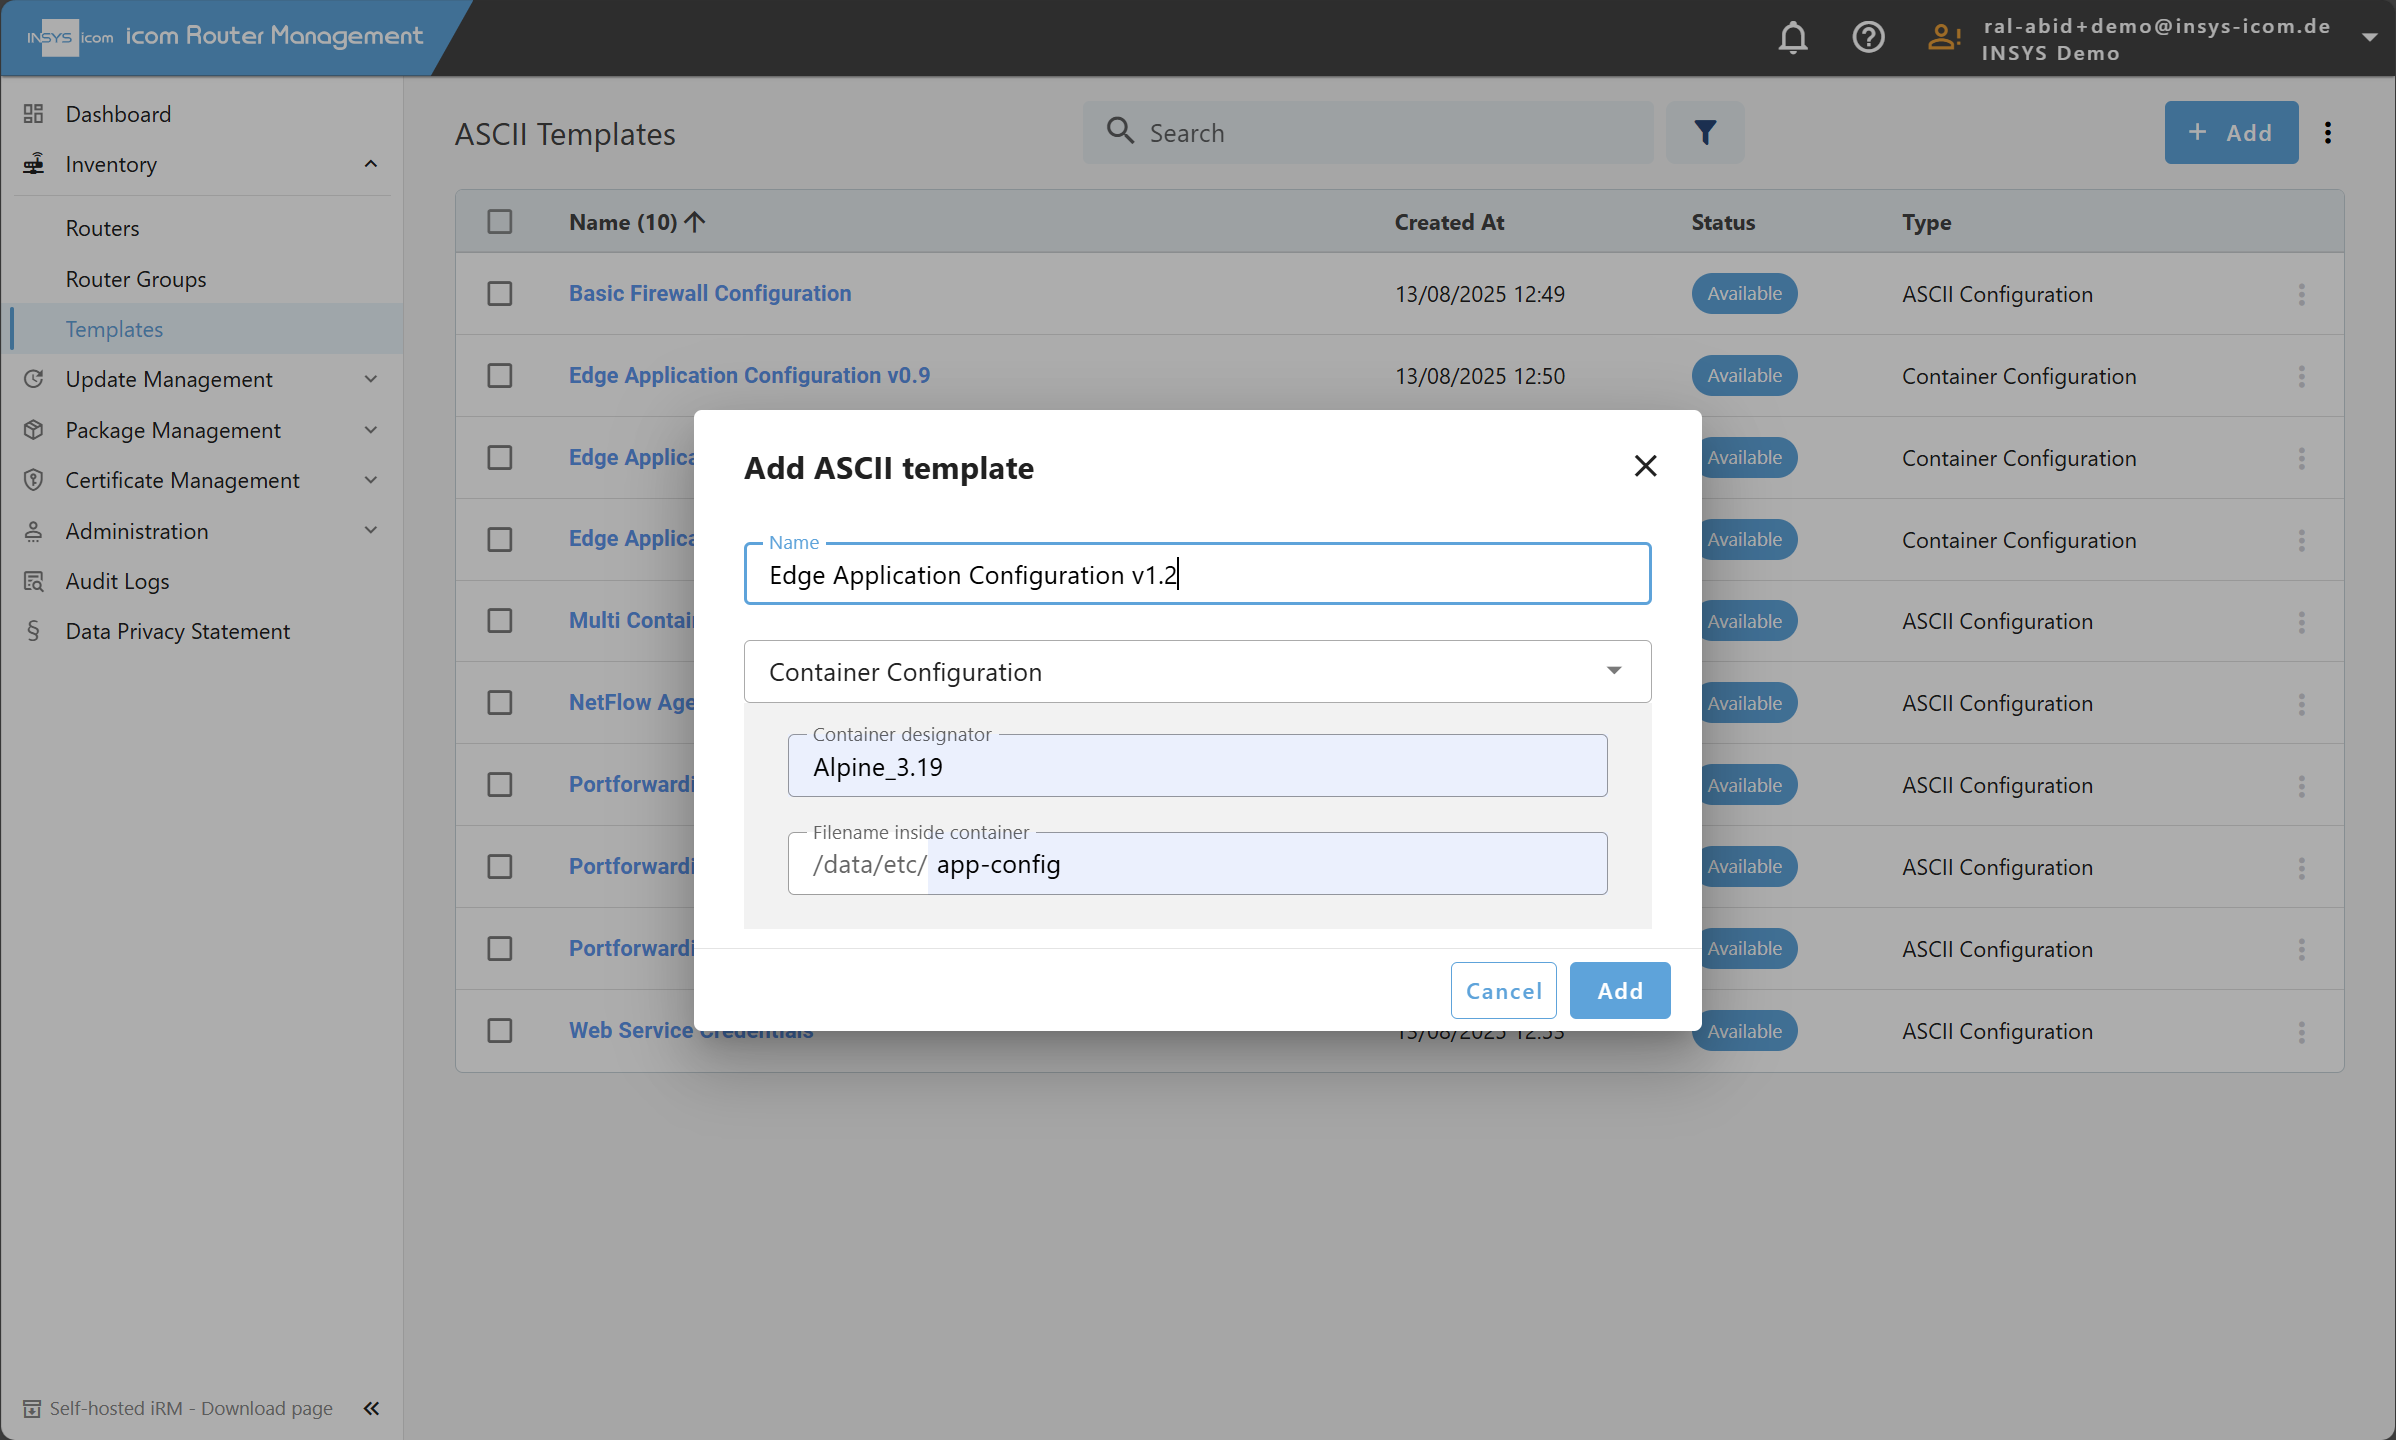
Click on the "Add" button in the top right
In the popup, select "Container Configuration" as the template type
Enter a unique name for the template
Specify the container designator. You can find the container designator by visiting the WebUI of your router.
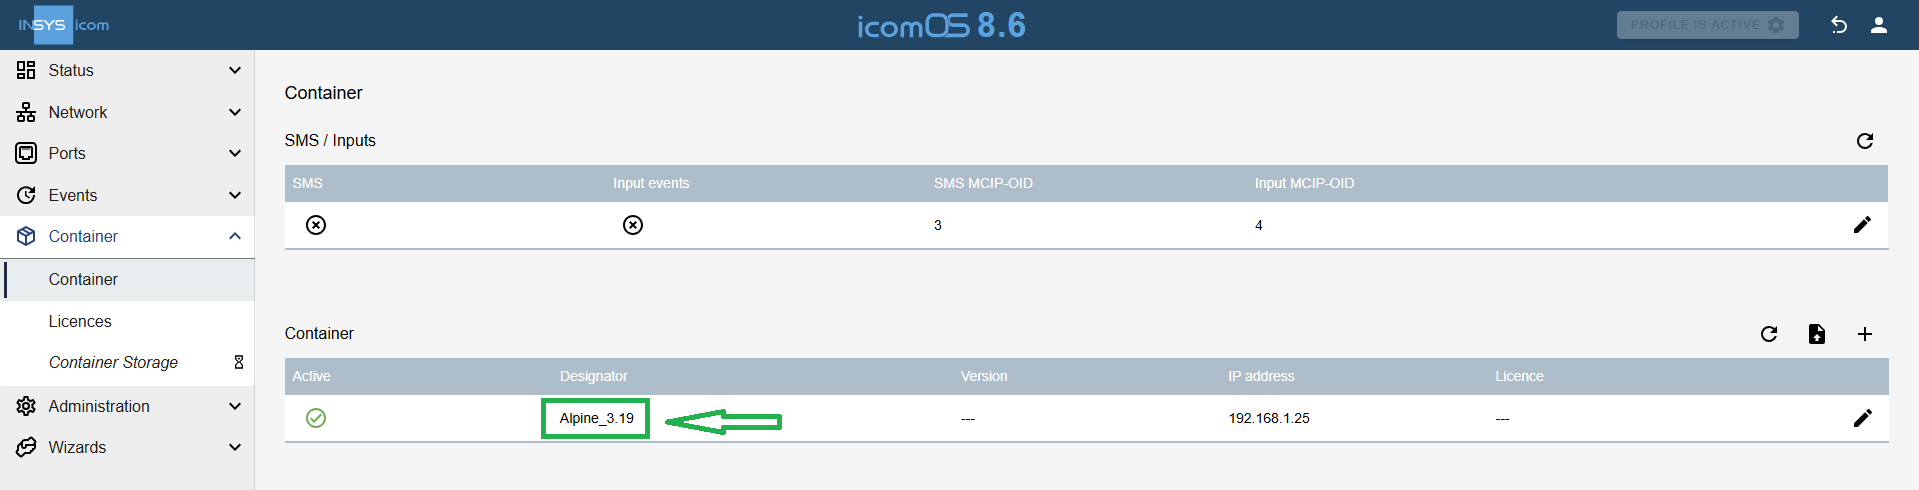
Important!
This must exactly match the container’s designator on all target routers. Mismatches will cause deployment failure.
Define the target file name (e.g.
config.ini) to be written into the containerEnter the desired content using
.inior Lua syntax, with optional placeholders for parameters
2. Handle Template Parameters
Use inline placeholders like
{{env}},{{mode}}, etc.Define which values are inline parameters (String type) and which are Custom Fields
Ensure that:
Inline parameters will be provided per device before deployment
All referenced Custom Fields are set for each router
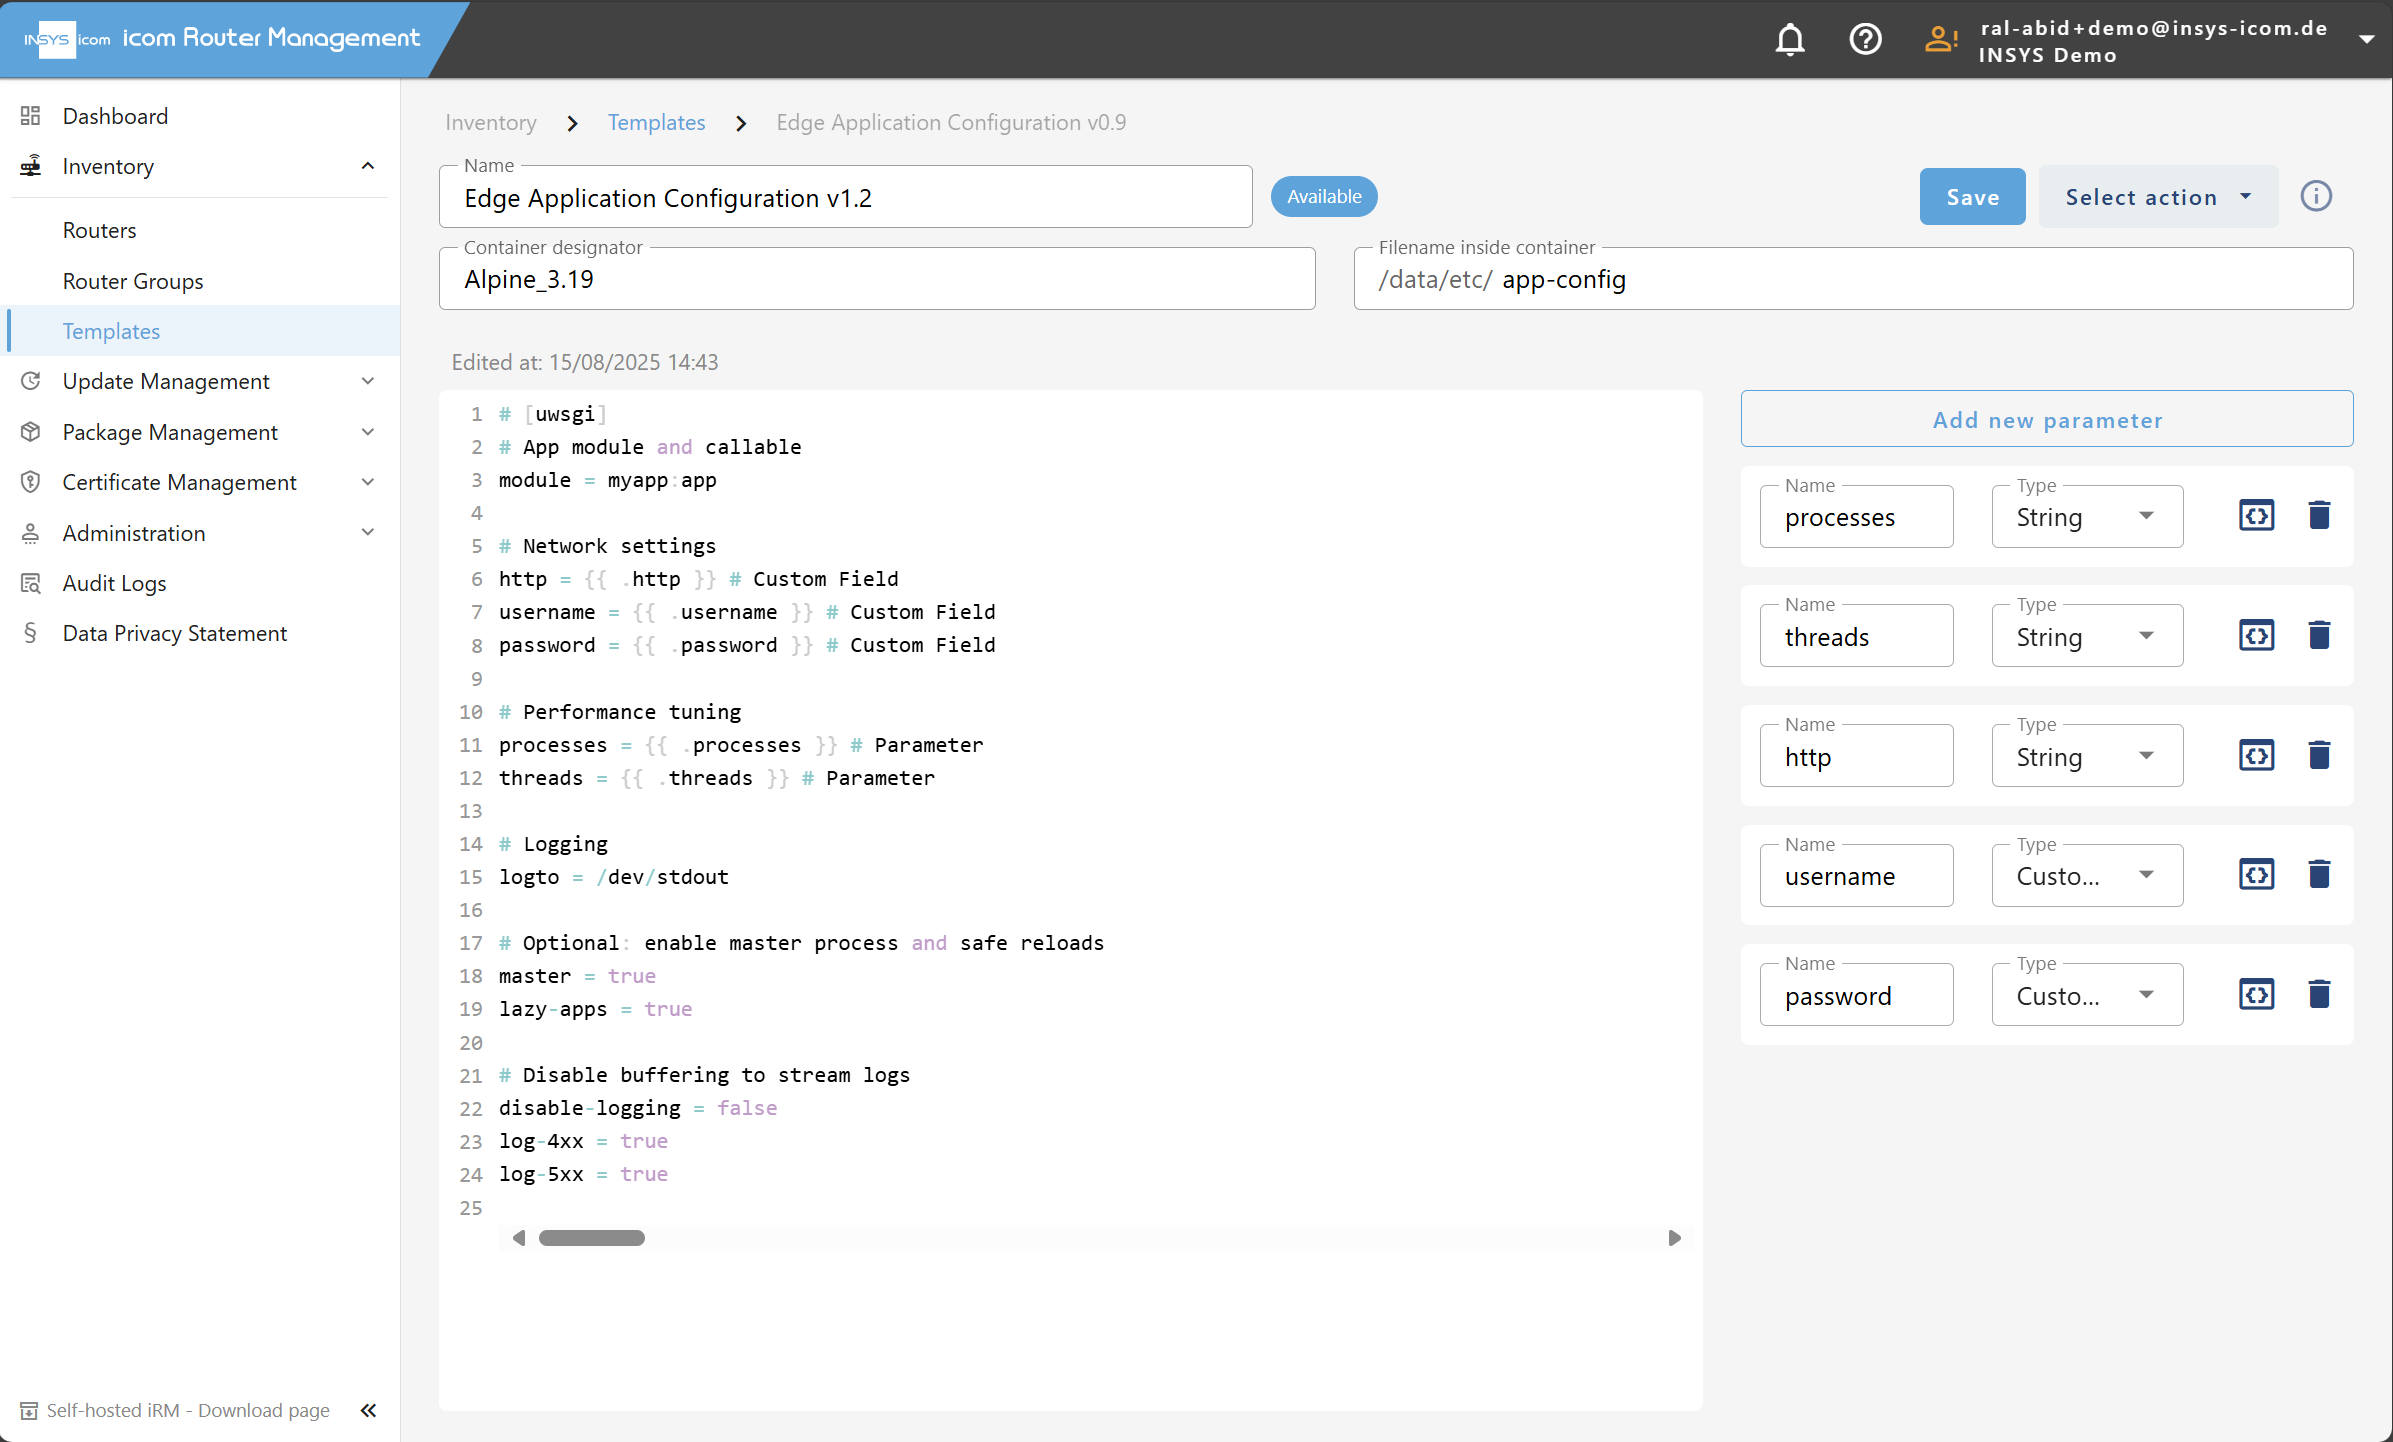
3. Save and Deploy
Click "Save"
While still in the editor, optionally choose "Apply to router" from the "Select action" menu
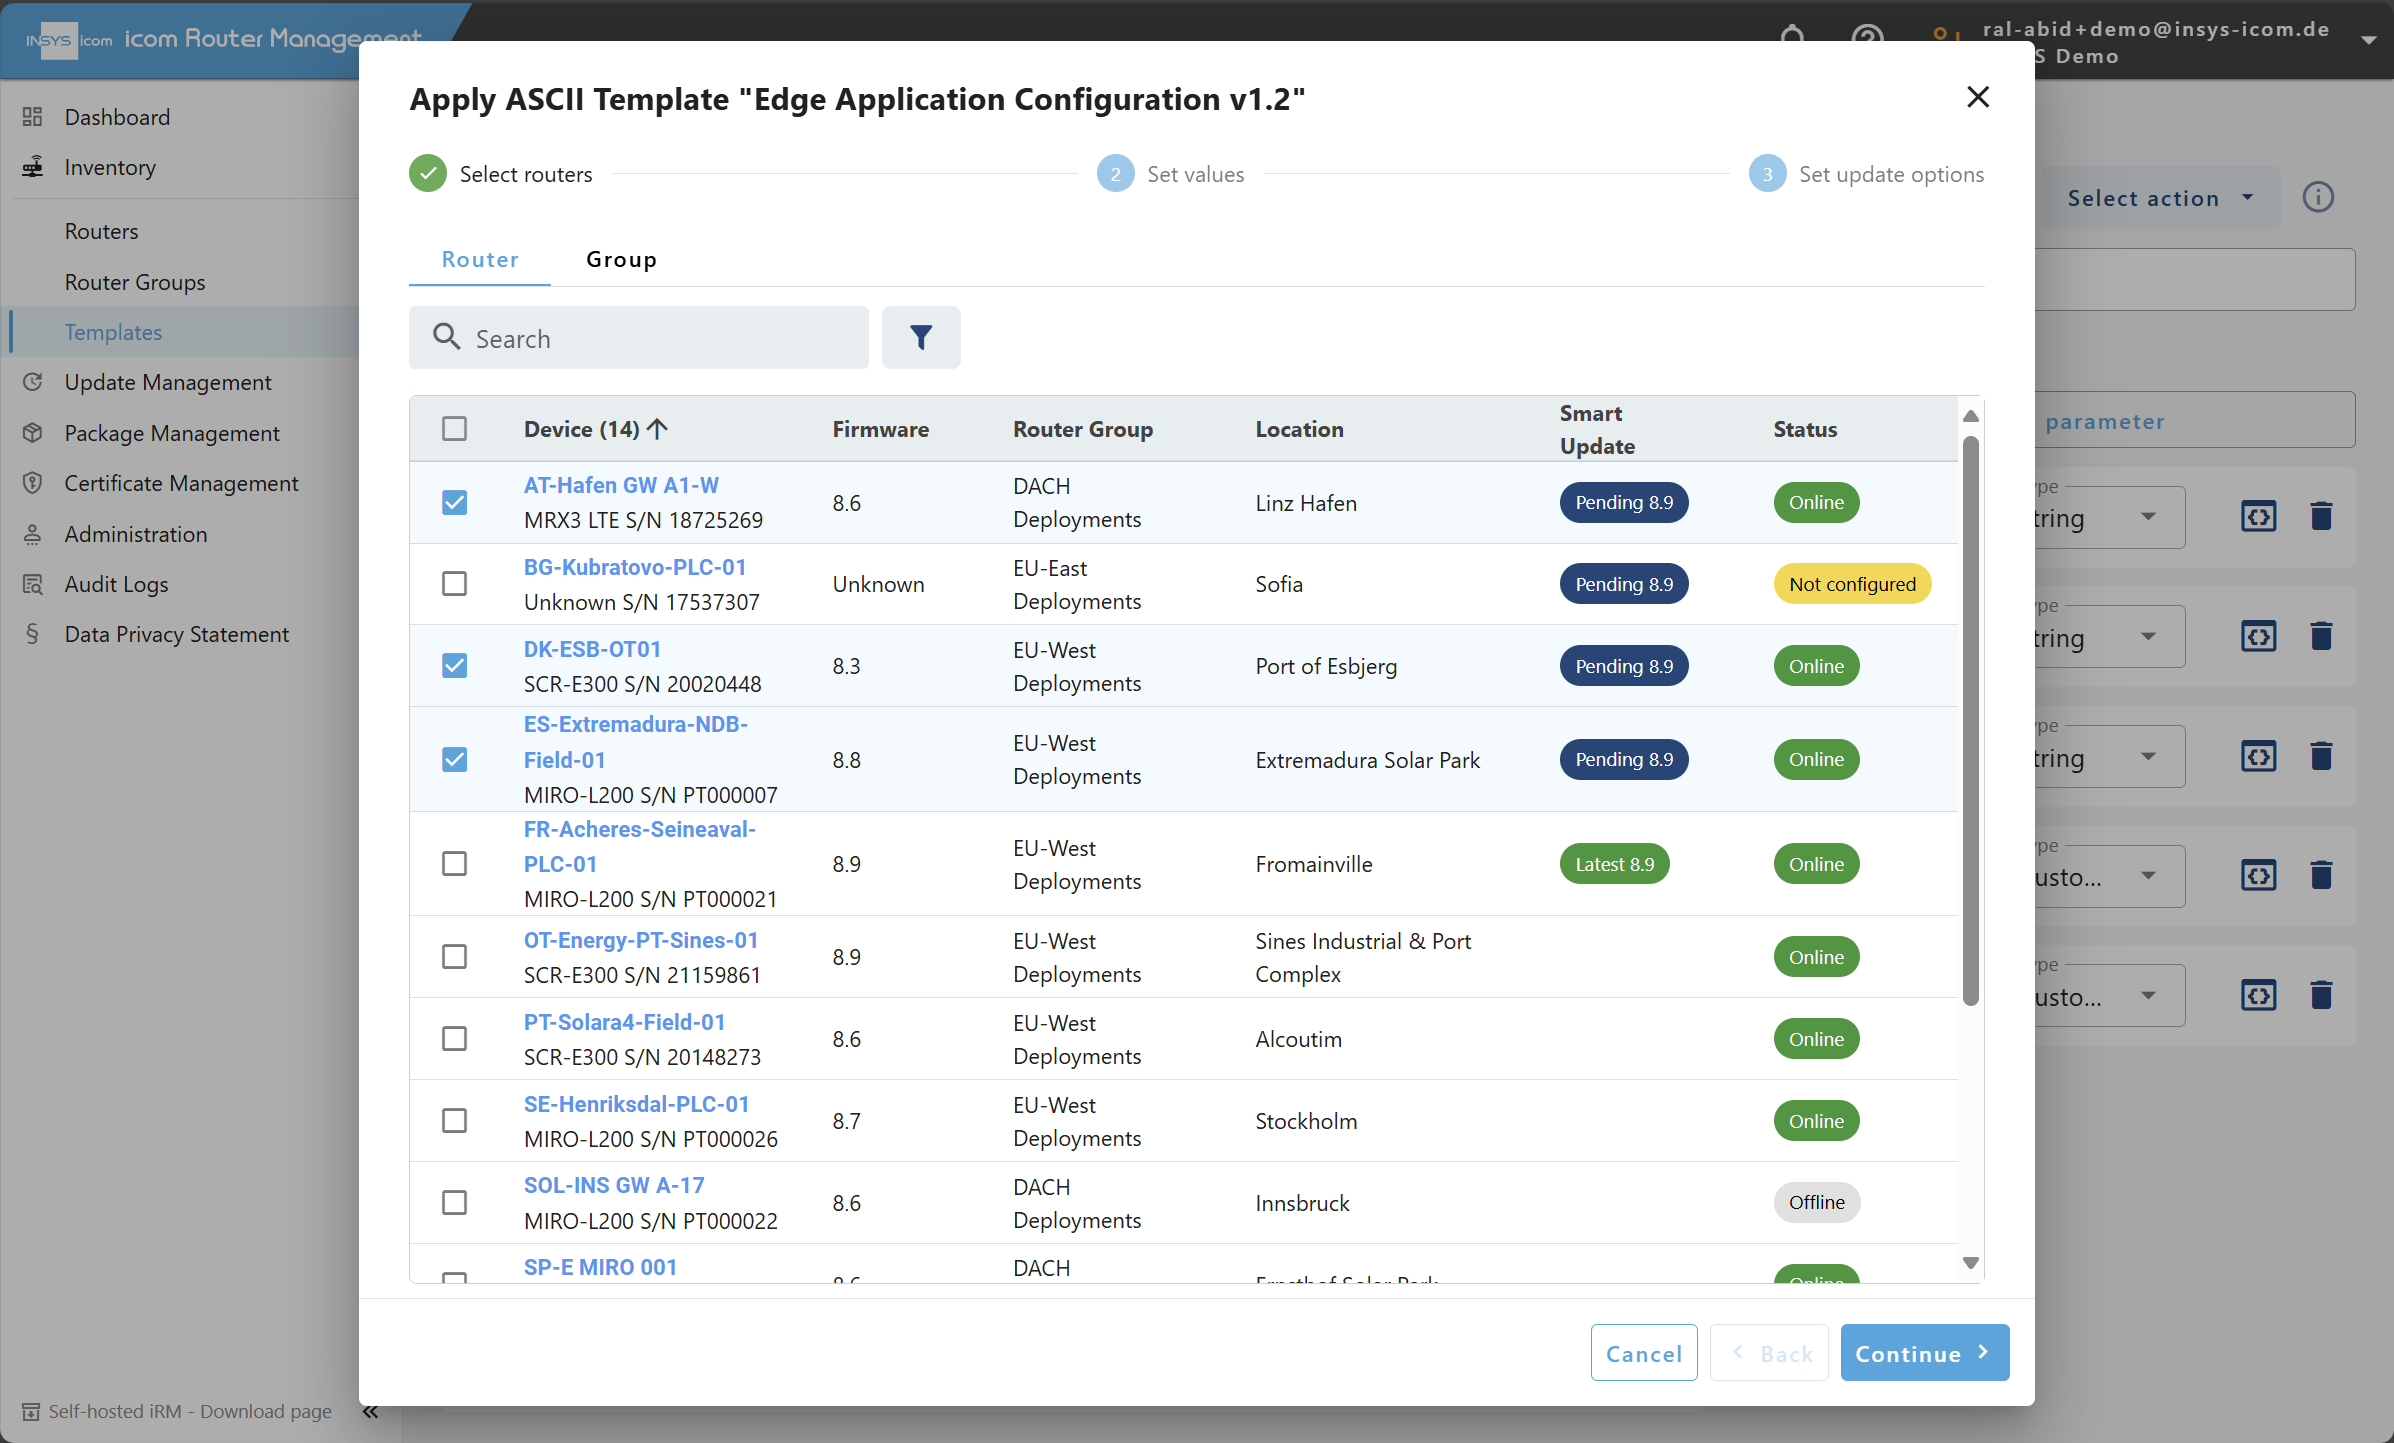
Alternatively, apply later from the ASCII Templates list.Select the target router(s) or router group(s) and click "Continue"
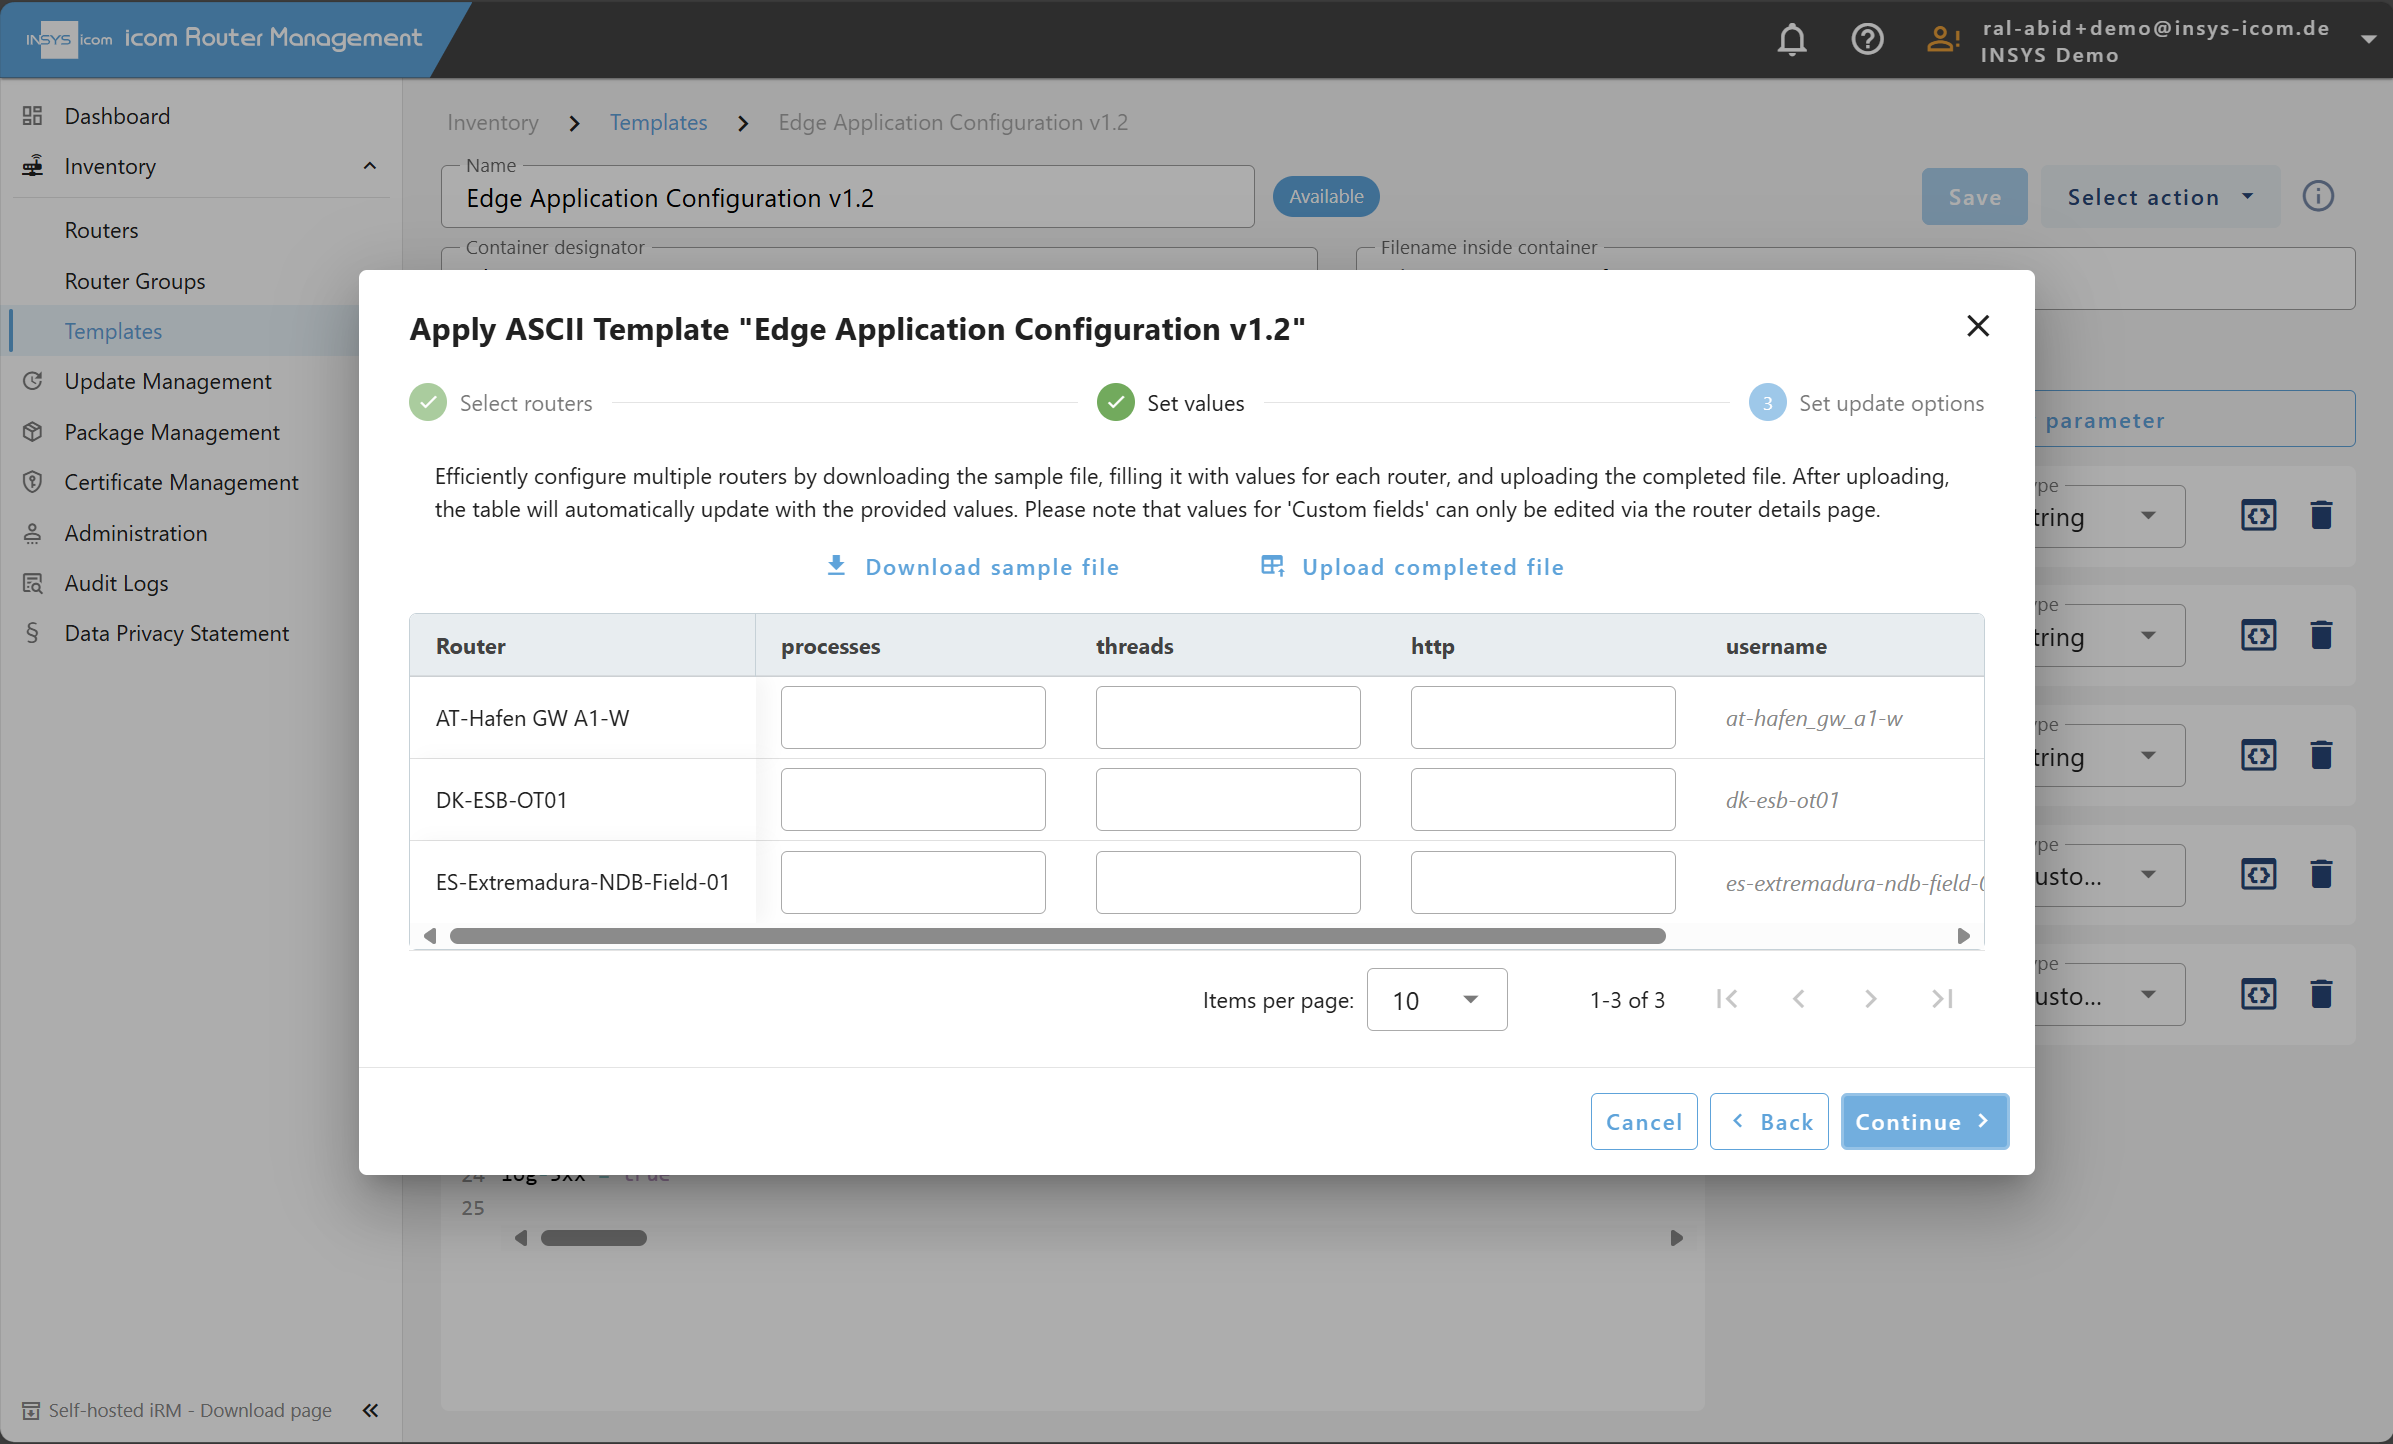
4. Provide Parameter Values
You’ll see a preview table with one row per target router, including:
Rendered Custom Field values
Required parameter fields
💡 Tip: Download the sample Excel file, populate all required values, and re-upload it. This ensures consistency across large deployments.
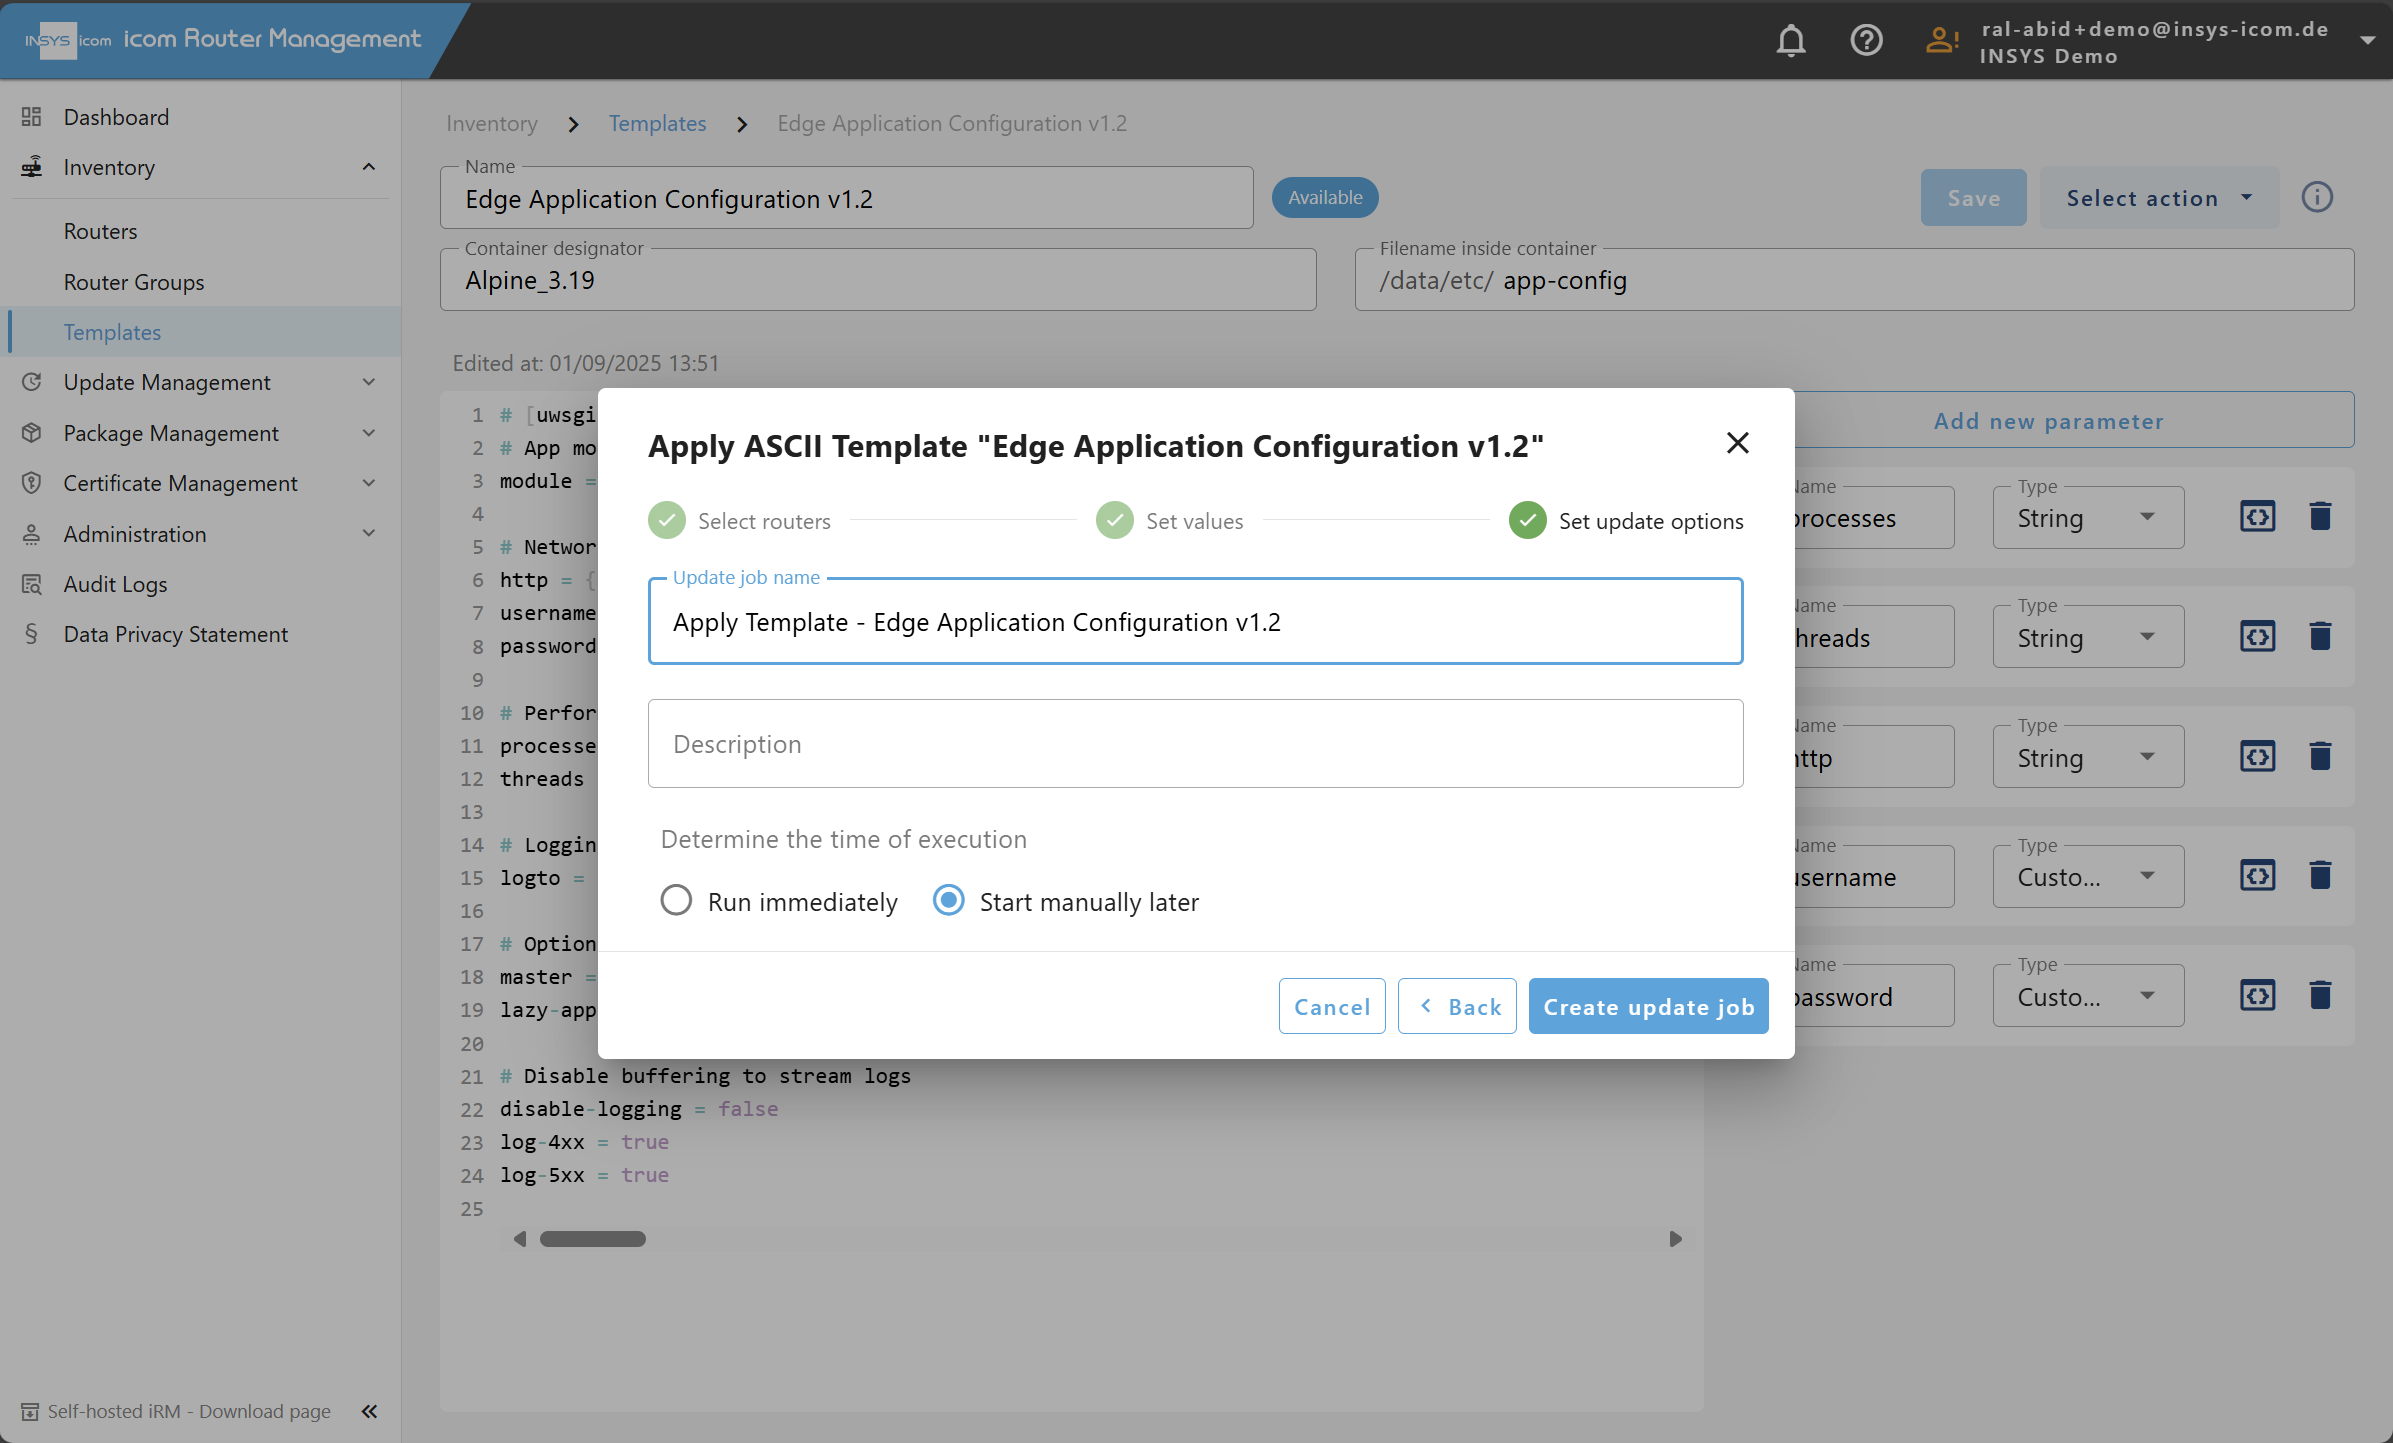
5. Finalize the Update Job
Click "Continue"
Provide a name for the Update Job or use the pre-filled suggestion
Choose to deploy the configuration "Immediately" or "Later"
Track deployment status under Update → Update Jobs
Best Practices
Template Naming: Use clear names like
prod_app_config,dev_app_config, etc.Parameter Strategy: Use Custom Fields for device metadata (e.g.
location,customer_id) and inline parameters for context-dependent valuesContainer Designator Consistency: Enforce naming standards across routers
Testing: Validate your rendered configuration on one test device before scaling out
Known Limitations
Only String parameters are supported for inline placeholders
Mismatches in container designator or missing parameter values will cause Update Job failure
No validation is done on the content format—ensure your application accepts the resulting file