icom Router Management (iRM) supports the creation of reusable configuration templates that are dynamically rendered for each router. This feature allows administrators to centrally manage configurations while adapting key values for individual devices.
Note: Using configuration templates requires an active iRM Cloud Basic, iRM Server, or iRM Data Center license.
The Core Concept
Templates contain placeholders that are replaced with device-specific values at deployment time, using iRM's Custom Fields and parameters. This approach reduces manual effort, prevents configuration errors, and ensures consistent structure across distributed router fleets — even when per-device customization is needed.
Use Case: Site-Specific NTP and DNS Configuration
Goal
An organization manages ~50 routers across various industrial sites. Each router must be configured with:
A unique hostname
A custom domain suffix (for internal DNS resolution)
A local NTP server IP (for time synchronization with local systems)
These values vary per site but follow a standard structure. Instead of maintaining 50 separate configurations, the administrator wants to use a single template, populated dynamically with values from each router’s profile.
Template Example
Below is a sample ASCII-style configuration template using iRM’s custom field placeholders:
administration.hostnames.hostname={{ .hostname }}
administration.hostnames.domainname={{ .domainname }}
administration.time.ntp_peer={{ .ntp_ip }}
How it works
Each placeholder (e.g. {{ .hostname }}) will be replaced by iRM at deployment time with the value stored in the router's Custom Fields.
Step-by-Step: How to Use Templates with Custom Fields
1. Define Custom Fields
Create the following custom fields in iRM (if not already defined):
Field Name | Description | Example Value |
|---|---|---|
| Desired router hostname |
|
| Desired domain name |
|
| IP of local NTP server |
|
To define or edit custom fields for a router:
Navigate to the router’s detail view
Open the Custom Fields section
Enter the appropriate values
2. Create the Configuration Template
Go to Inventory → Templates.
Click Add.
Name the template (e.g.,
Site-Specific NTP and DNS).Click Add to create the template.

Paste the template content (see example above) and remove the placeholders (e.g.
{{ .hostname }}).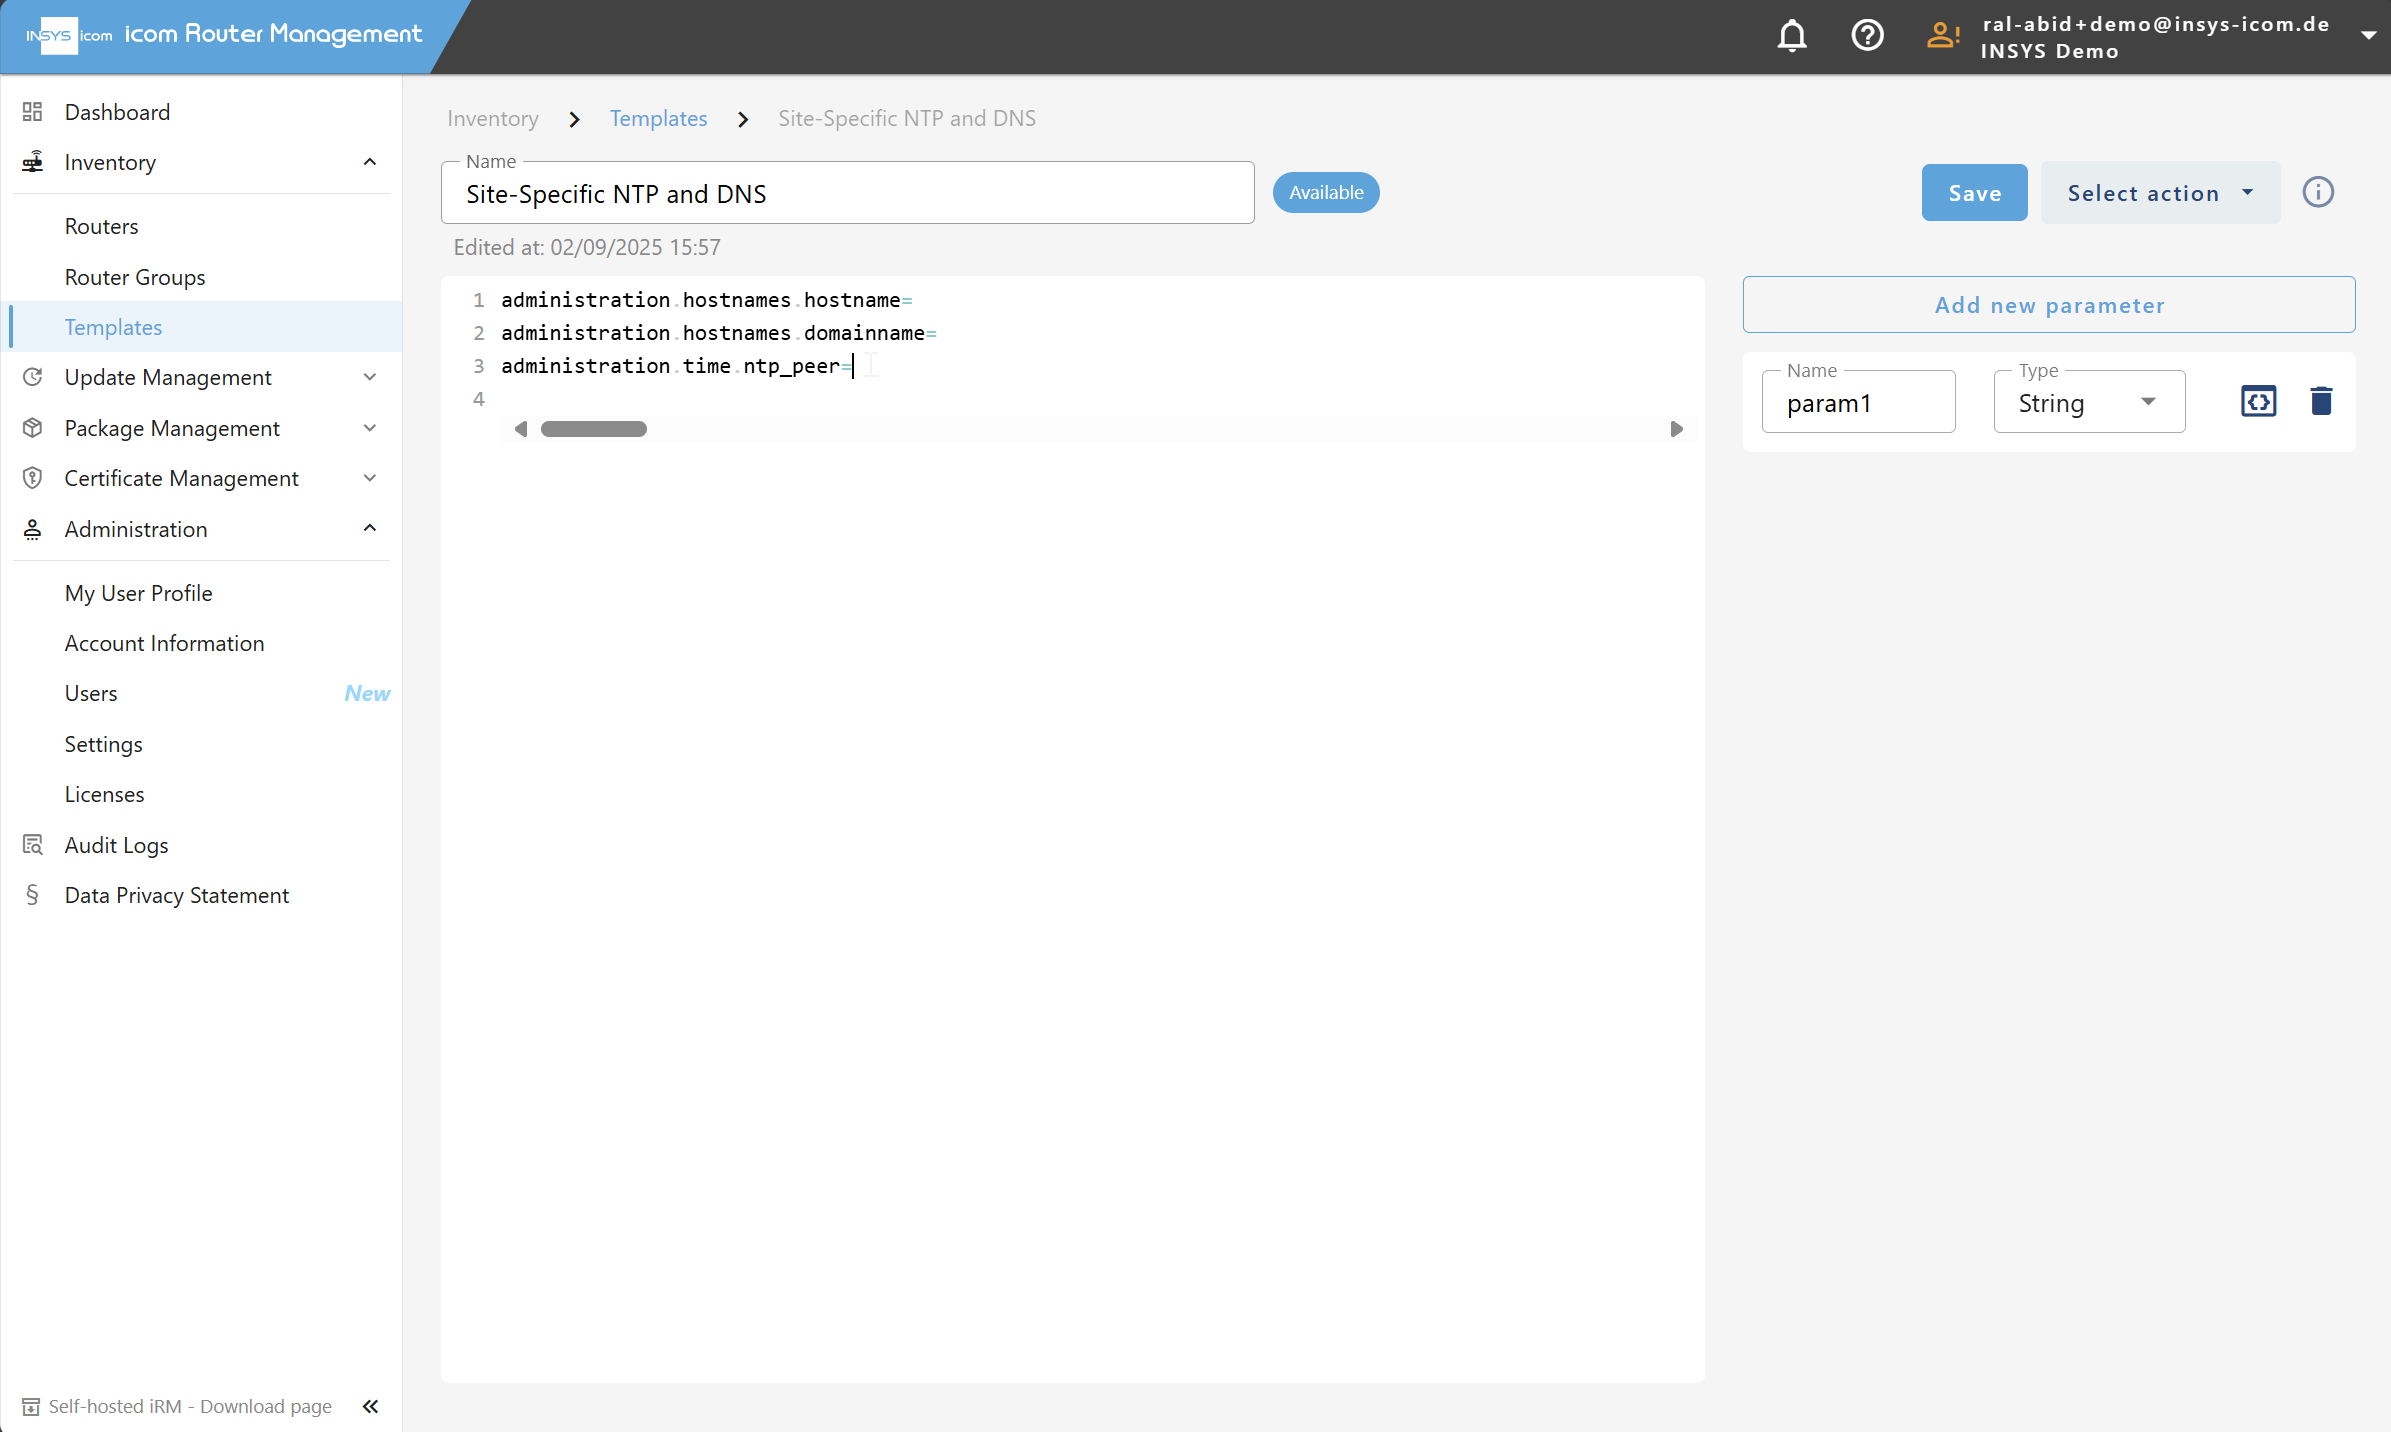
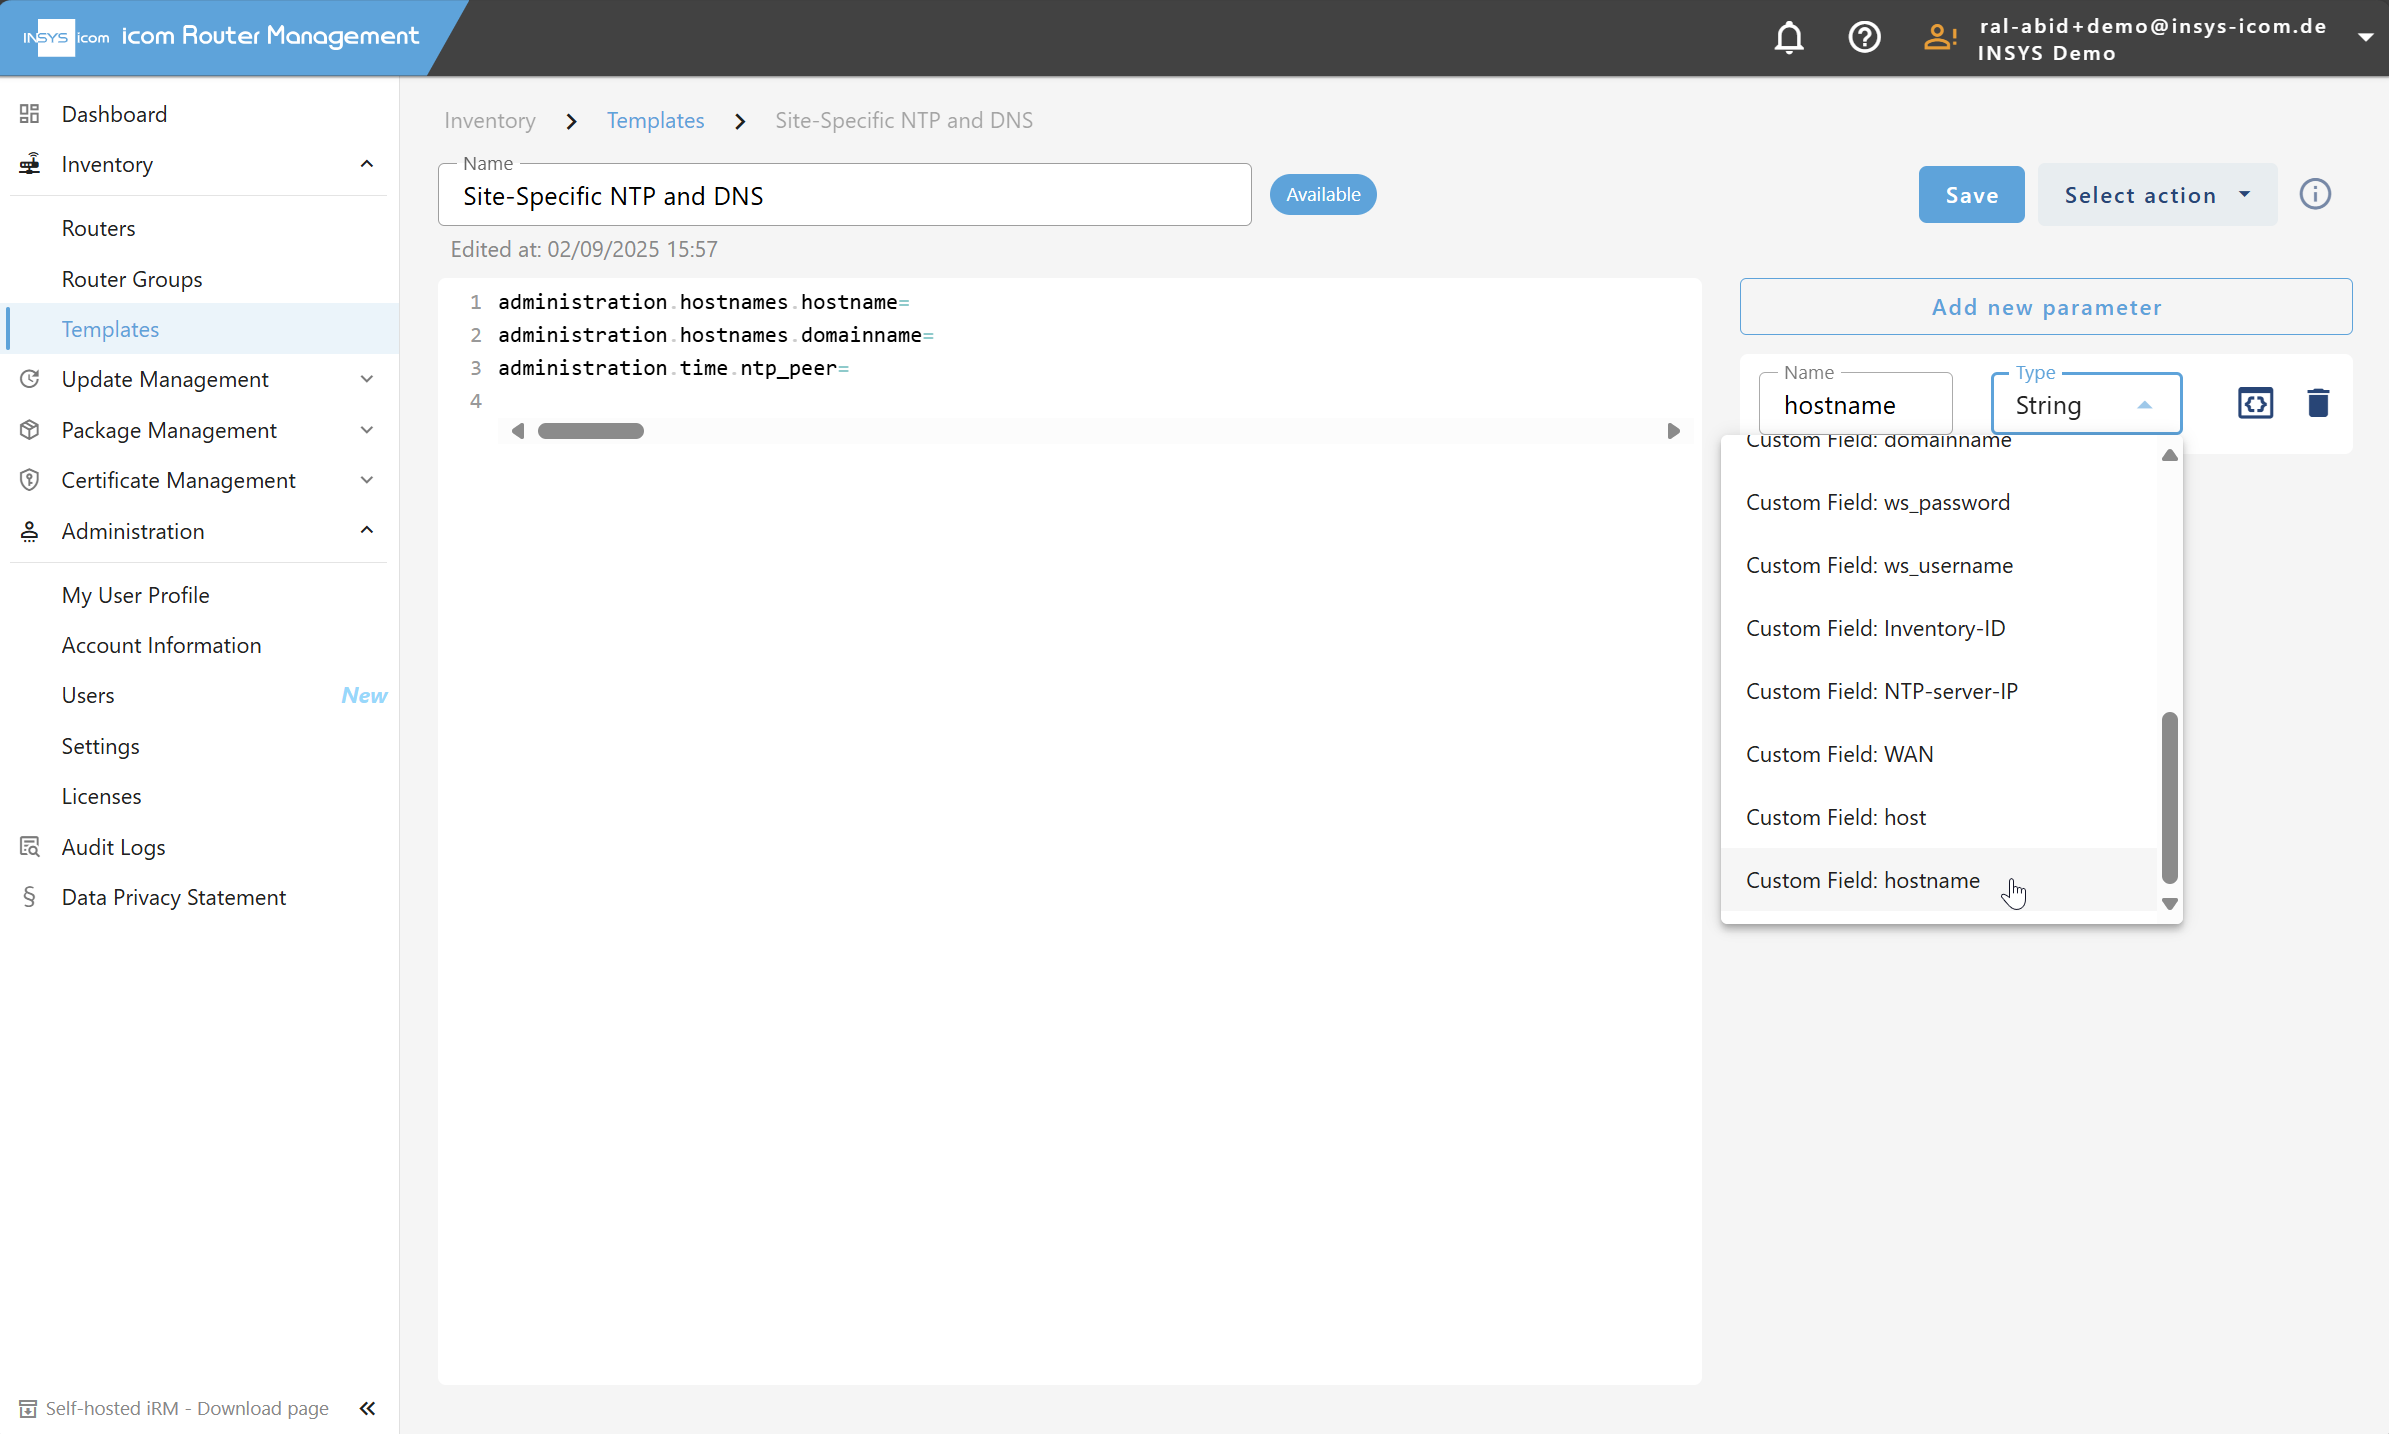
Rename the default parameter to your desired name, e.g.
hostnameUse the Type drop-down and choose Custom field: hostname
Next, place your cursor after the equal sign in line 1 and click on the
 Copy parameter into template button. This will paste the parameter in the right format at the cursor position.
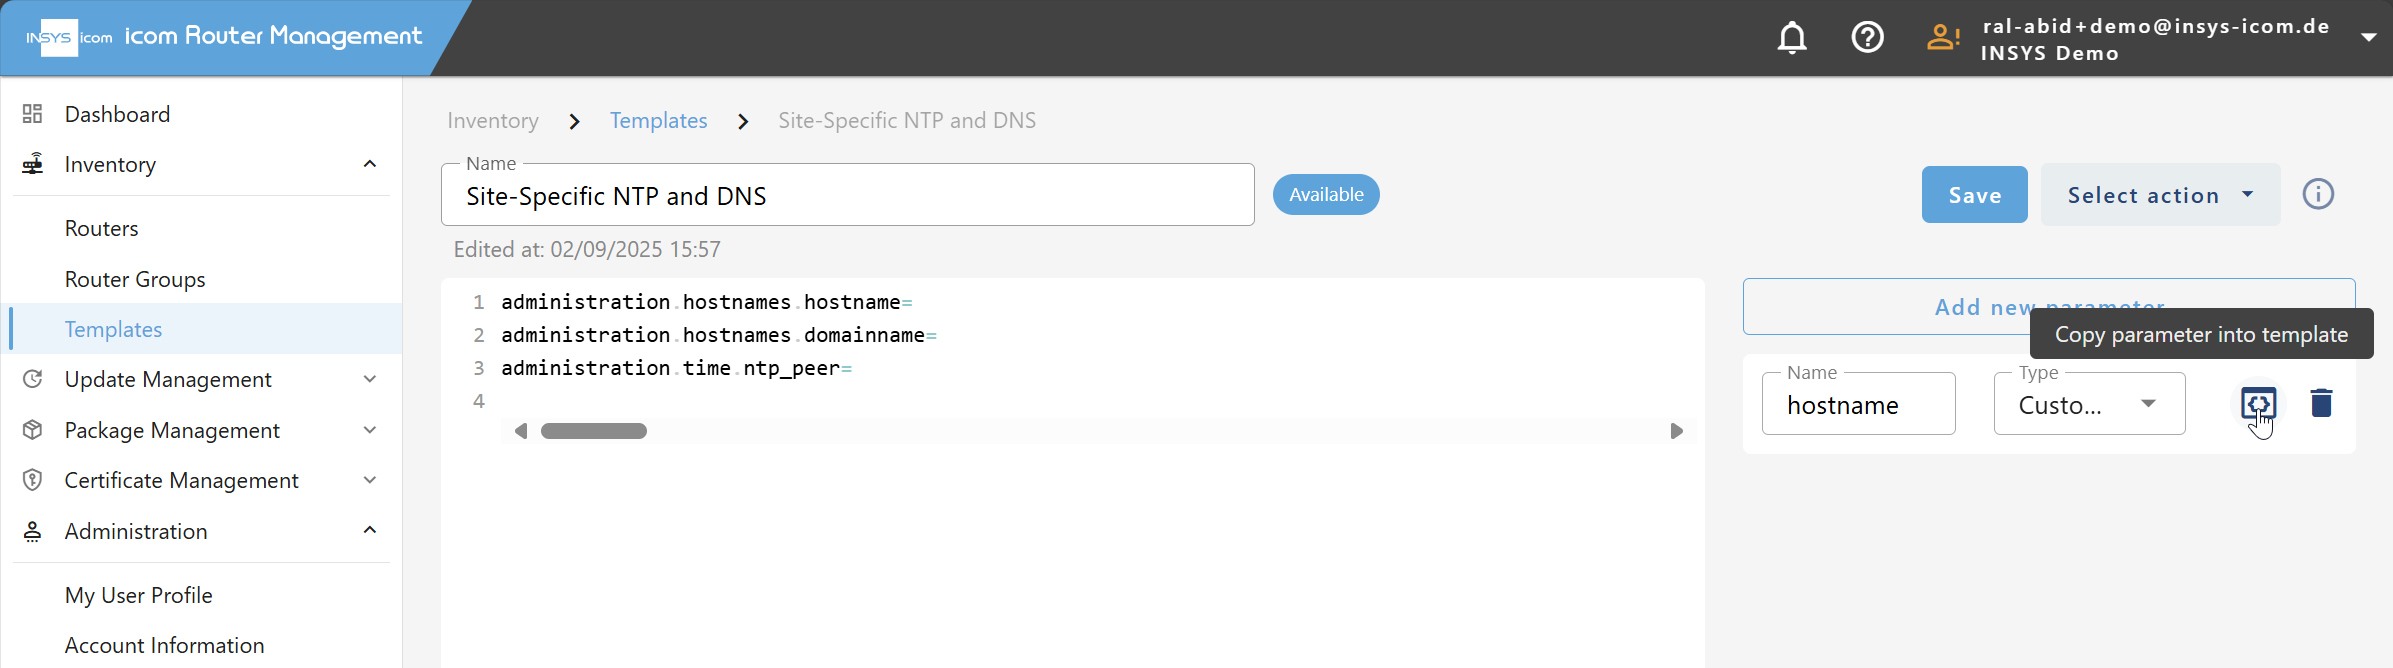
Add the next parameter by clicking on Add new parameter.
Repeat steps 7 - 9 until you have all parameters added to the corresponding line of configuration.
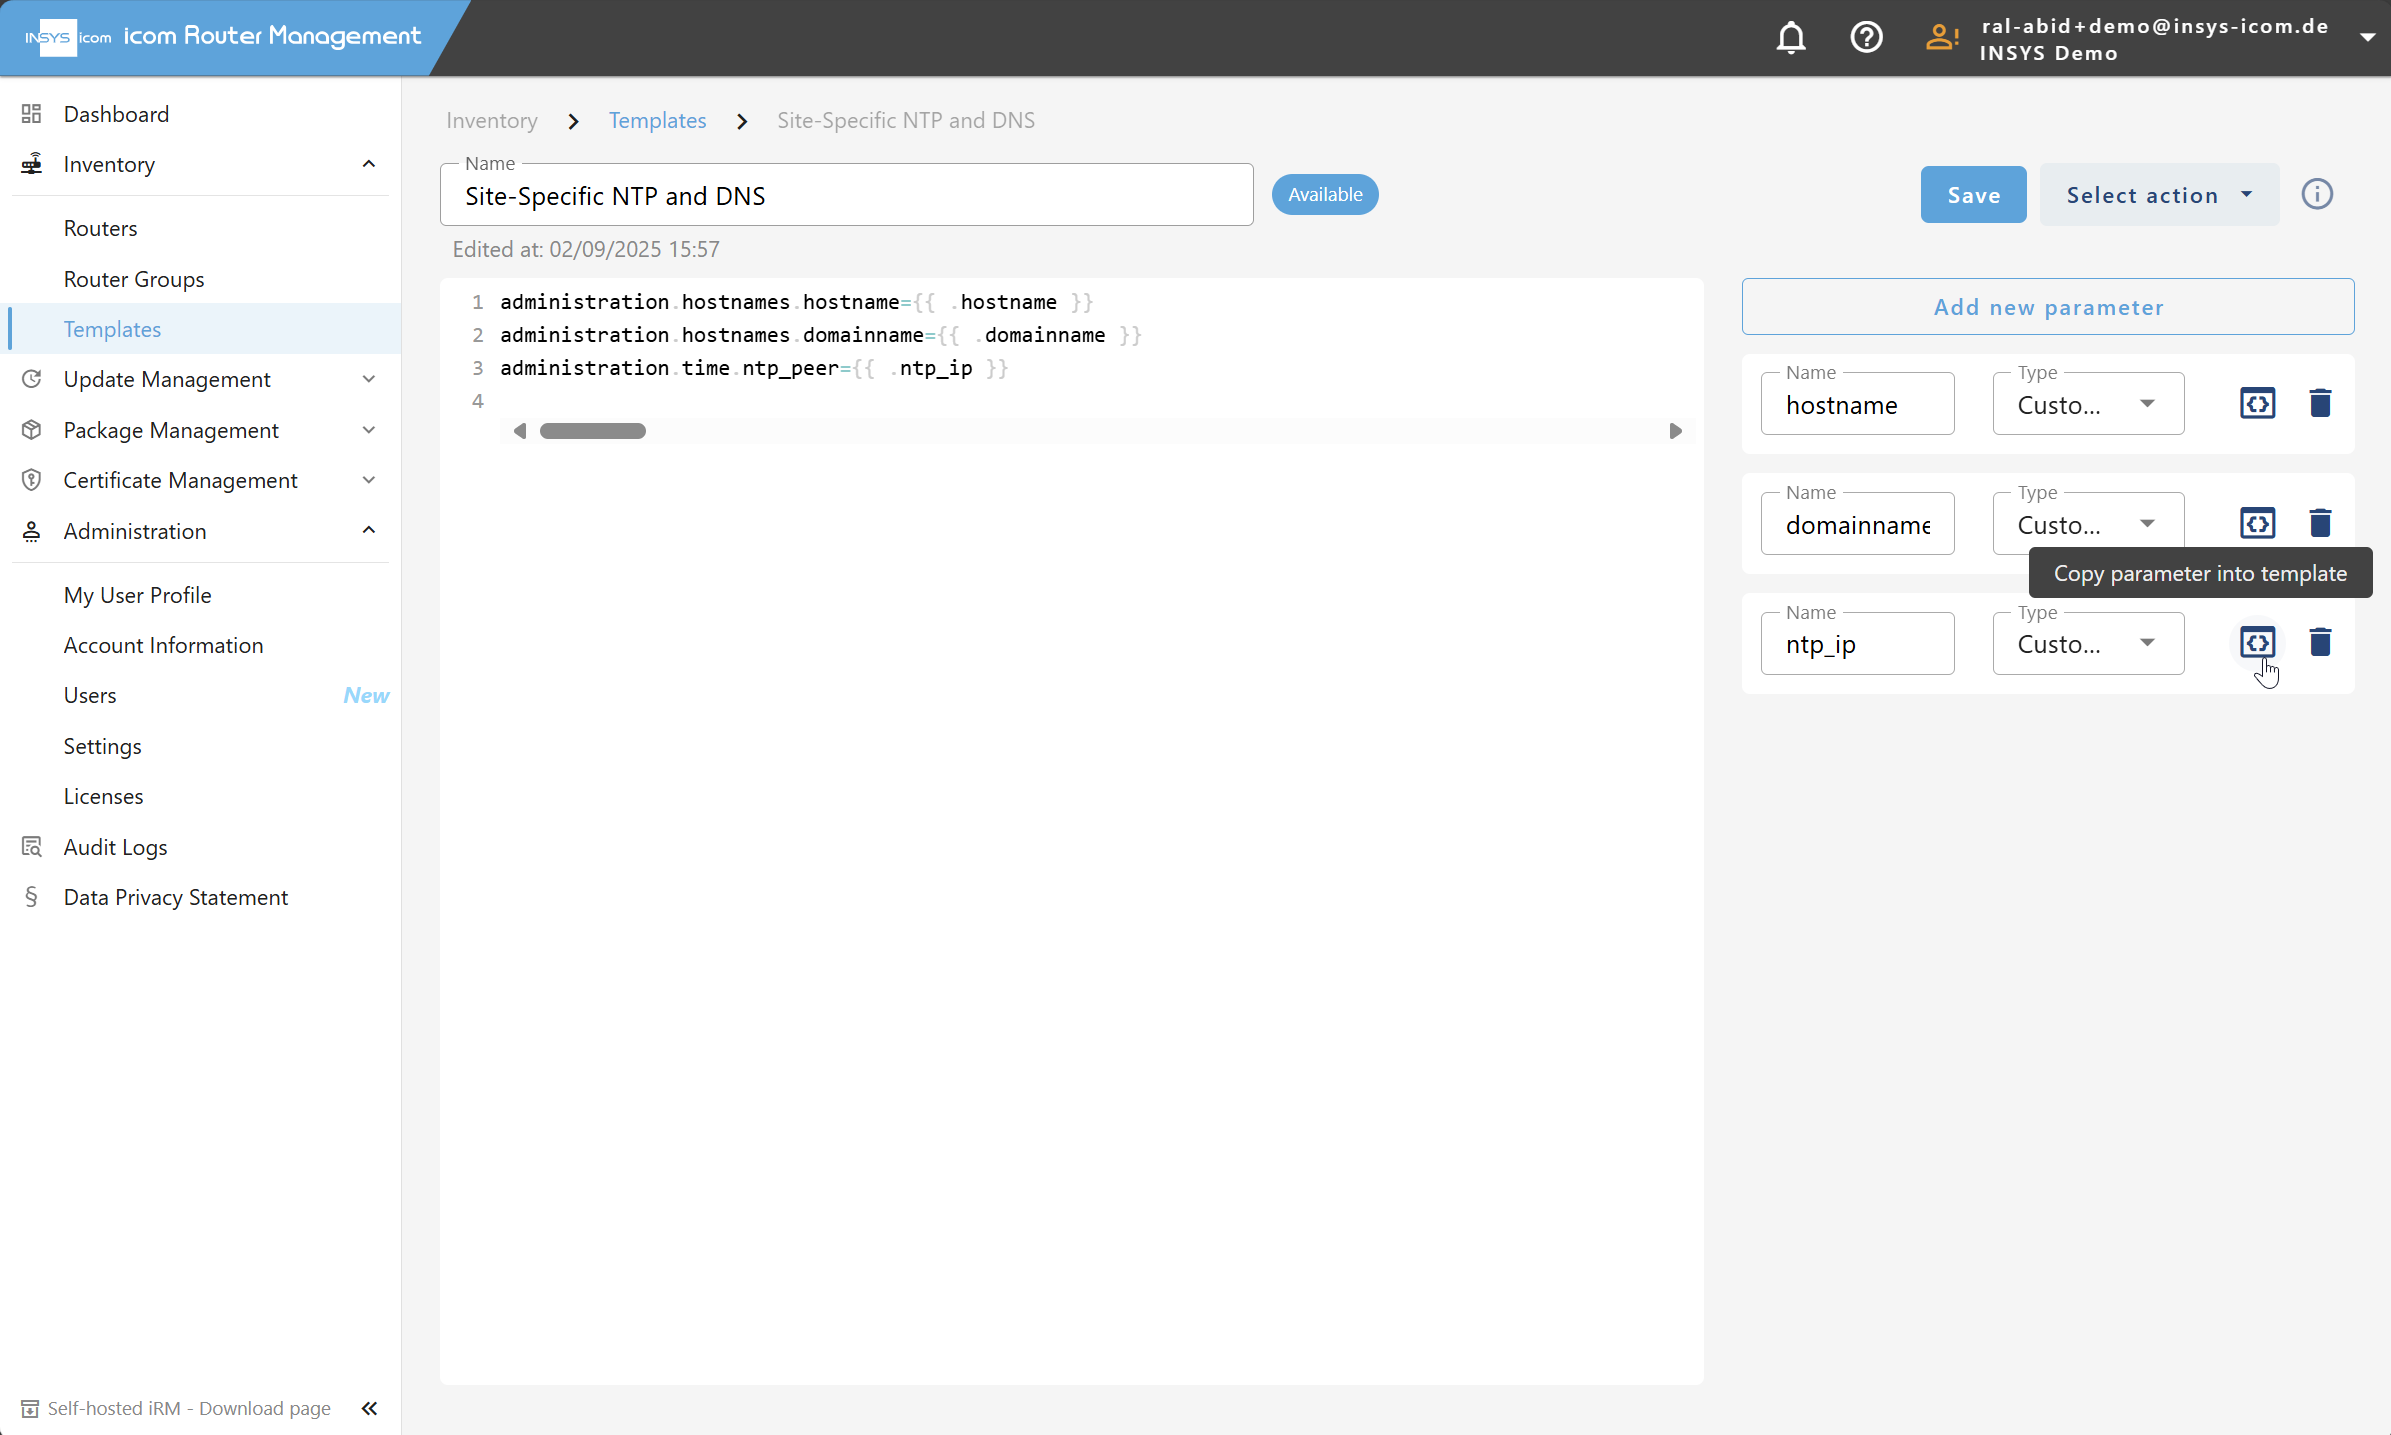
Save the template by clicking on Save.
3. Create an Update Job
To deploy the rendered template:
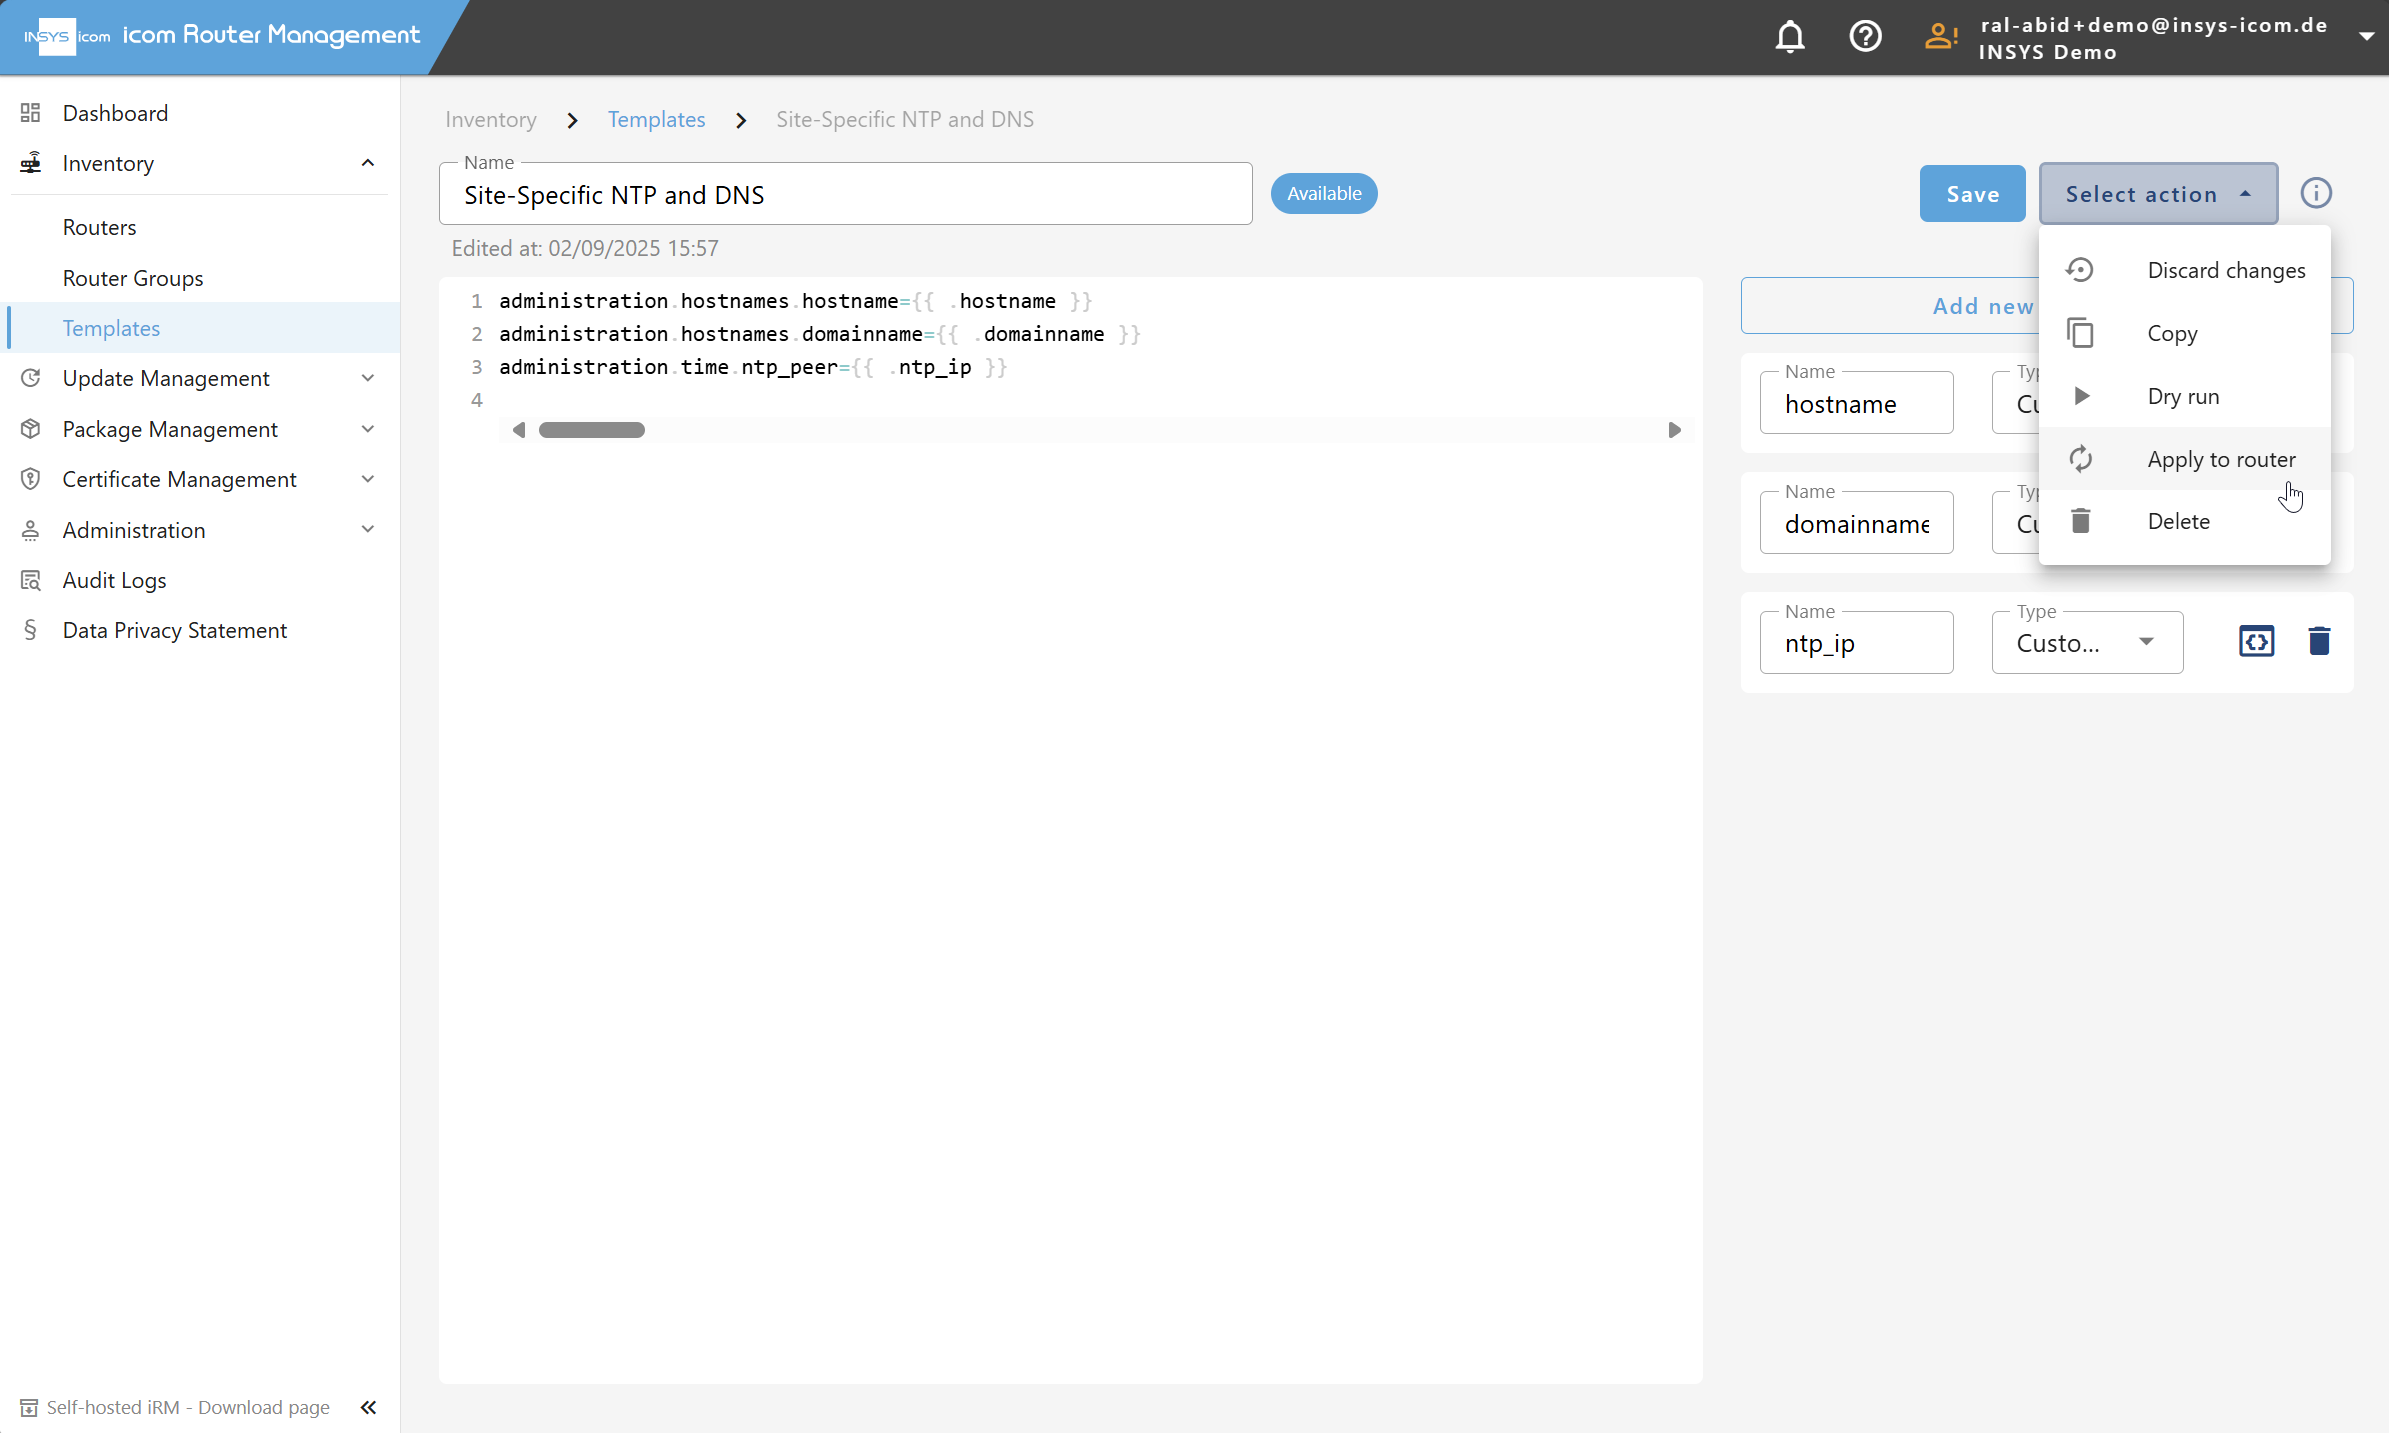
Use the Select action menu and choose Apply to router.
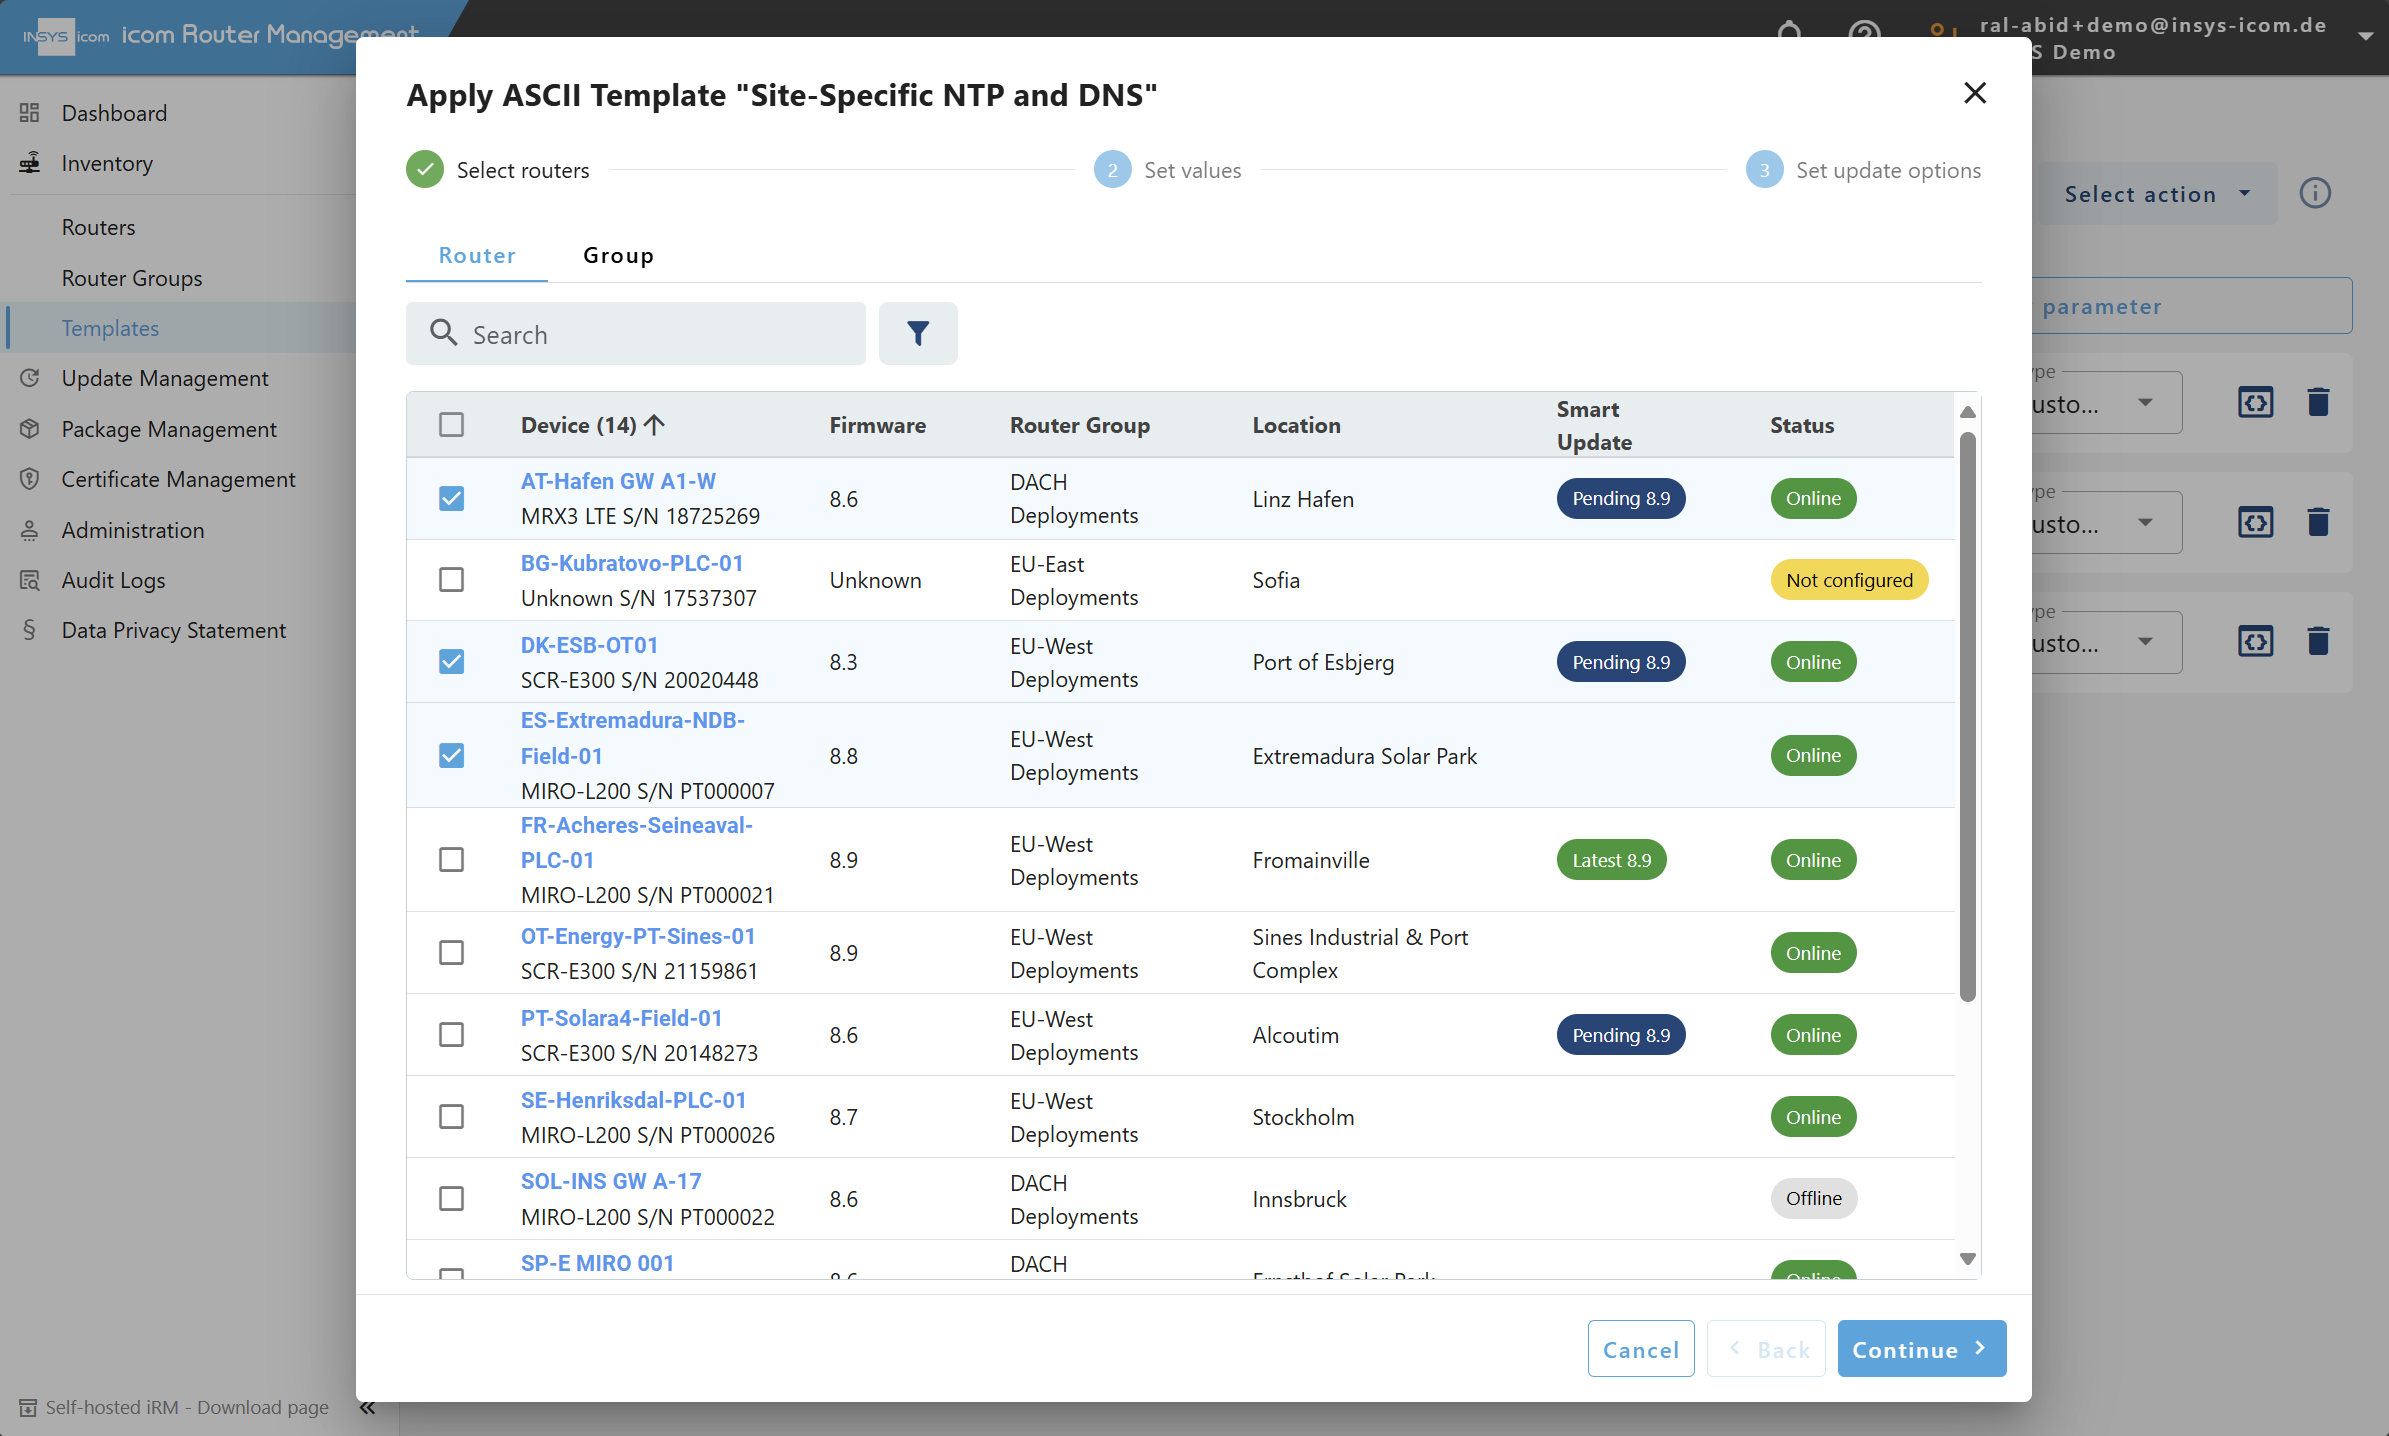
Choose the target router(s) or group(s) and click on Continue.
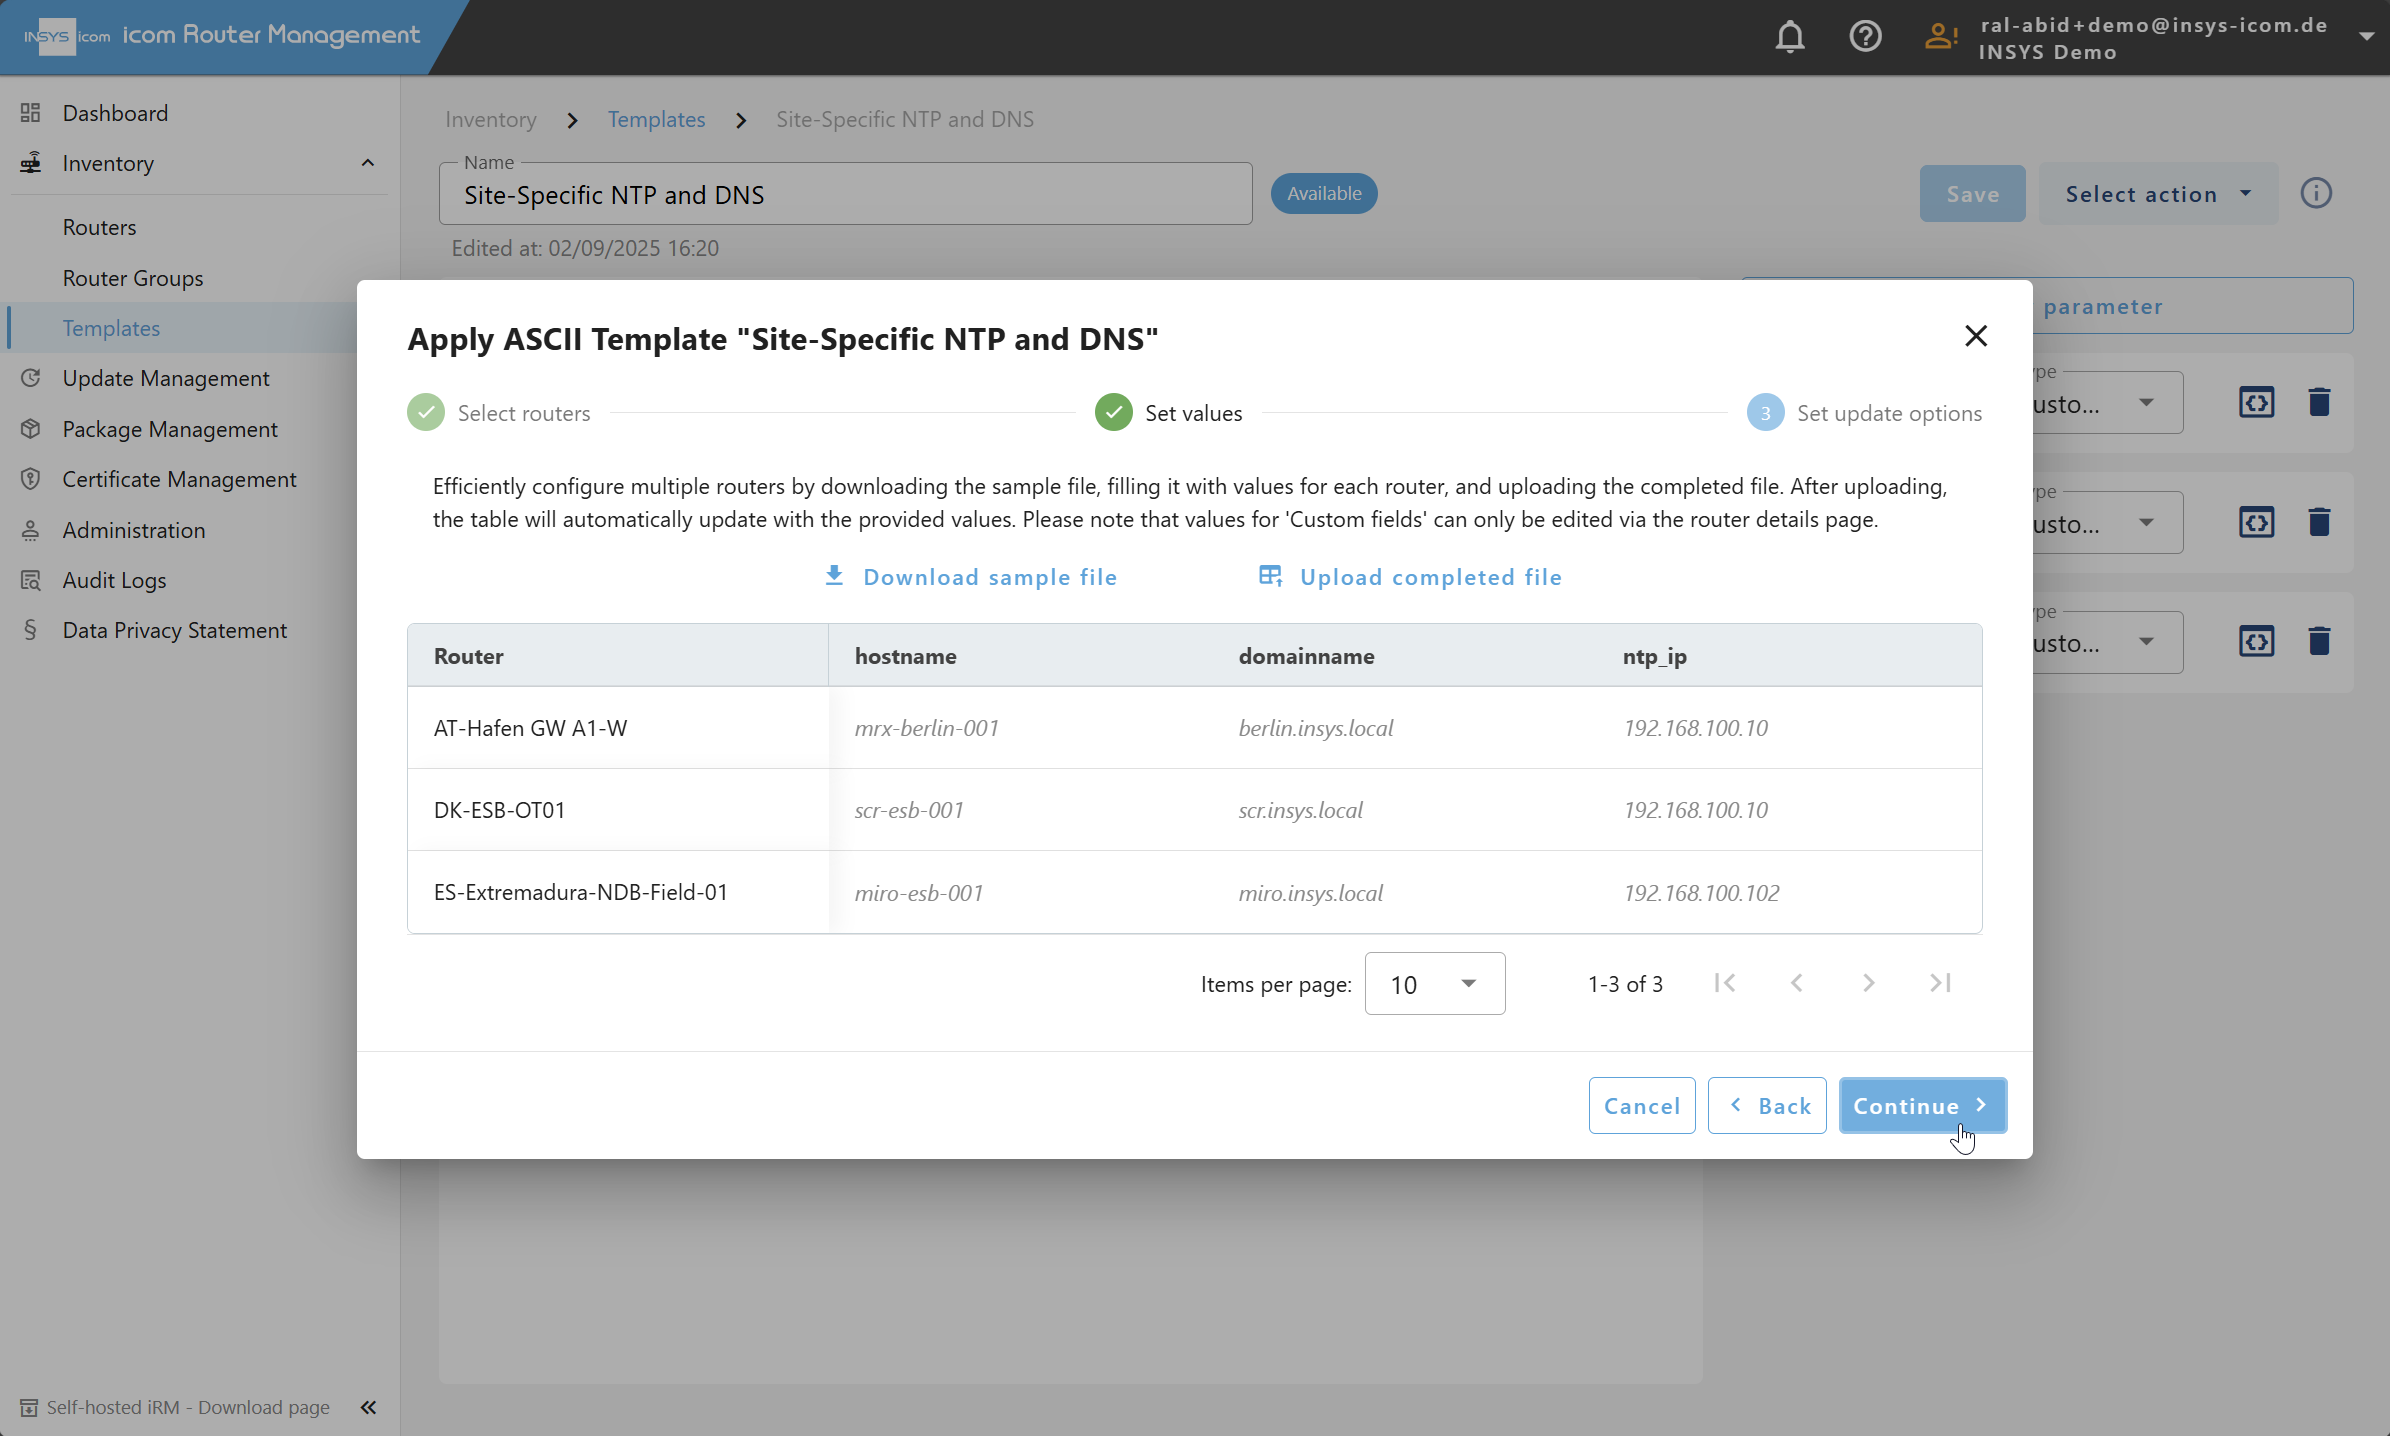
Review the job details.
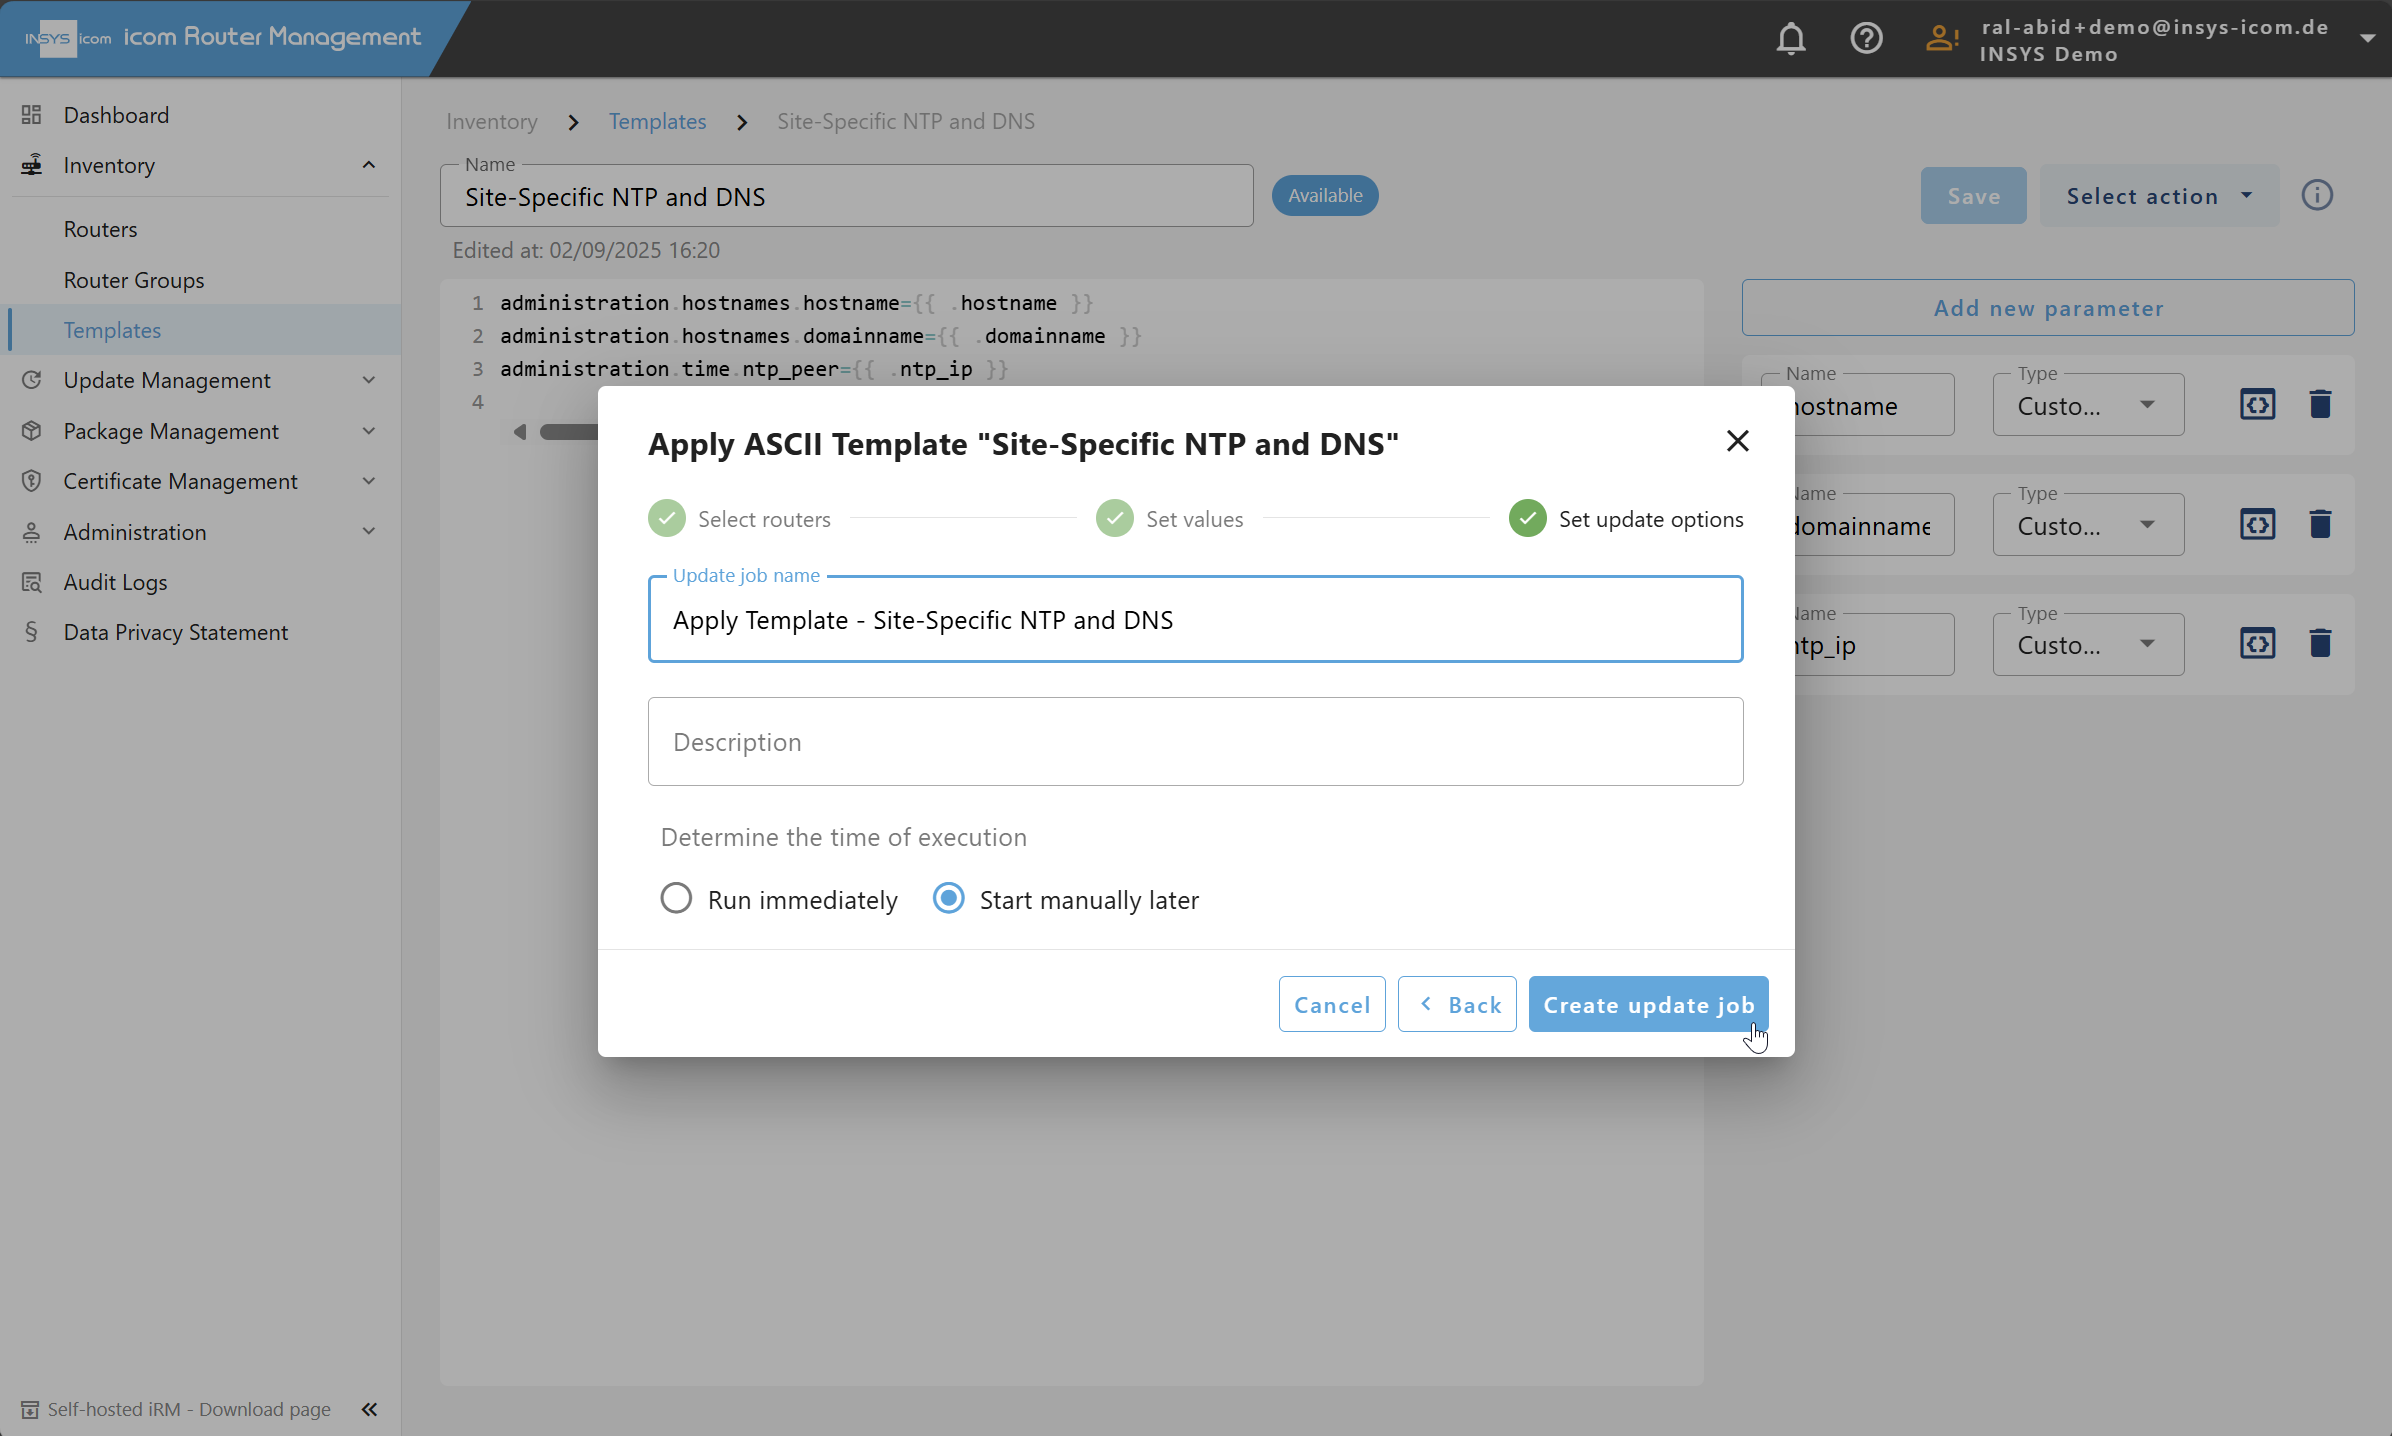
You can trigger the rollout of the template immediately by selecting Run immediately, or schedule it for manual execution at a later time by selecting Start manually later. The resulting Update Job can be viewed in Update Management → Update Jobs.
Attention
If a required custom field is missing on a router, the job will fail for that device — check the logs to identify and fix issues.
Templates support more complex configurations (ACLs, firewall rules, routes, etc.) using the same pattern.
For more advanced use cases or help setting up your templates, please contact our support team.